This guide walks you through setting up your profile on the Refari platform, so that you appear on your company's widgets such as Meet The Team and Testimonials. You will first receive an email with a sign-up link inviting you to access Refari. Once you have set a password, you can log in and set up your profile.
Note: Any field marked with an asterisk (*) must be completed for your profile to appear across the platform, including the Meet The Team and Testimonials widgets and in relevant emails.Setting up your profile
Step 1: Log in and open your dashboard
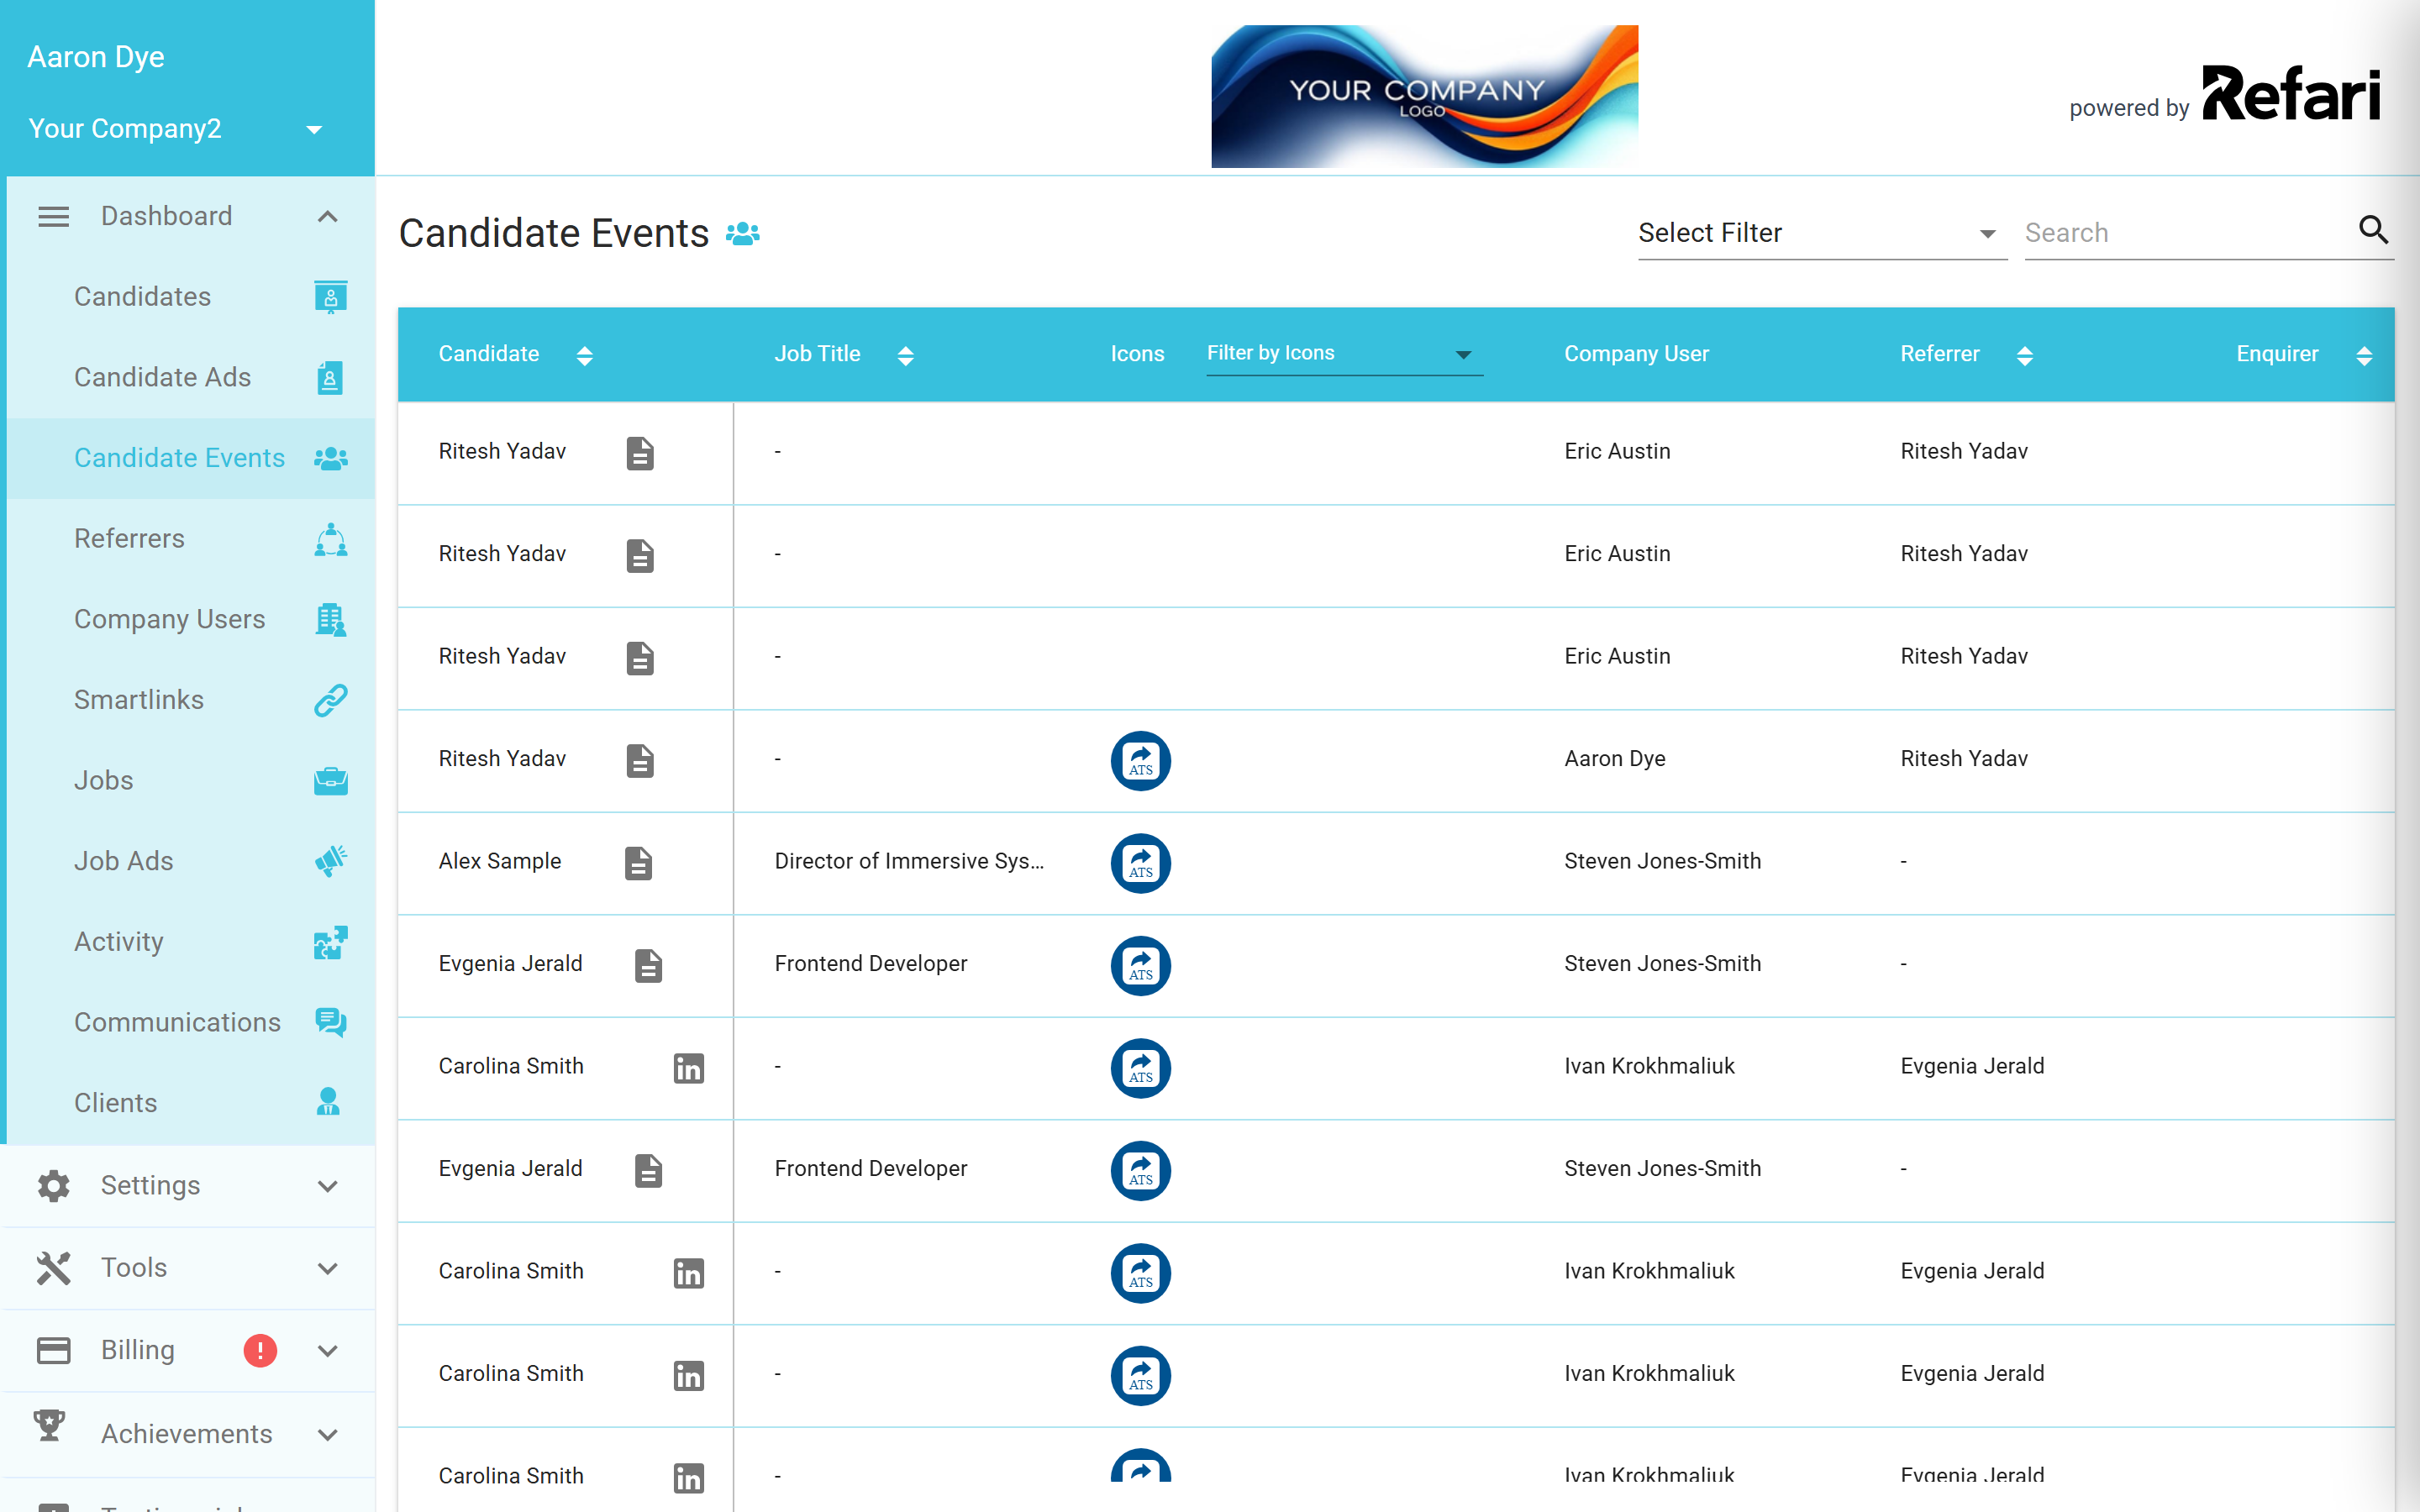
Log in to Refari at refari.co. You will arrive on your dashboard.
Step 2: Open your account profile
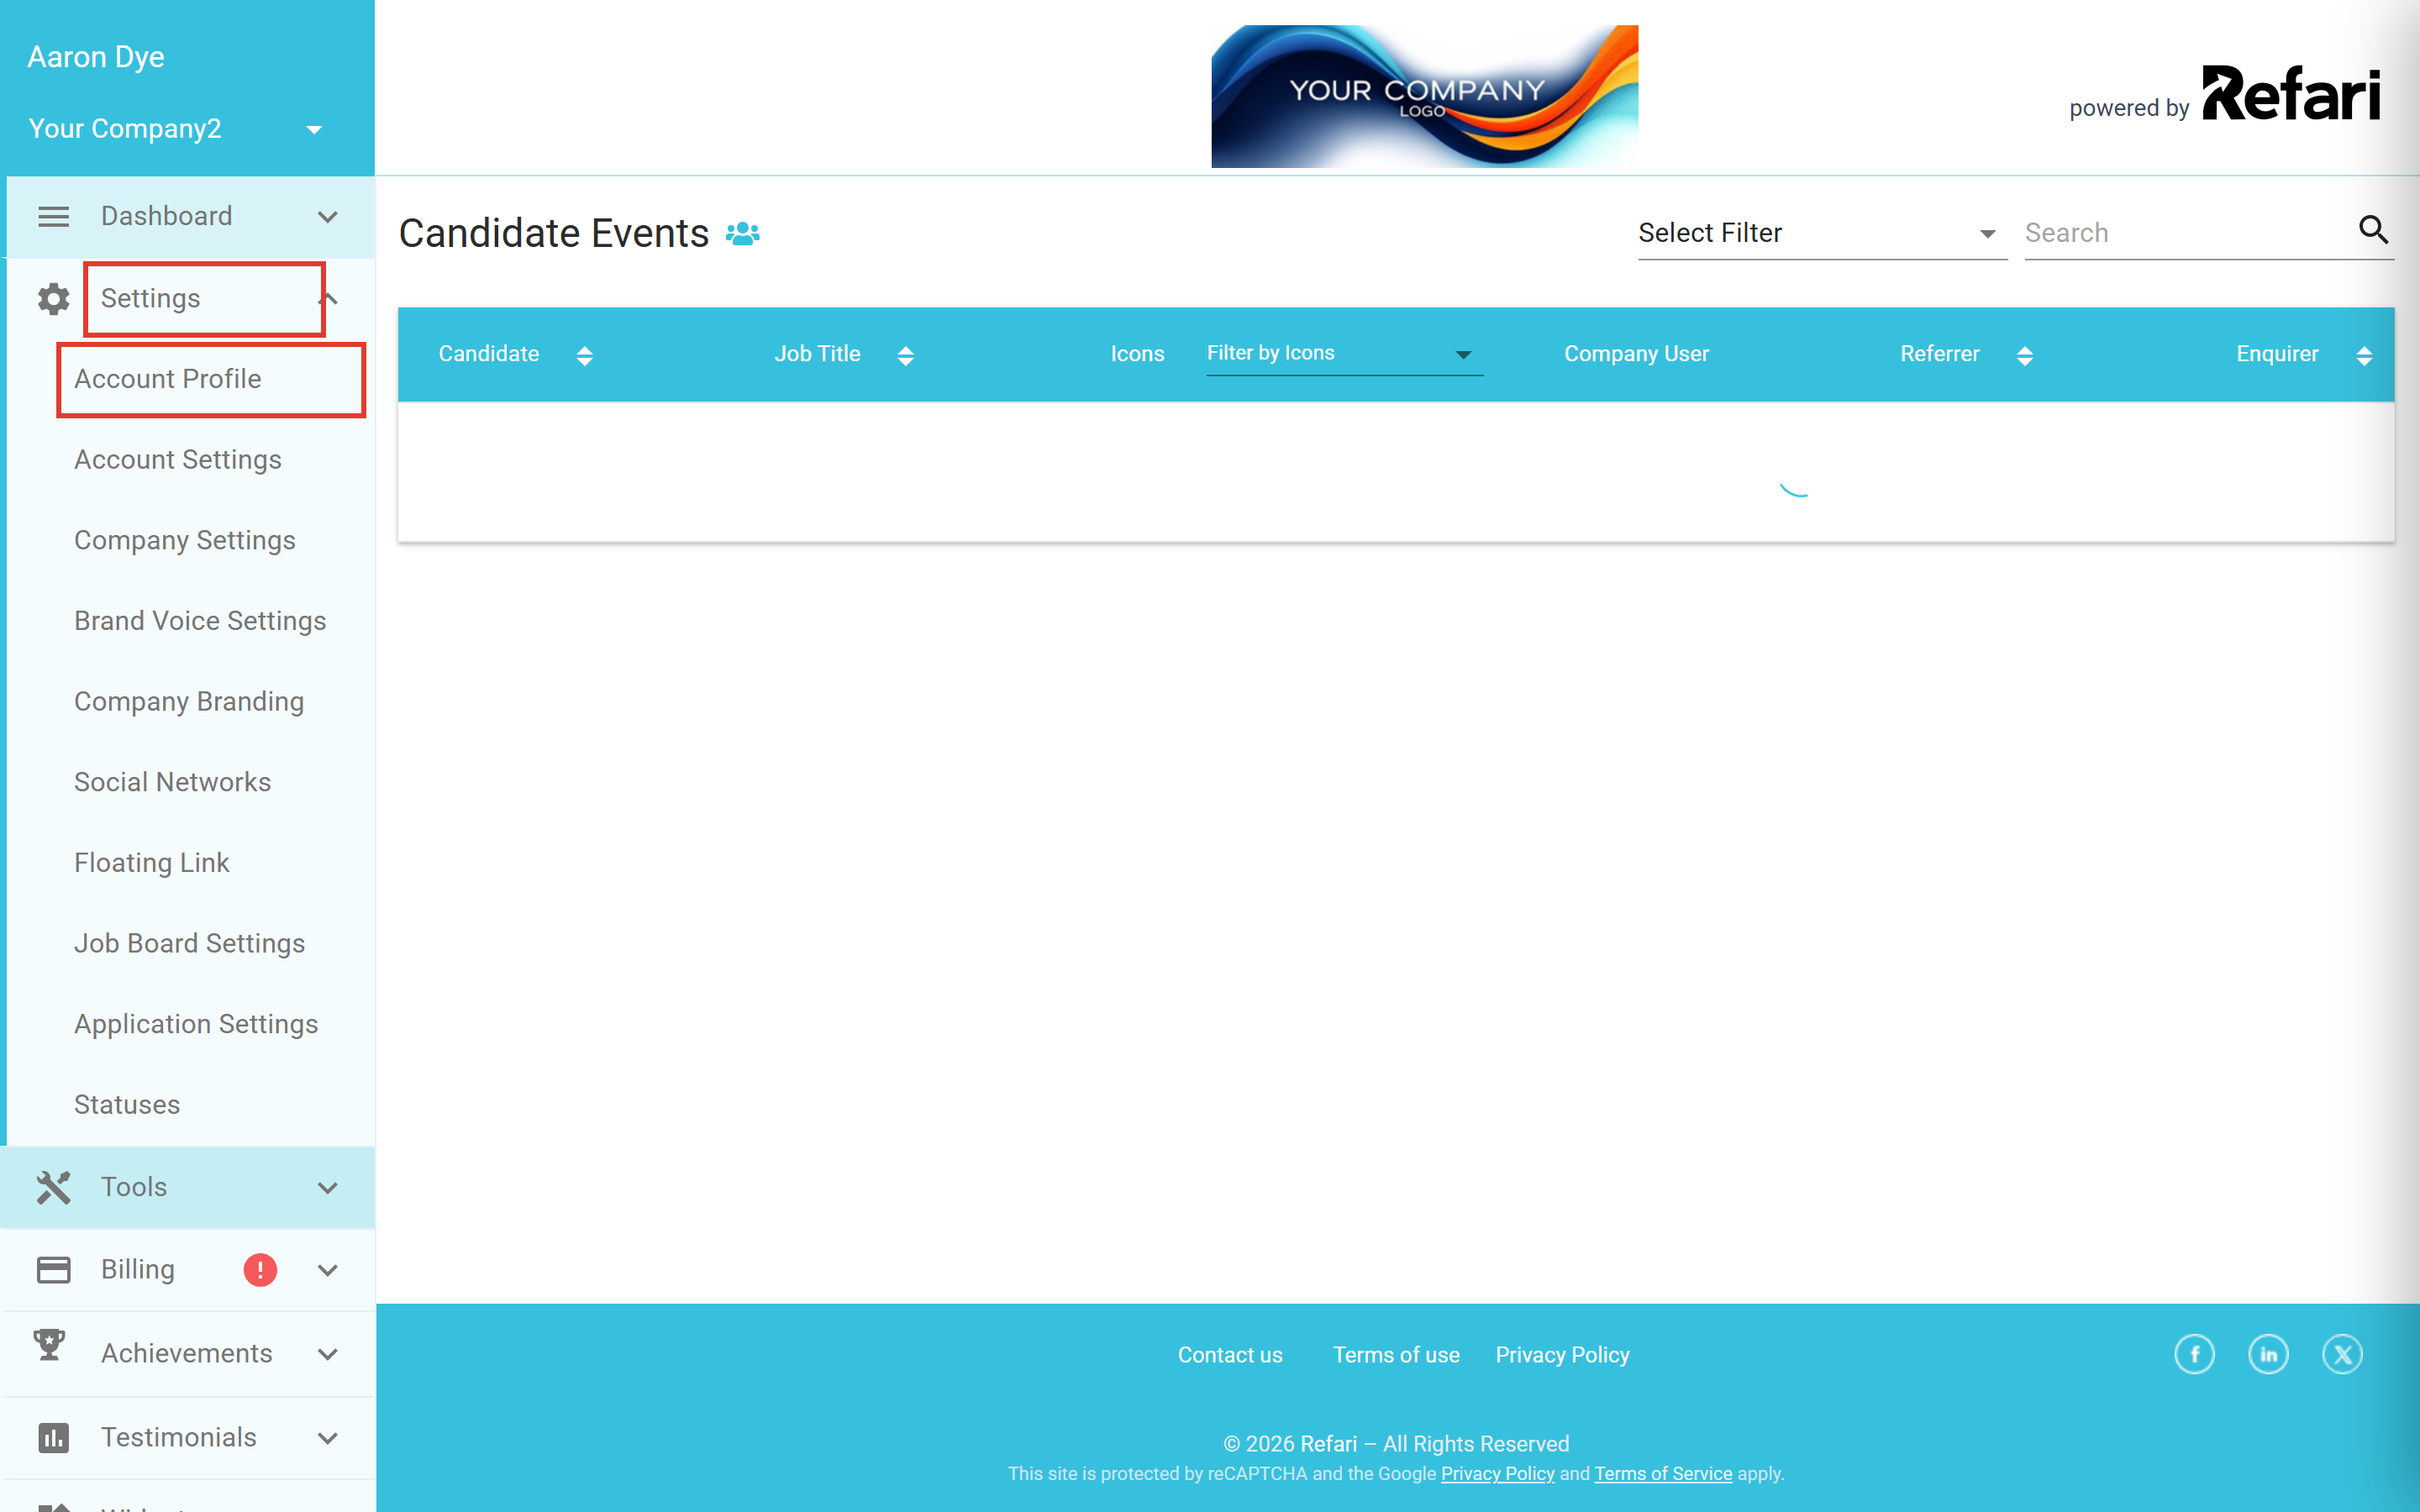
On the left, click Settings, then Account Profile.
Step 3: Check your name and email
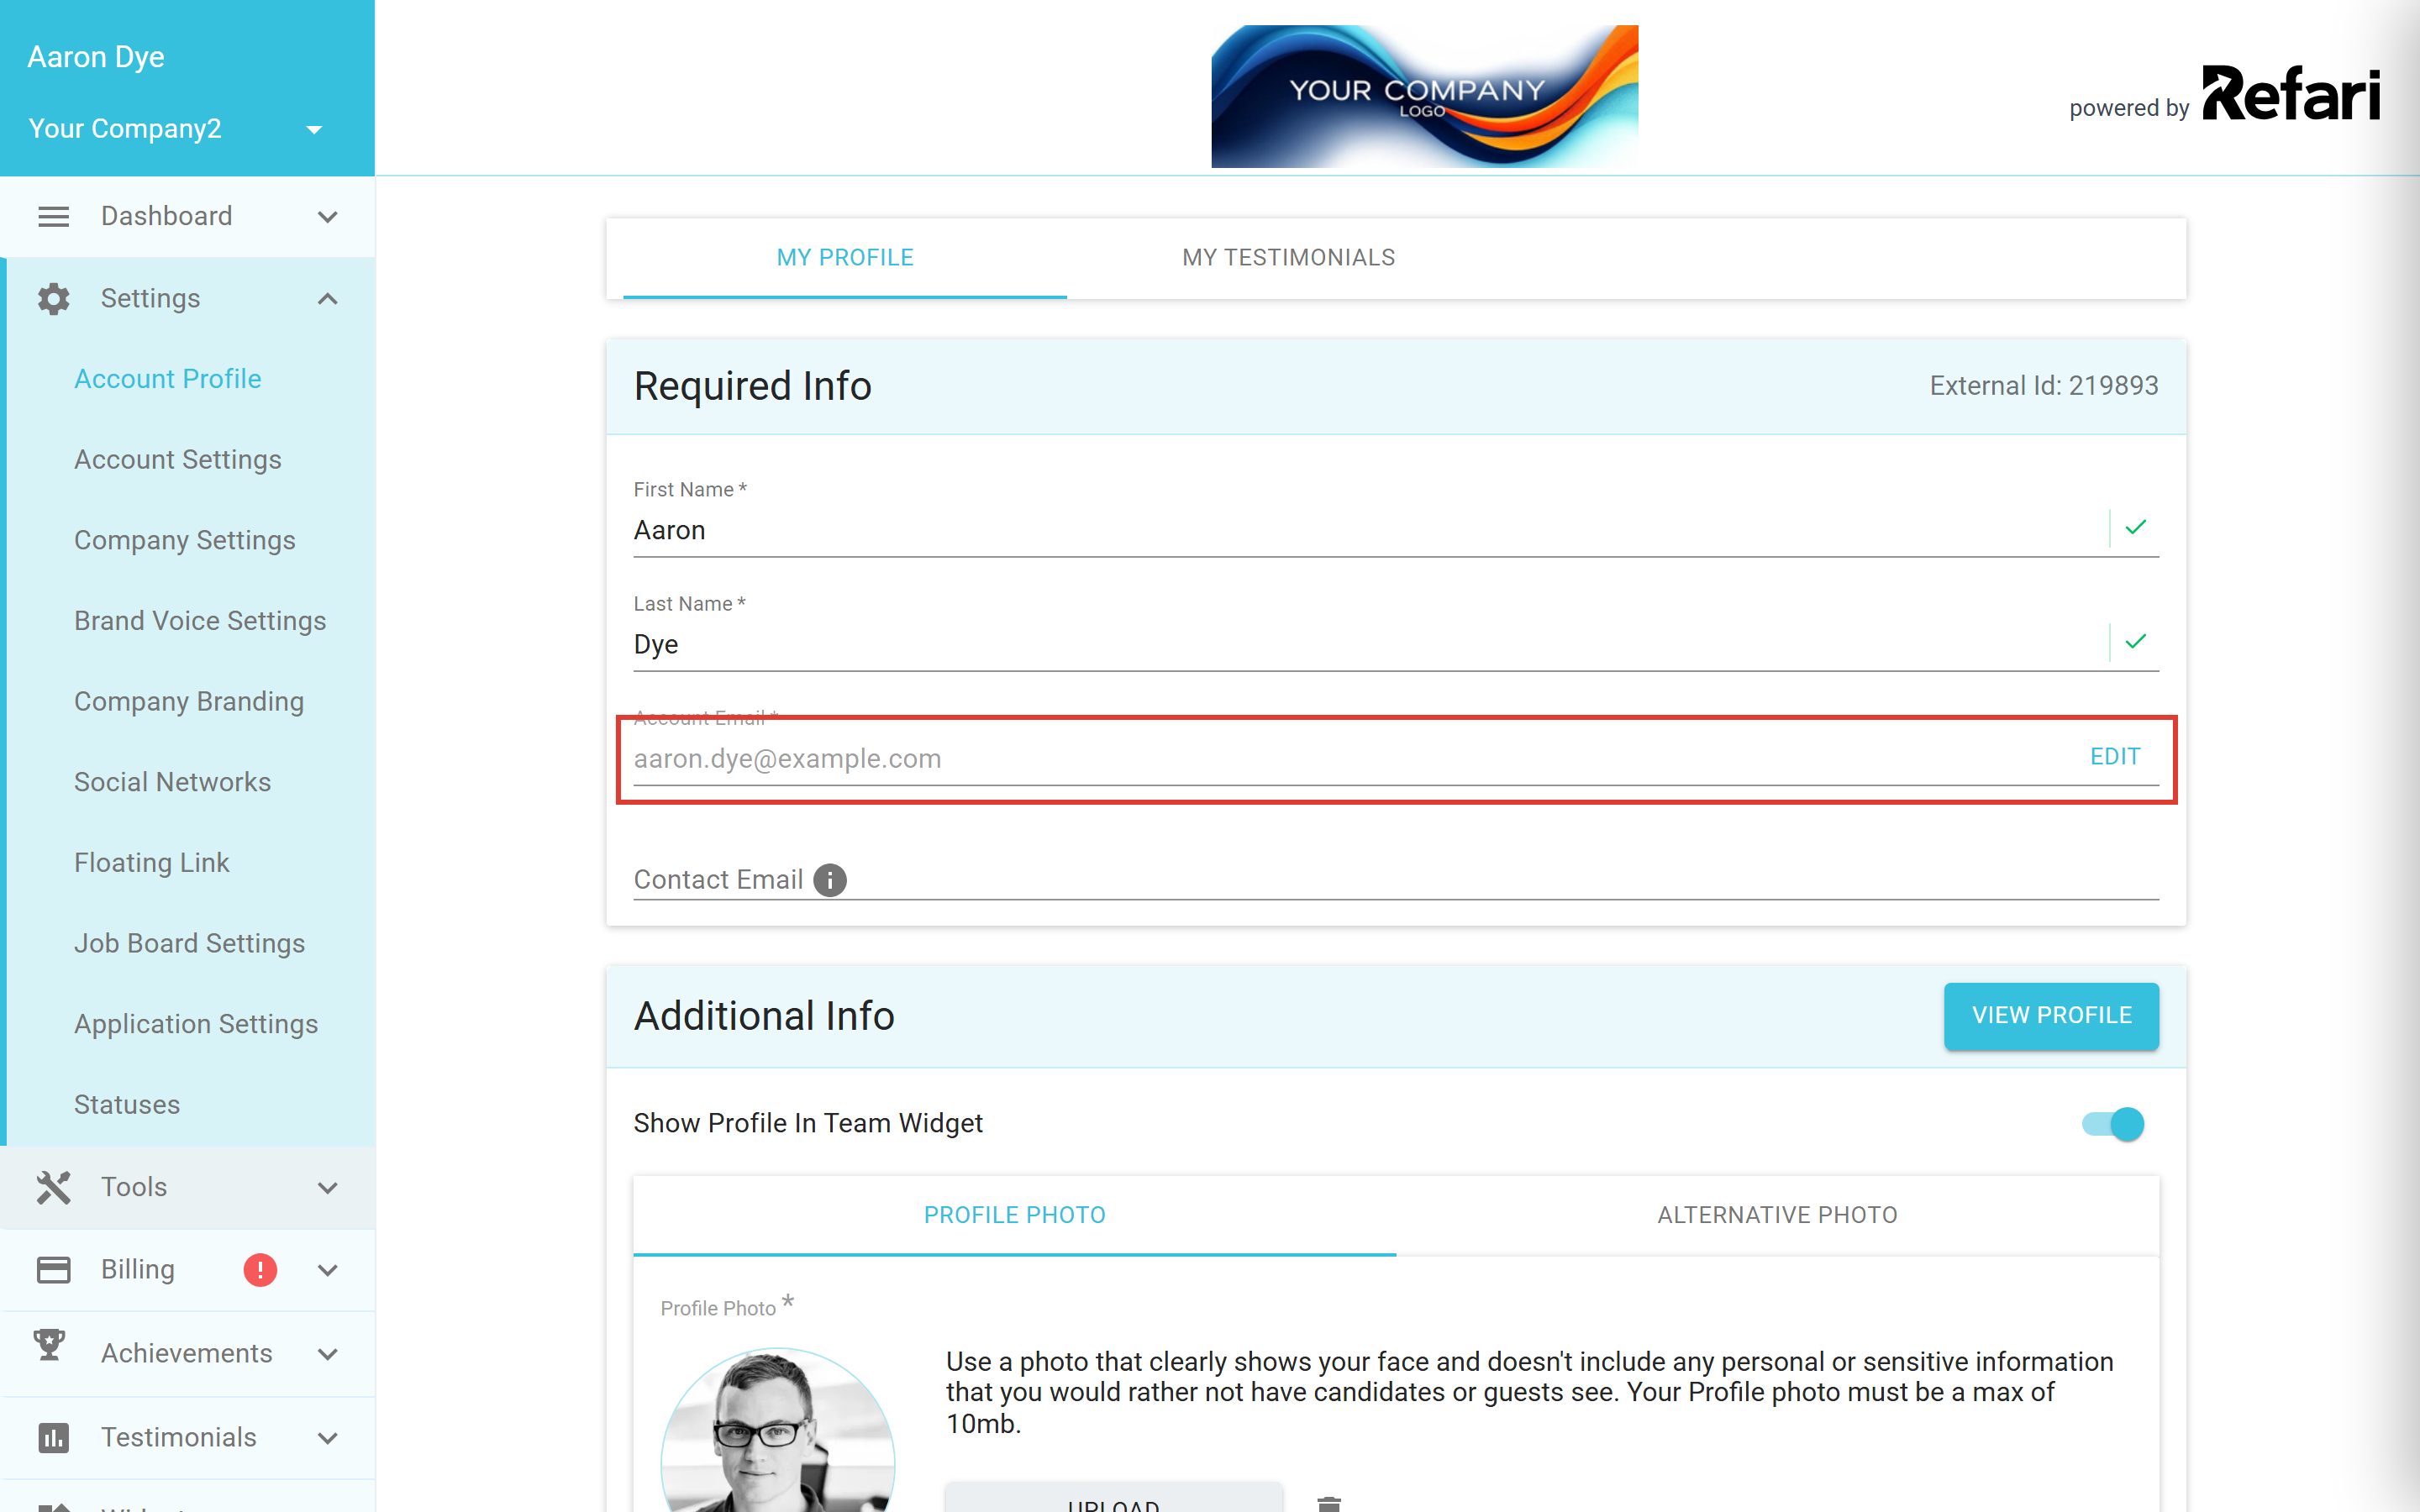
Your first and last name are already filled in under Required Info, and you can change them here if you need to. Your account email is shown too; if it ever needs updating, click EDIT beside it and confirm the new address. You can also add a separate Contact Email if you would like people to reach you on a different address.
Step 4: Switch on "Show Profile In Team Widget"
At the top of the Additional Info section you will find the Show Profile In Team Widget toggle. This is the switch that puts your profile on your company's Meet The Team widget, so make sure it is switched on. When it is on, the toggle is coloured.
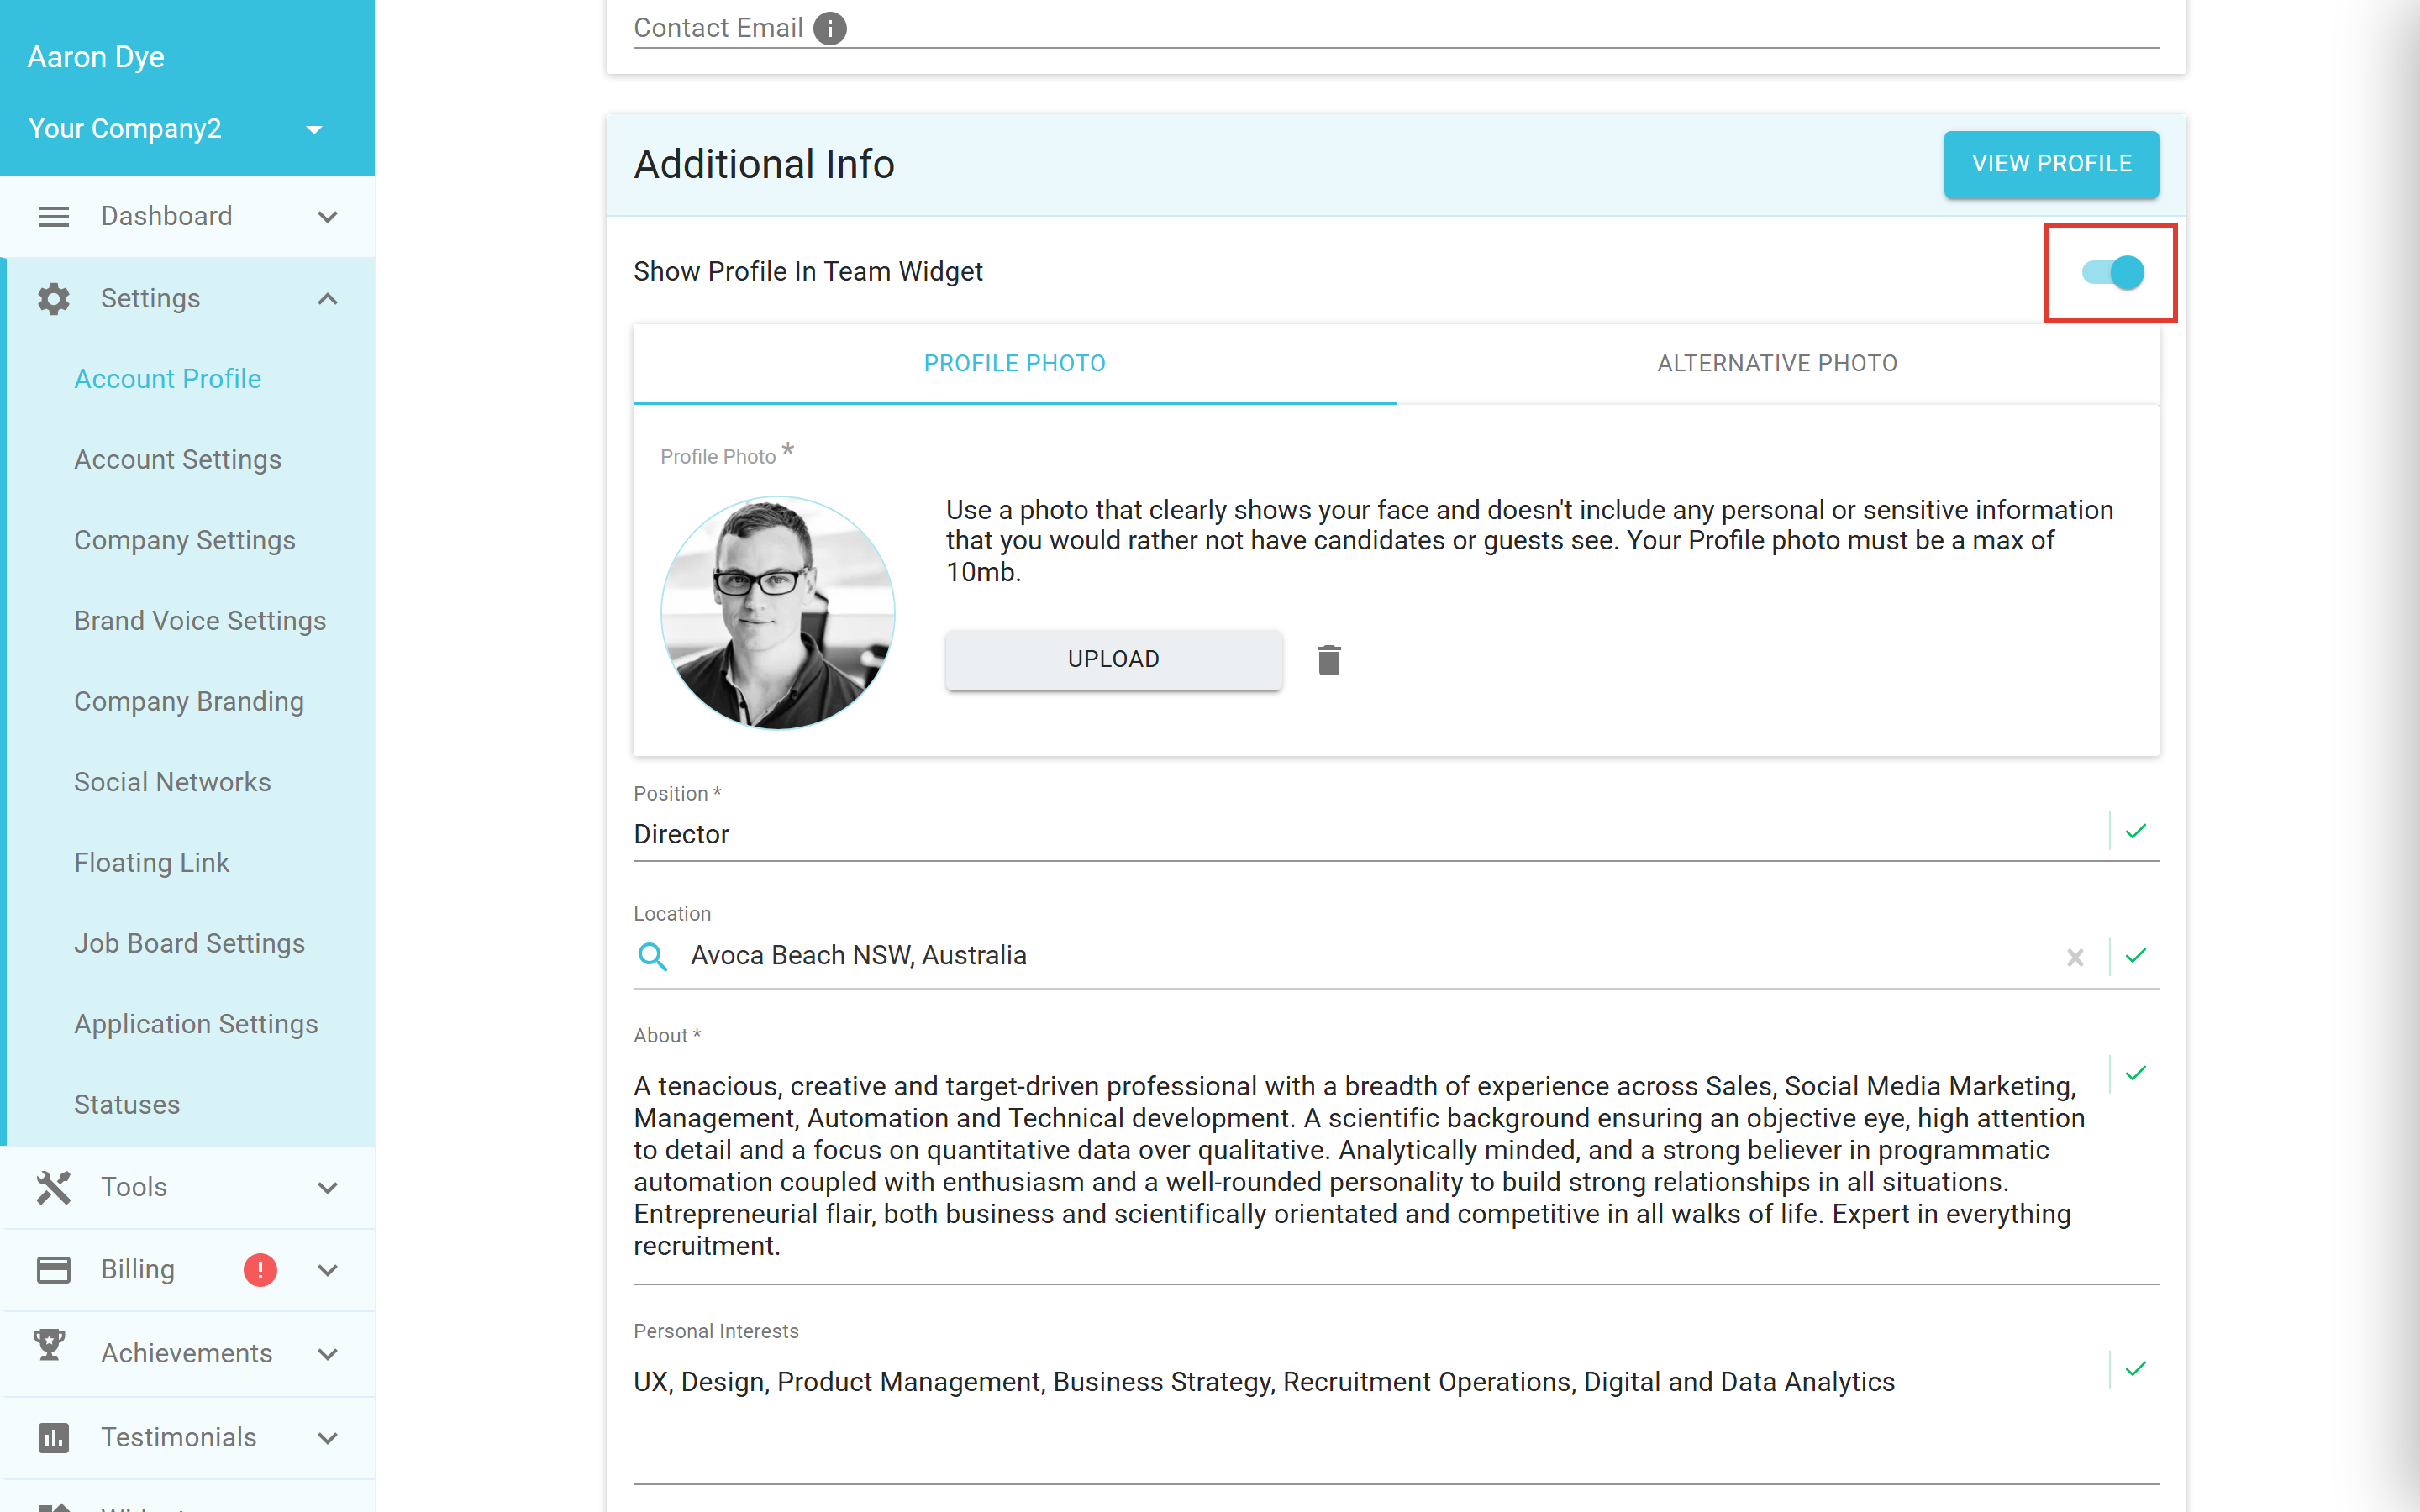
Note: If this toggle is switched off, your profile will not appear on the Meet The Team widget even when every required field is complete.Step 5: Add your profile photo and details
Still in the Additional Info section, click UPLOAD to add your profile photo, choosing one that clearly shows your face, as it appears on your company's widgets. You can also add an alternative, more casual photo by switching to the Alternative Photo tab and uploading there. While you are here, fill in your other details too, such as your position, a short bio, your specialities and your location.
Idea: Use a clear, friendly headshot for your profile photo. It sits next to your name on your company's widgets and in emails, so it is the first thing candidates and referrers see.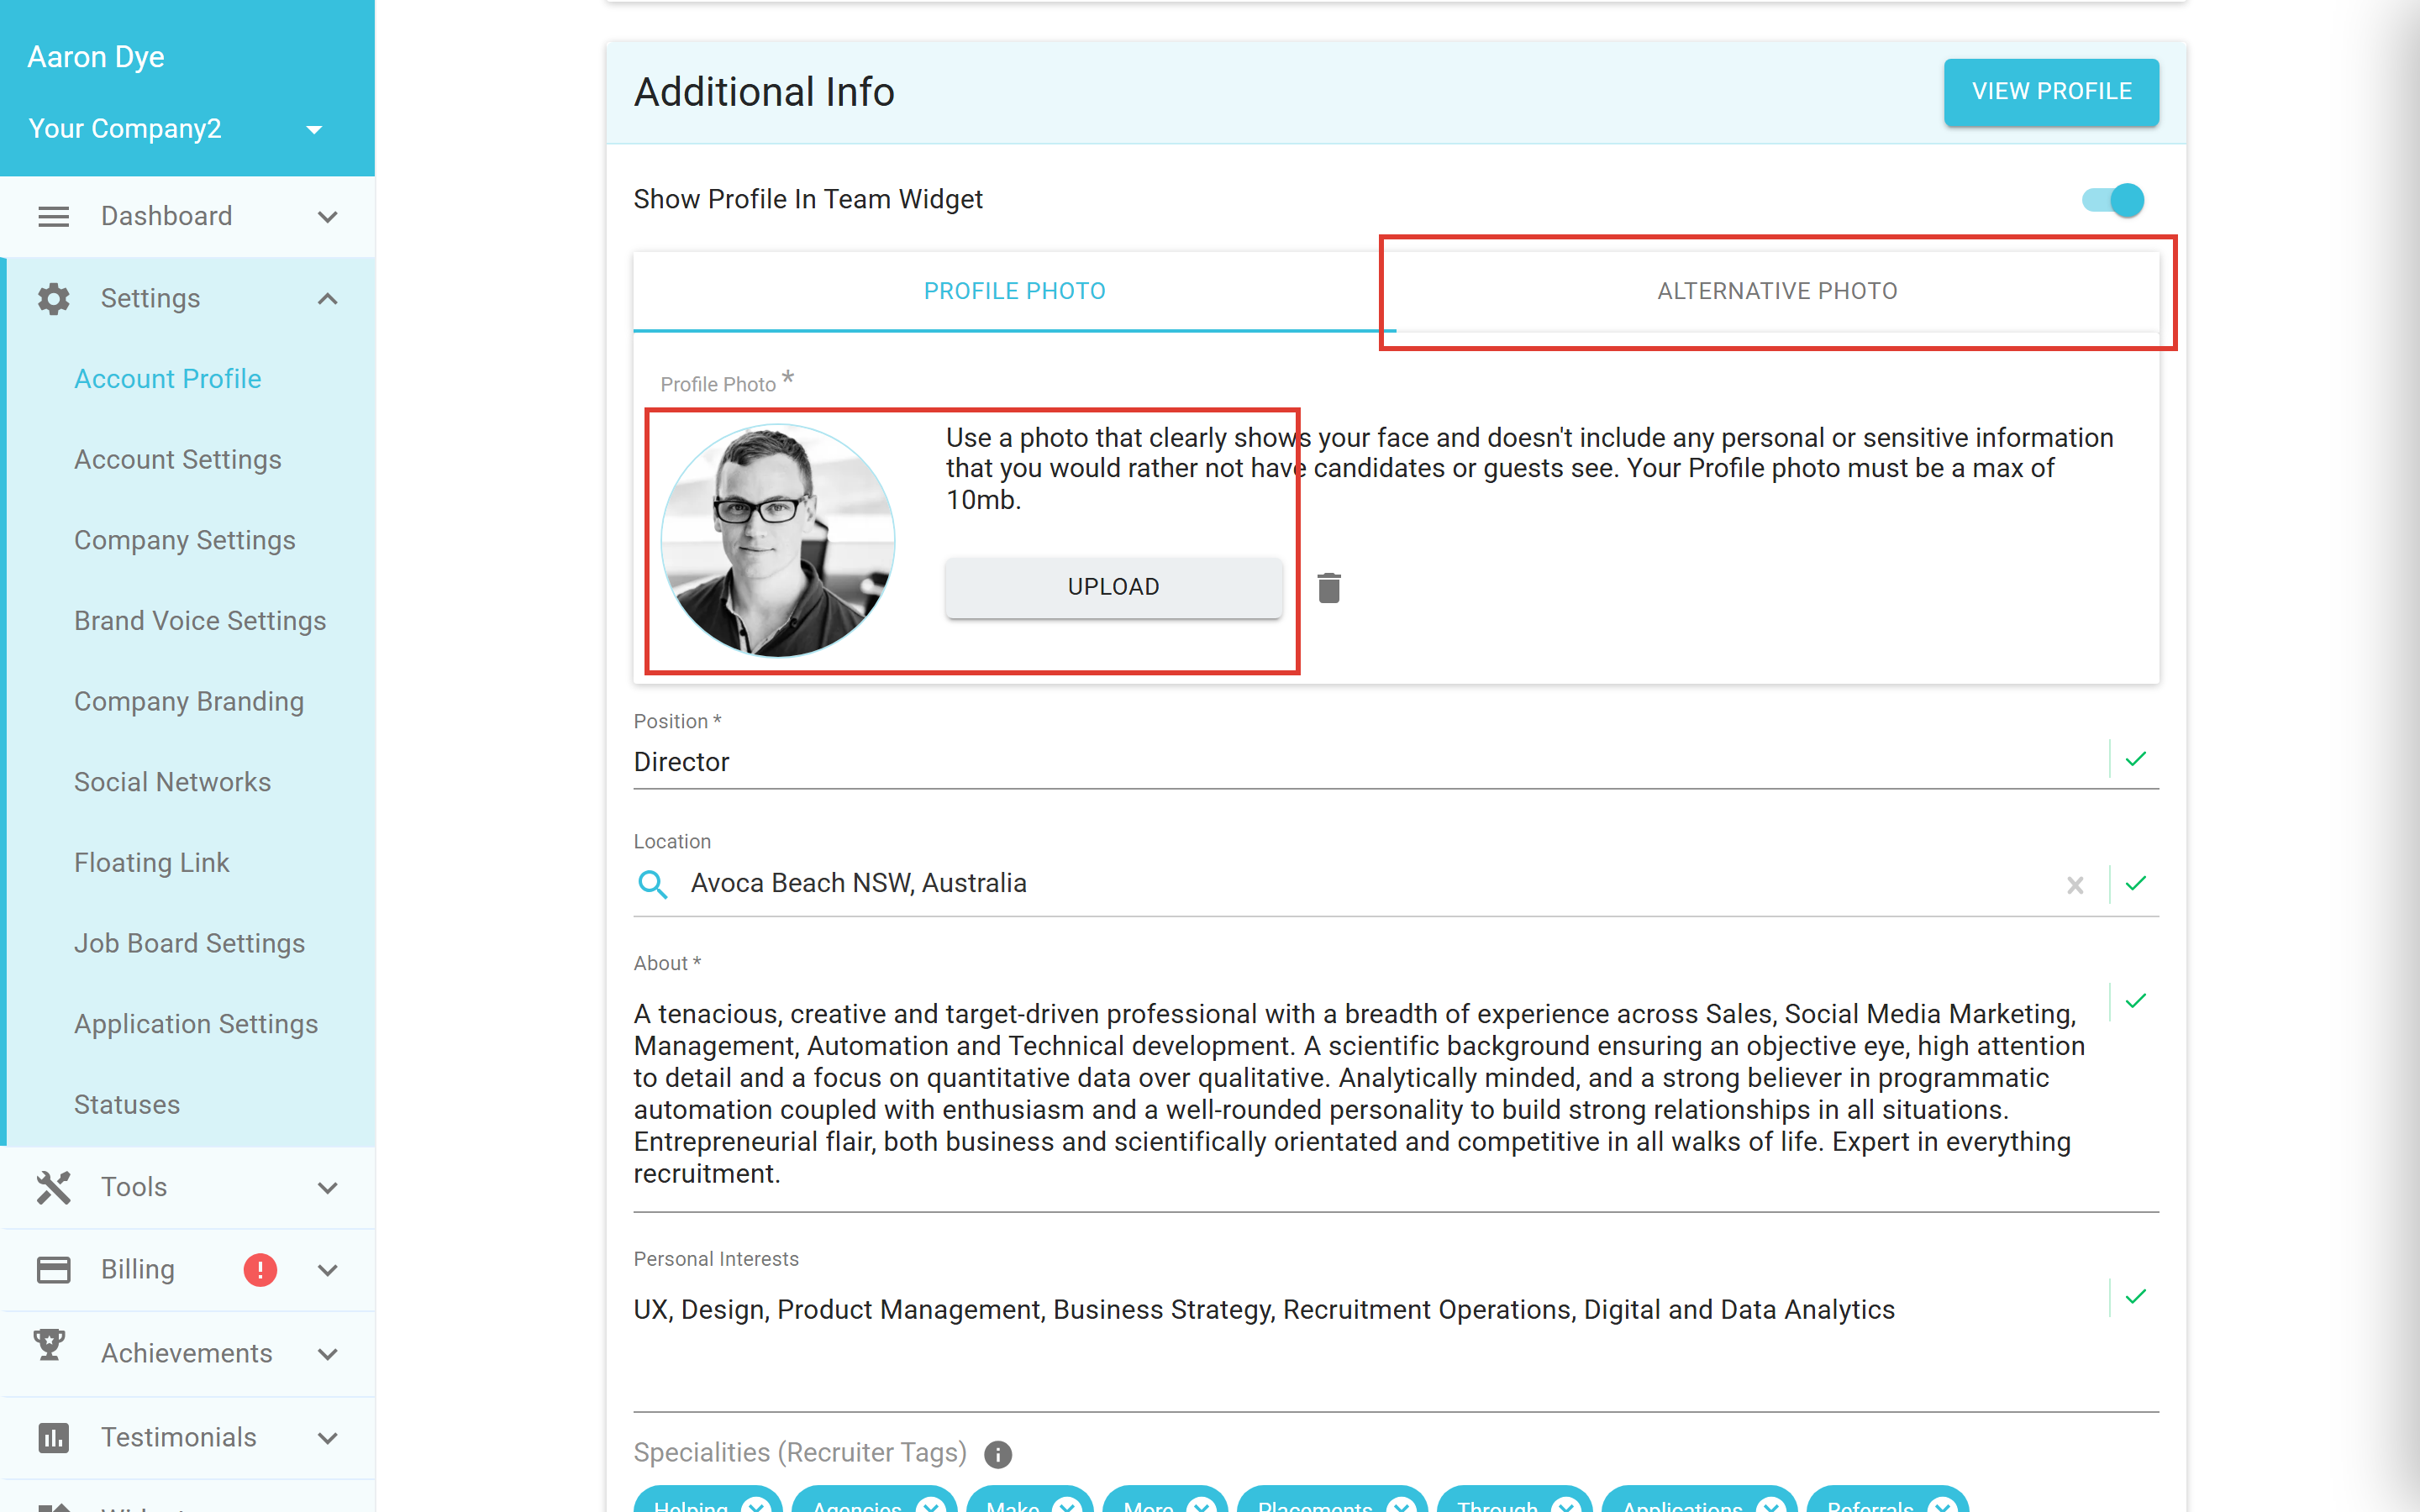
Step 6: Enter your contact number
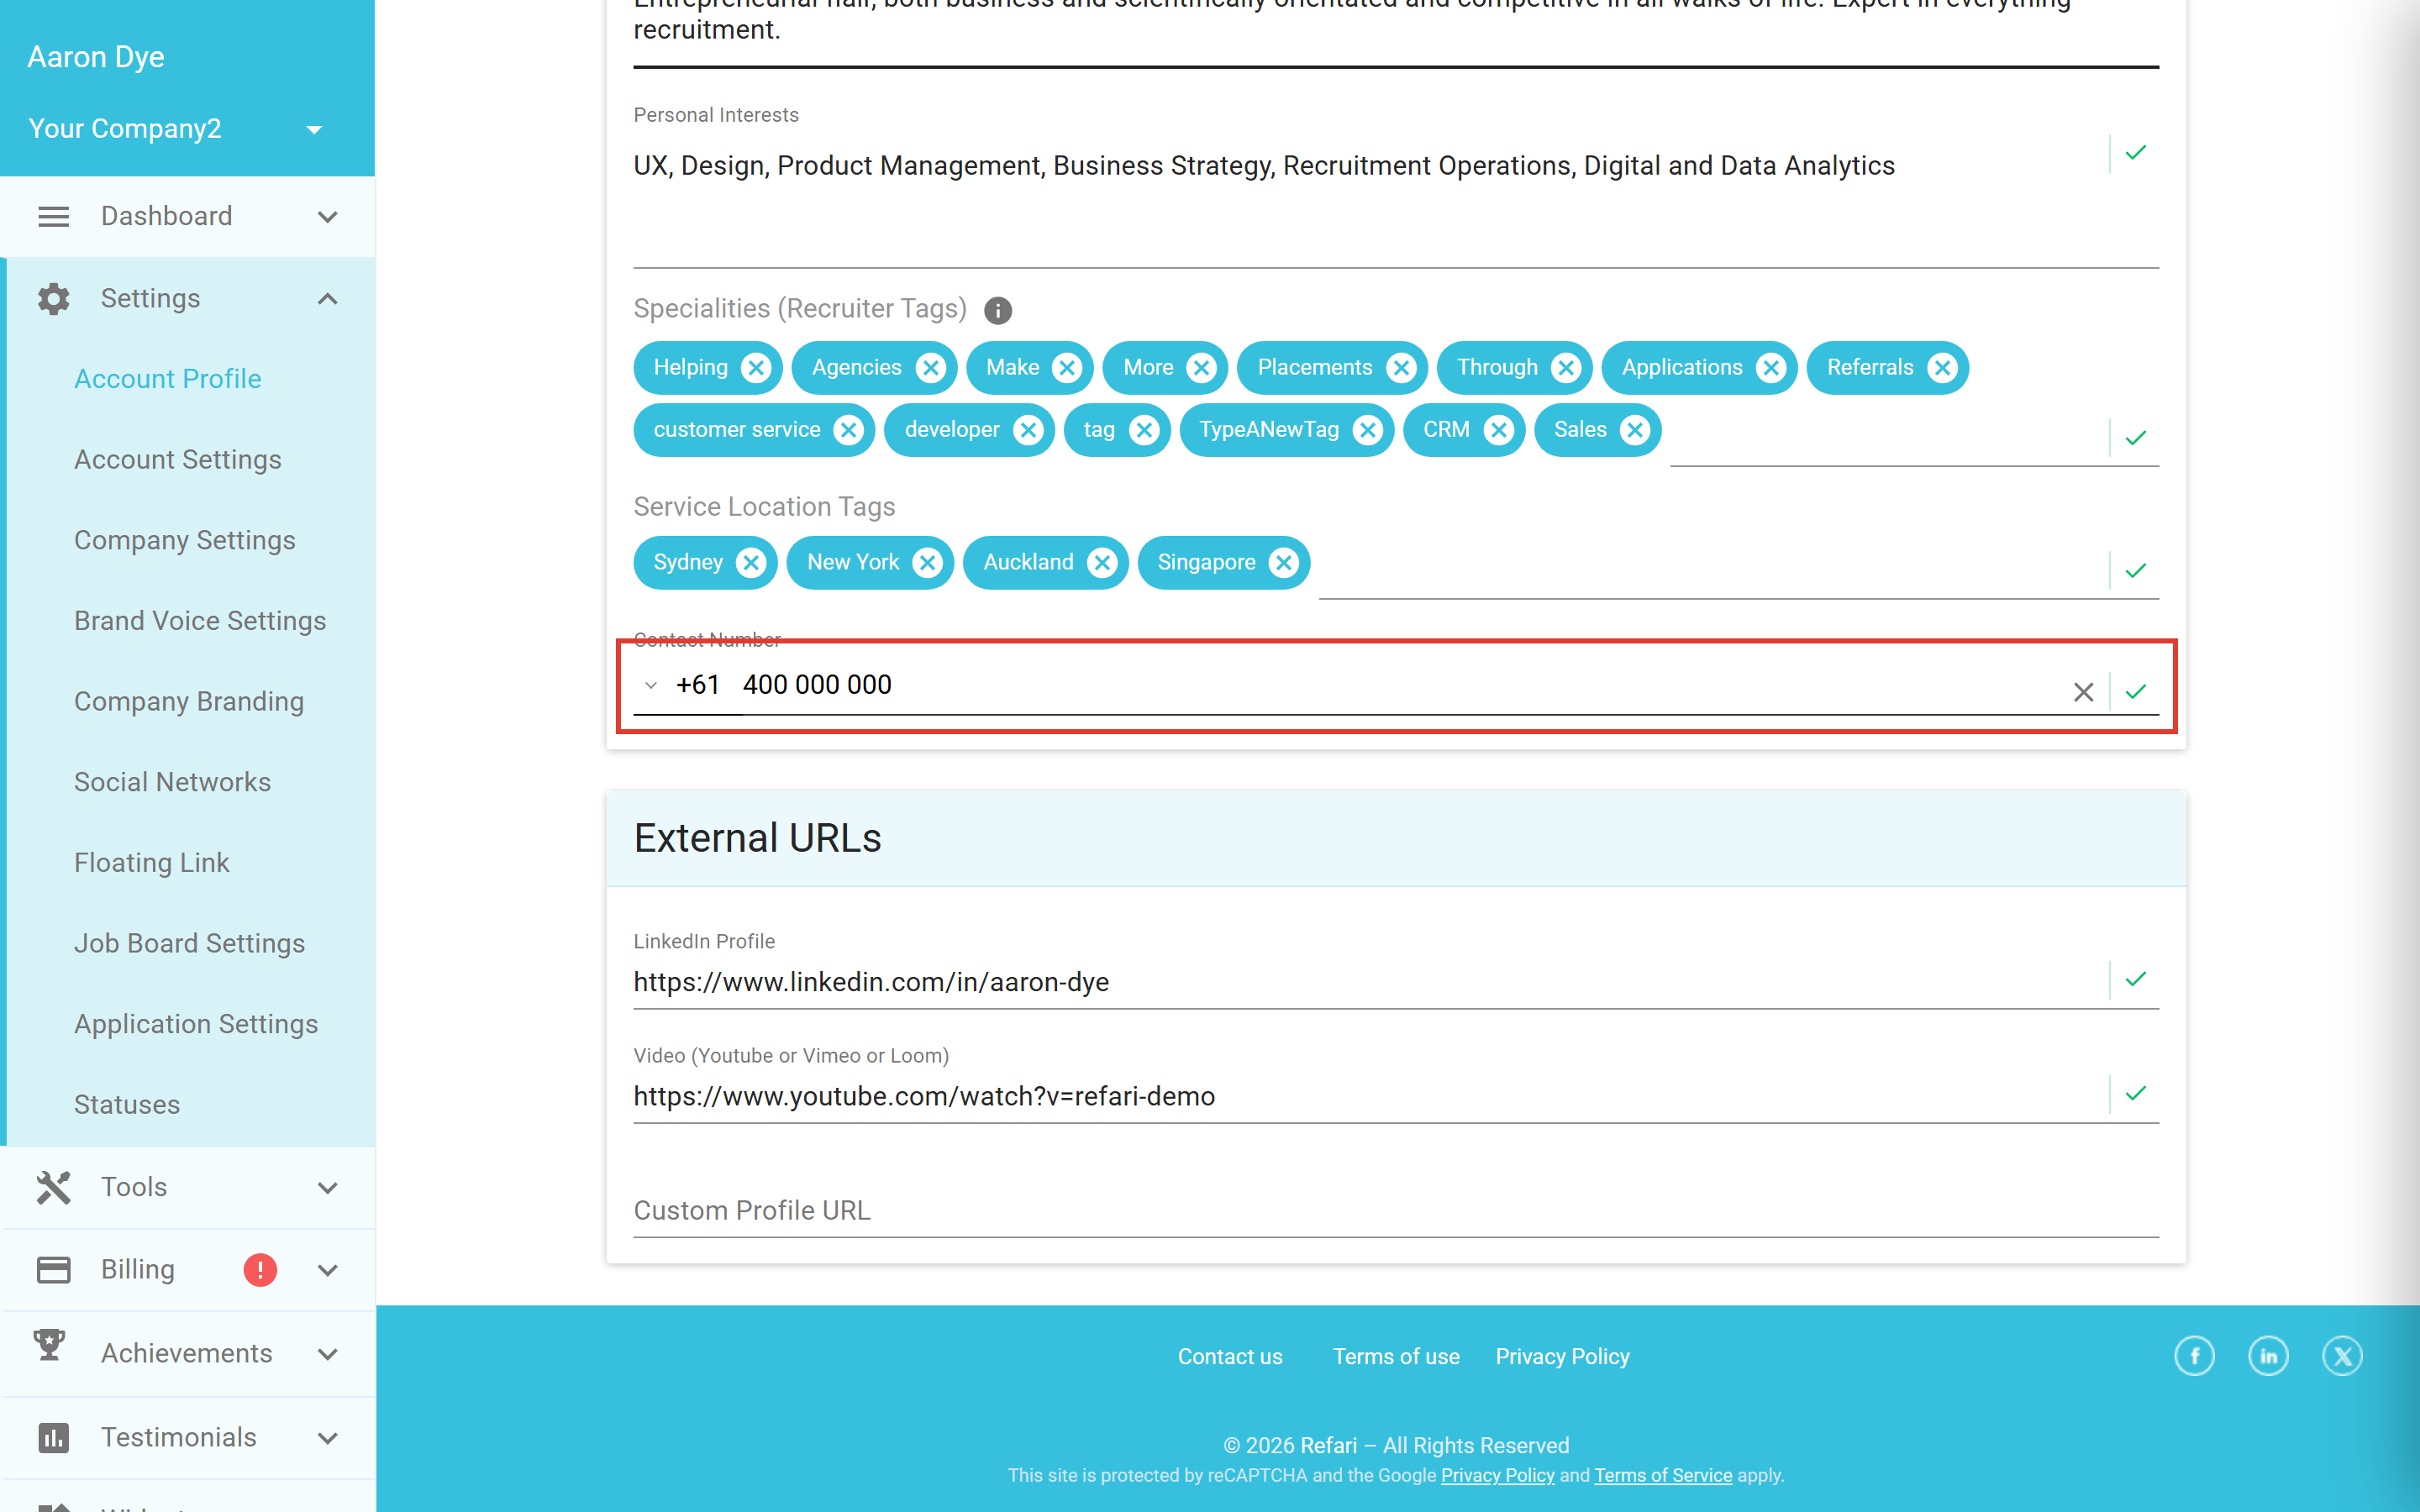
Scroll down to the Contact Number field and enter your number, following the format shown.
Step 7: Save your profile
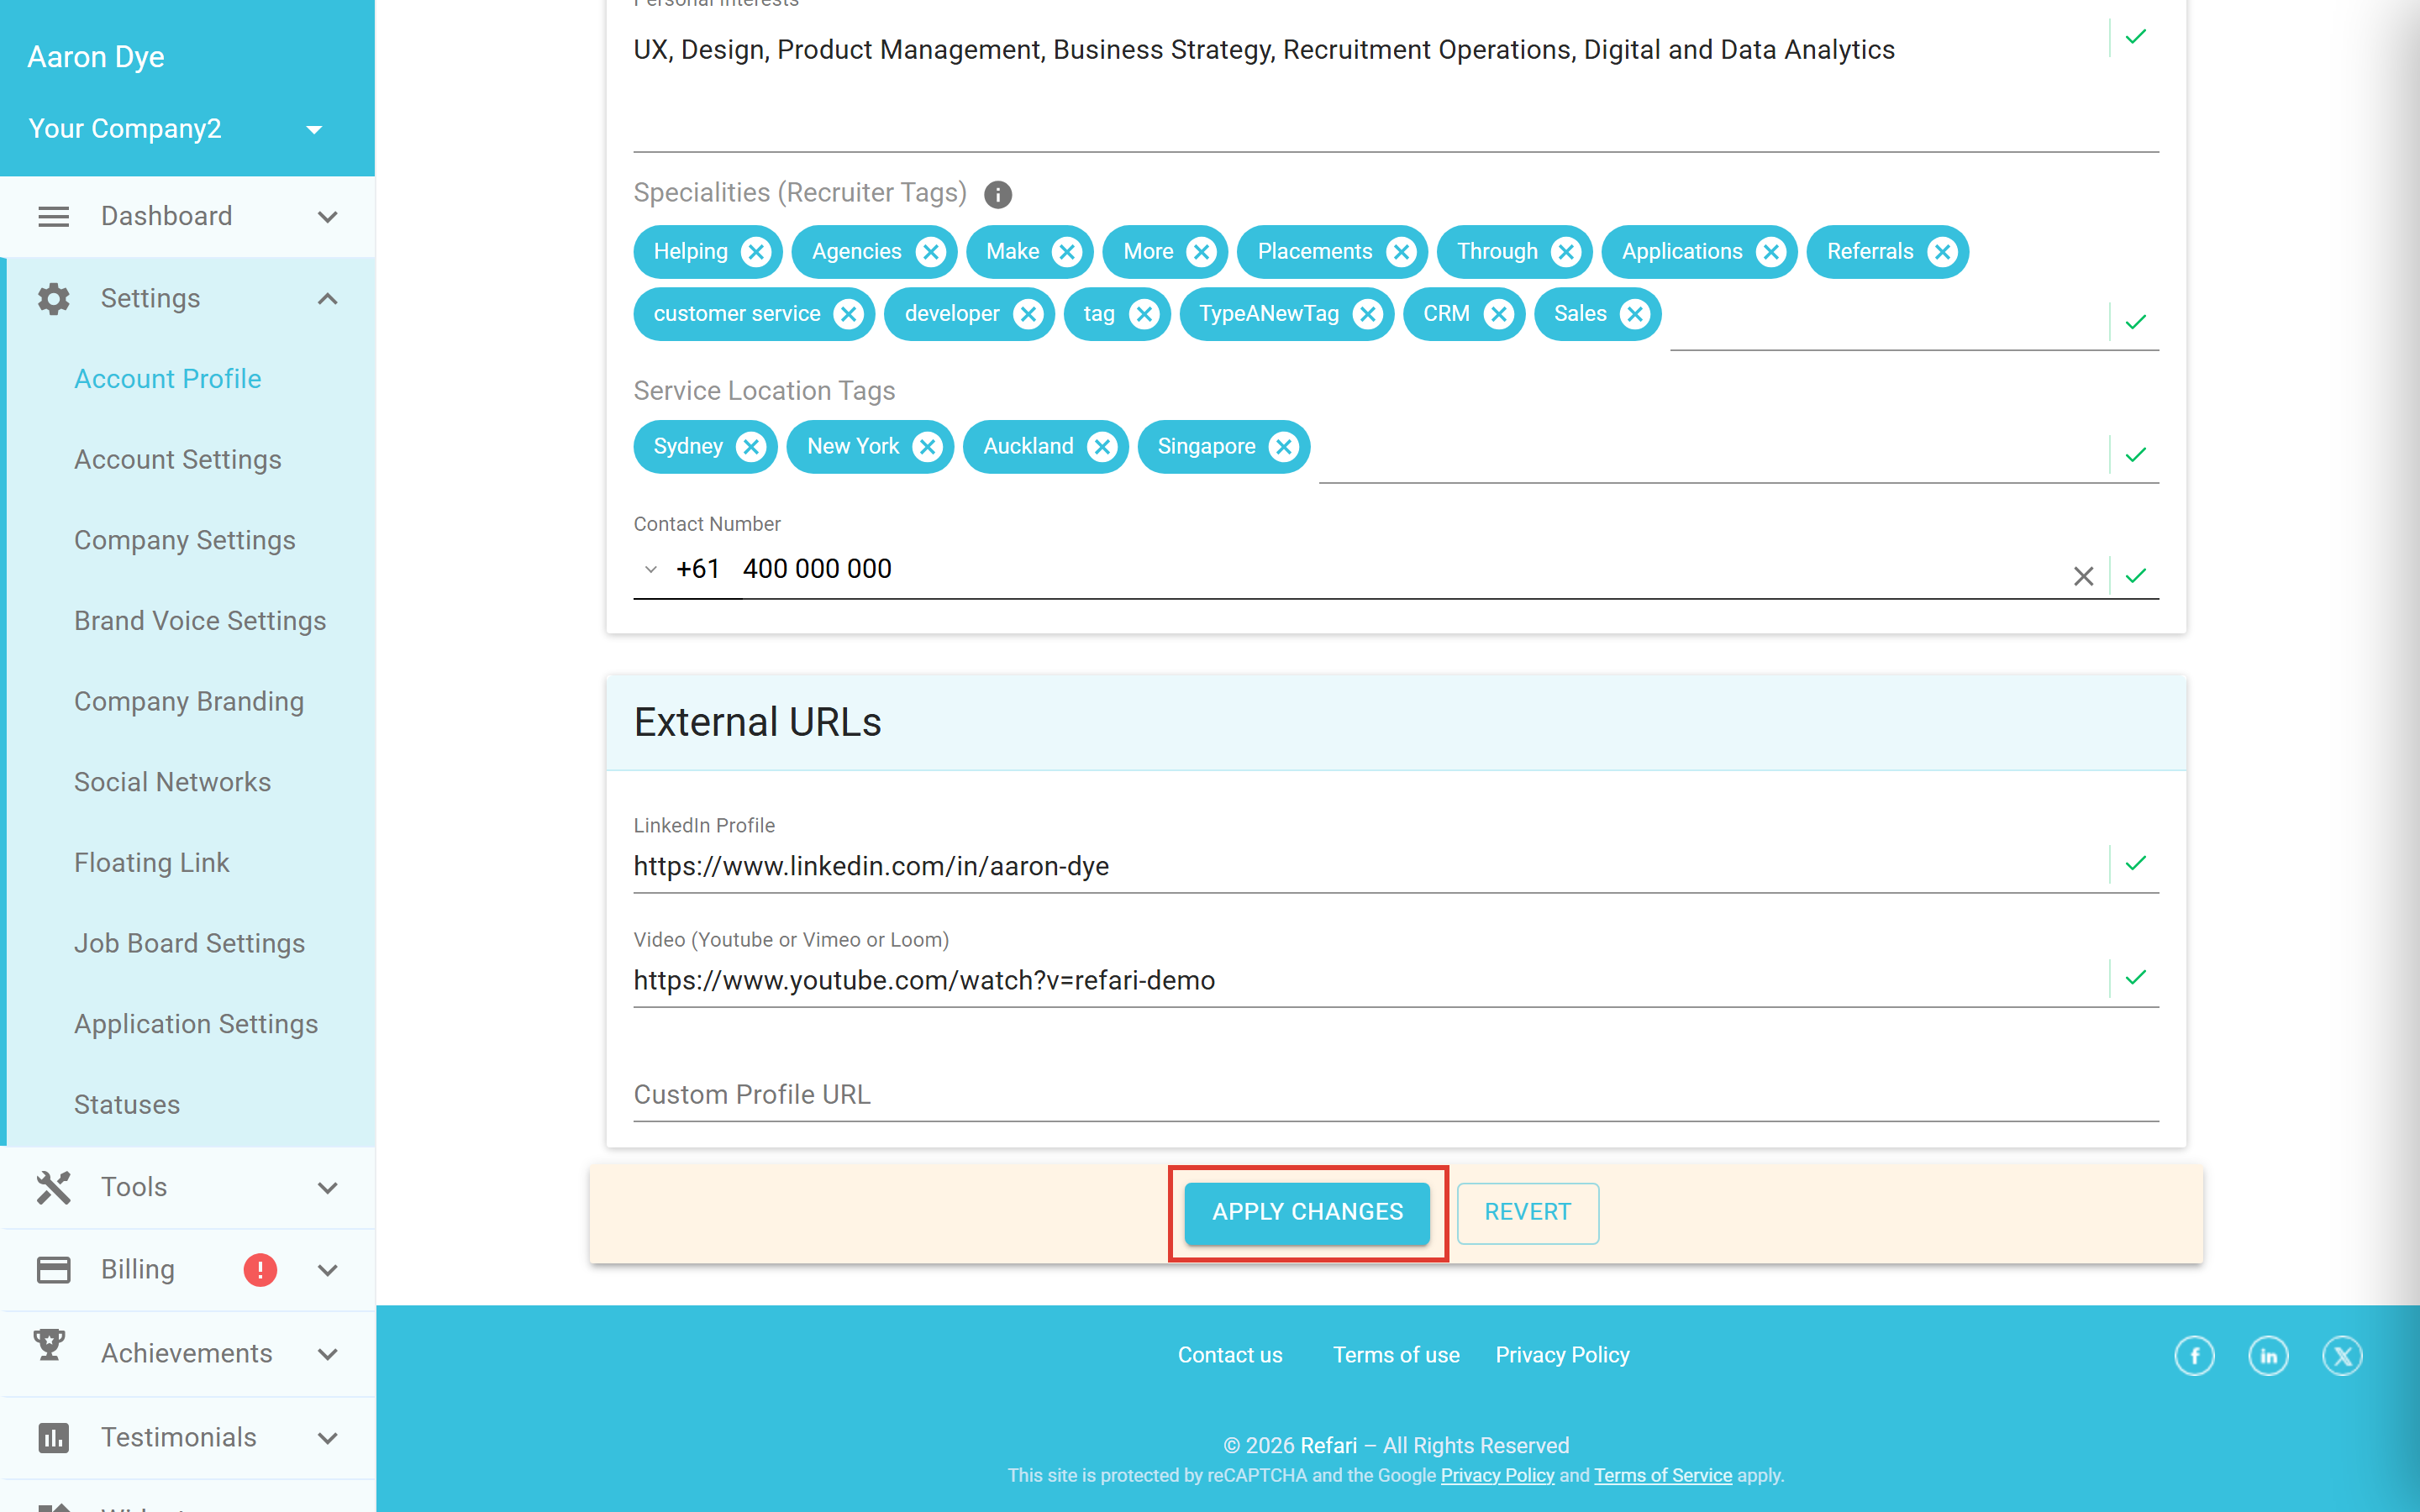
As soon as you make a change, an Apply Changes bar appears at the bottom of the page. Once you have completed your details, click Apply Changes to save them. If you would rather discard your edits, click Revert.
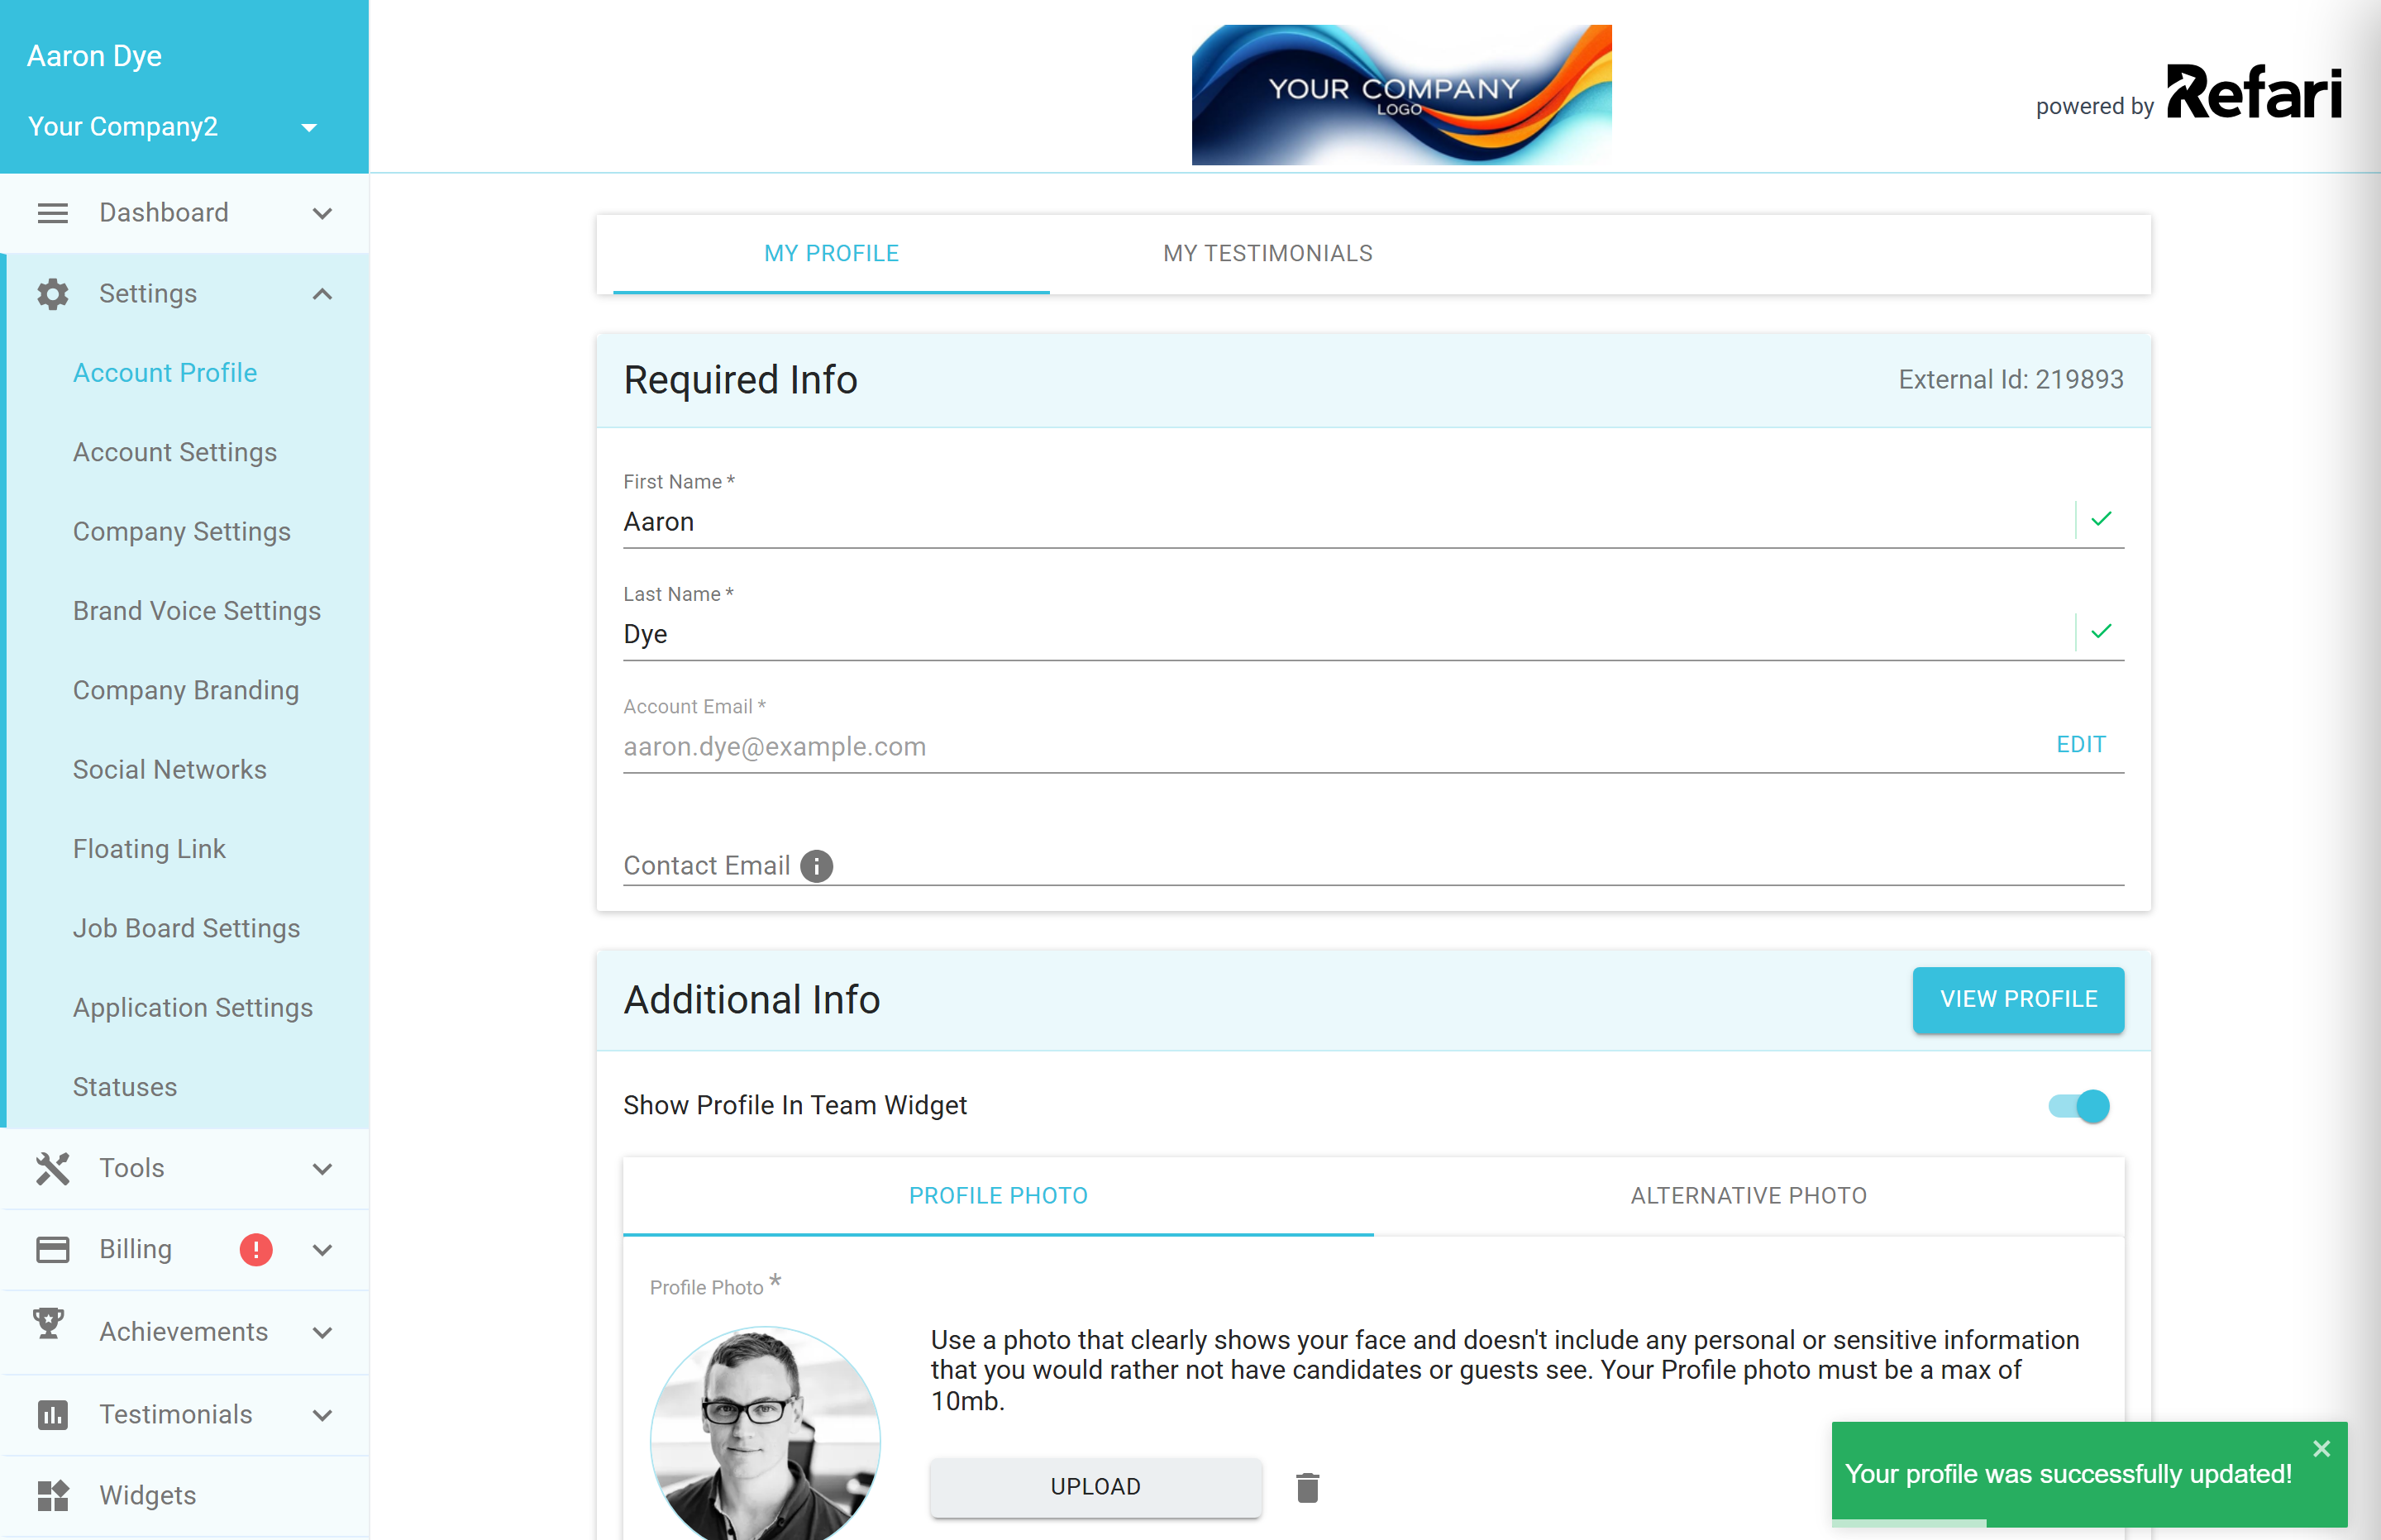
A confirmation appears in the bottom-right corner to let you know your profile was updated successfully.
See your profile across the platform
With all the required (*) fields completed and the Team Widget toggle switched on, your profile now appears across the platform. Here is an example of a Meet The Team widget showing the profiles.

Success! Your profile is set up and ready to go. You can update your details any time from Settings > Account Profile, just remember to click Apply Changes to save.Other articles you might be interested in: Adding Company Testimonials in Refari | Best practices with Refari
Was this article helpful?
That’s Great!
Thank you for your feedback
Sorry! We couldn't be helpful
Thank you for your feedback
Feedback sent
We appreciate your effort and will try to fix the article