This guide explains AutoSuggest AI and how to set it up. It is one of the quickest ways to keep your candidates engaged: in around ten seconds you can send off ten job alert suggestions, each one drafted and curated by AI, so the right candidates keep hearing from you without you lifting a finger.
Why use AutoSuggest AI?
Staying in touch with past candidates is the task that always slips, because there is never enough time. AutoSuggest AI does it for you and turns your job board into a marketing machine. Every time a candidate's application reaches a status you care about, the AI quietly drafts a relevant job alert for them, ready for you to send with a glance.
- Keep candidates warm automatically, with no writing or chasing on your part.
- Market your jobs continuously: every status change becomes a reason to put fresh, relevant roles in front of a candidate.
- Save hours: review and send around ten AI-drafted suggestions in roughly ten seconds, rather than writing each email by hand.
- Boost engagement: candidates keep seeing roles that suit them, so they stay interested in the jobs you are hiring for.
Idea: Think of it as your job board doing the marketing for you. The AI writes the alerts; you simply skim the queue and approve the ones you are happy with.What is AutoSuggest AI?
Here is how it works. When an application moves to a status you have chosen, such as unsuccessful, shortlisted, offered or placed, AutoSuggest AI drafts a tailored job alert email for that candidate. It never sends anything on its own: it adds a suggestion to a queue for you to approve or reject, so you stay in control of what goes out.
There are two parts to it: the automation rules that decide when a suggestion is created, and the suggestions queue where you review and send them.
Note: AutoSuggest AI is an AI-powered feature, so it is available when AI is enabled for your company, and generating suggestions draws on your account's AI budget.Step 1: Create an automation rule
In your dashboard, go to "Tools > AutoSuggest AI". This page lists any rules you already have. Click Create to add a new one.
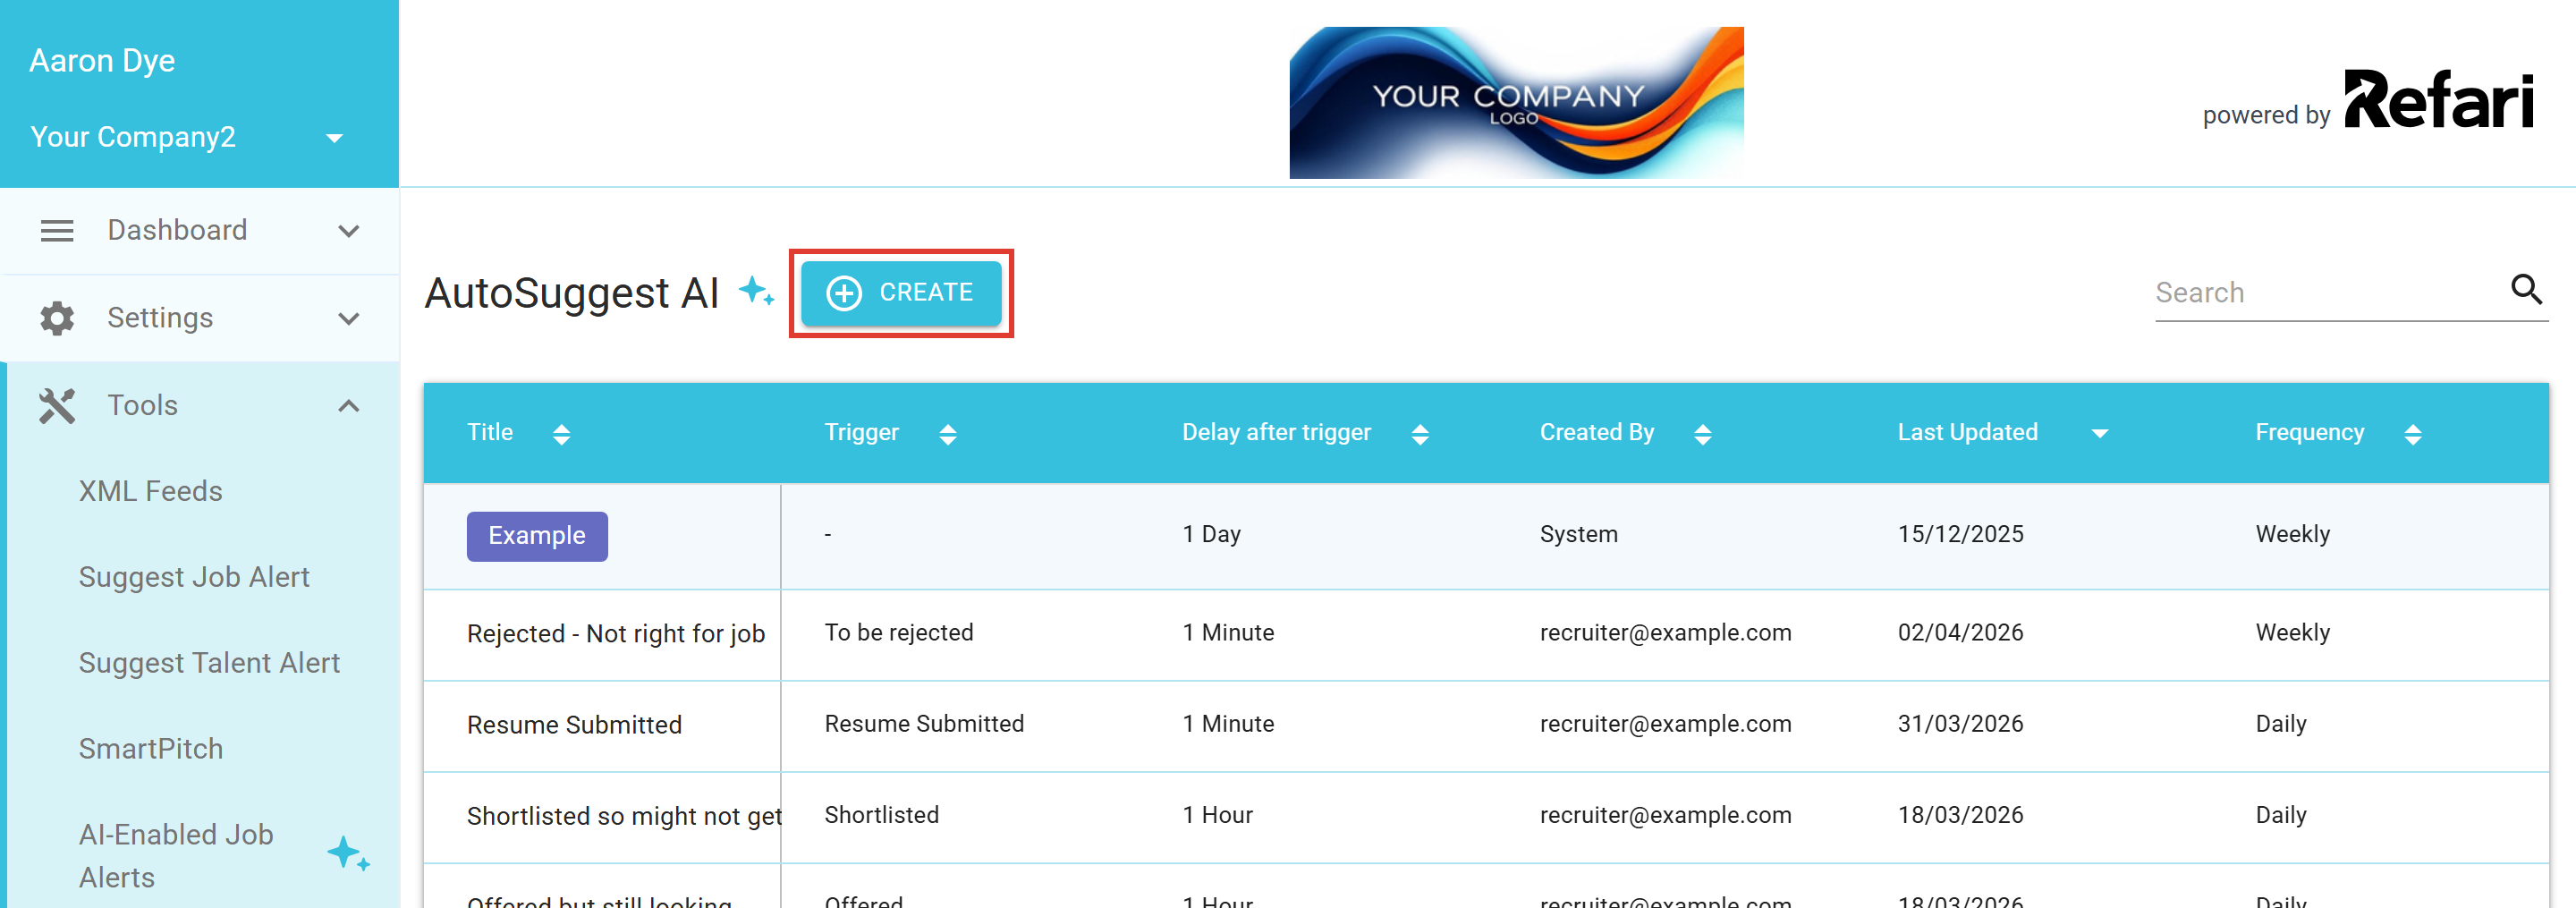
The Job Alert Suggestion Automation window opens with two steps: Trigger Setup and Email Setup.
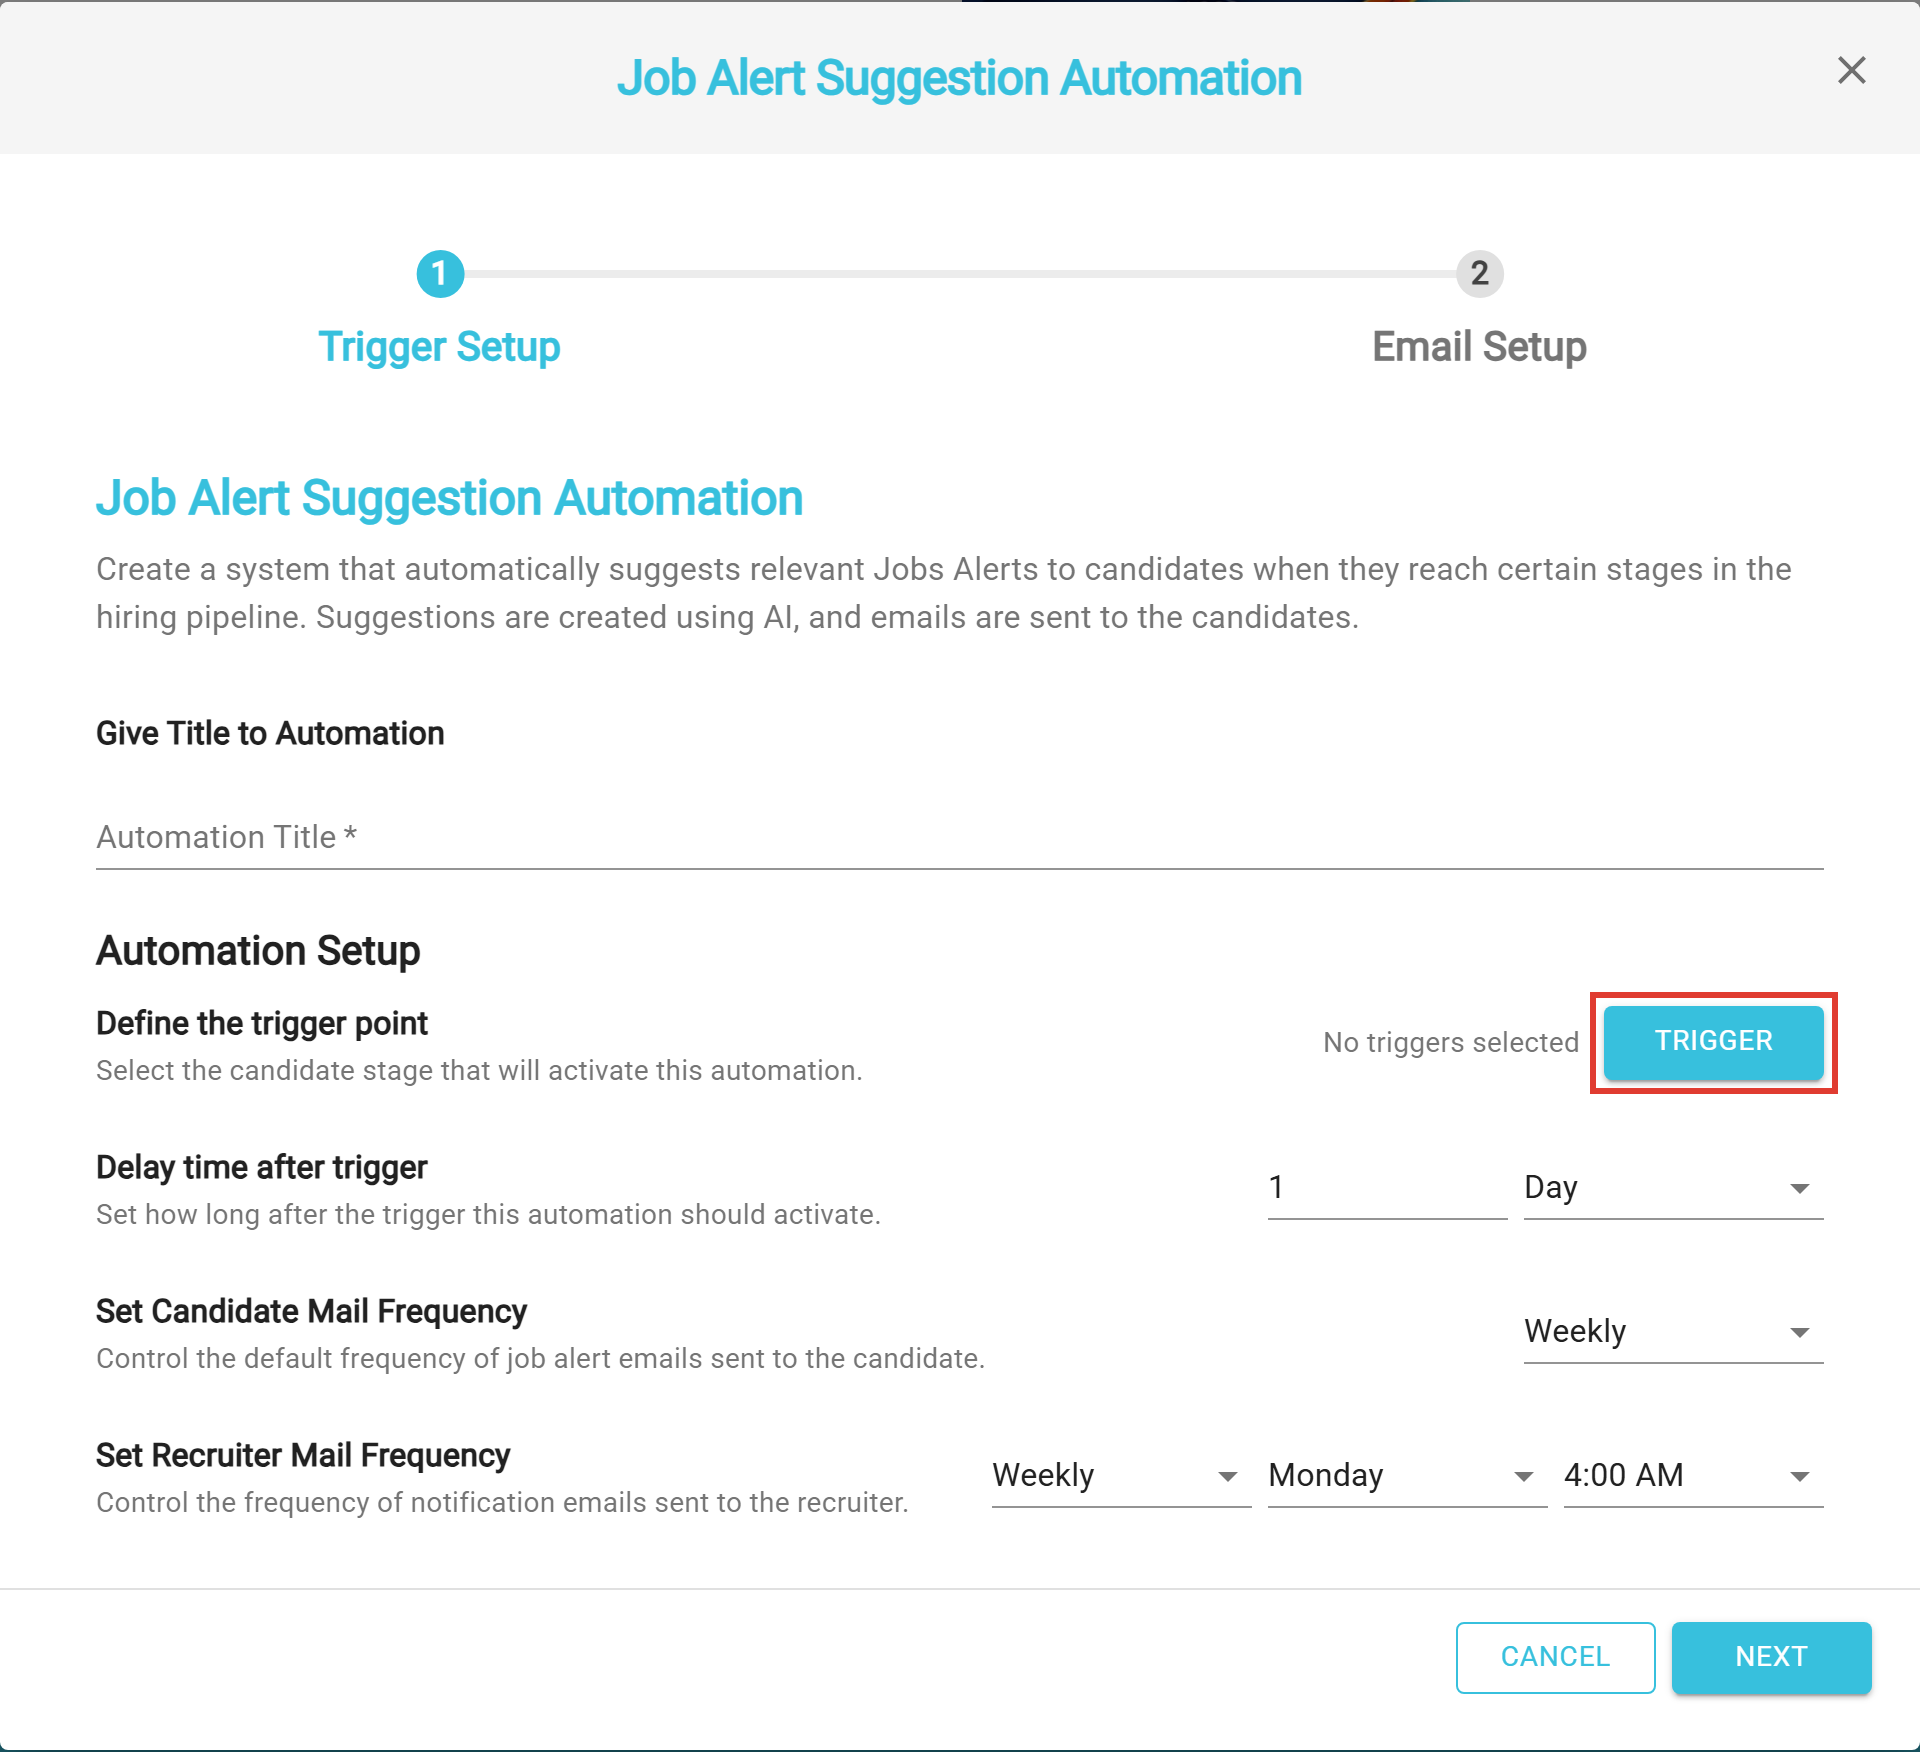
On Trigger Setup you set:
- Automation Title: a name so you can recognise the rule later.
- The trigger point: click TRIGGER and tick the candidate status (or statuses) that should create a suggestion. These come from your ATS application statuses, for example unsuccessful, shortlisted, offered or placed, and you can choose more than one.
- Delay time after trigger: how long to wait before the suggestion is created, in minutes, hours, days or weeks.
- Candidate mail frequency: how often the alert is sent to the candidate once approved (daily, weekly or monthly), and a separate recruiter mail frequency for how often you are notified.
On Email Setup you tell the AI how to write the email: add an AI Custom Prompt to steer the wording, or supply an Example Message to follow. The email handling method is set to Require manual approval, so nothing is ever sent until you approve it. Save the rule when you are done.
Back on the list, each rule shows its title, trigger, delay and frequency, and a Status of Active or Inactive. From the row you can pause or activate a rule, and edit, clone or delete it, so you can turn one off without losing it.
Step 2: Review and approve suggestions
When a rule fires, the draft alert appears under "Tools > AutoSuggest AI Suggestions". Each suggestion shows the candidate, what triggered it, and a preview of the message.
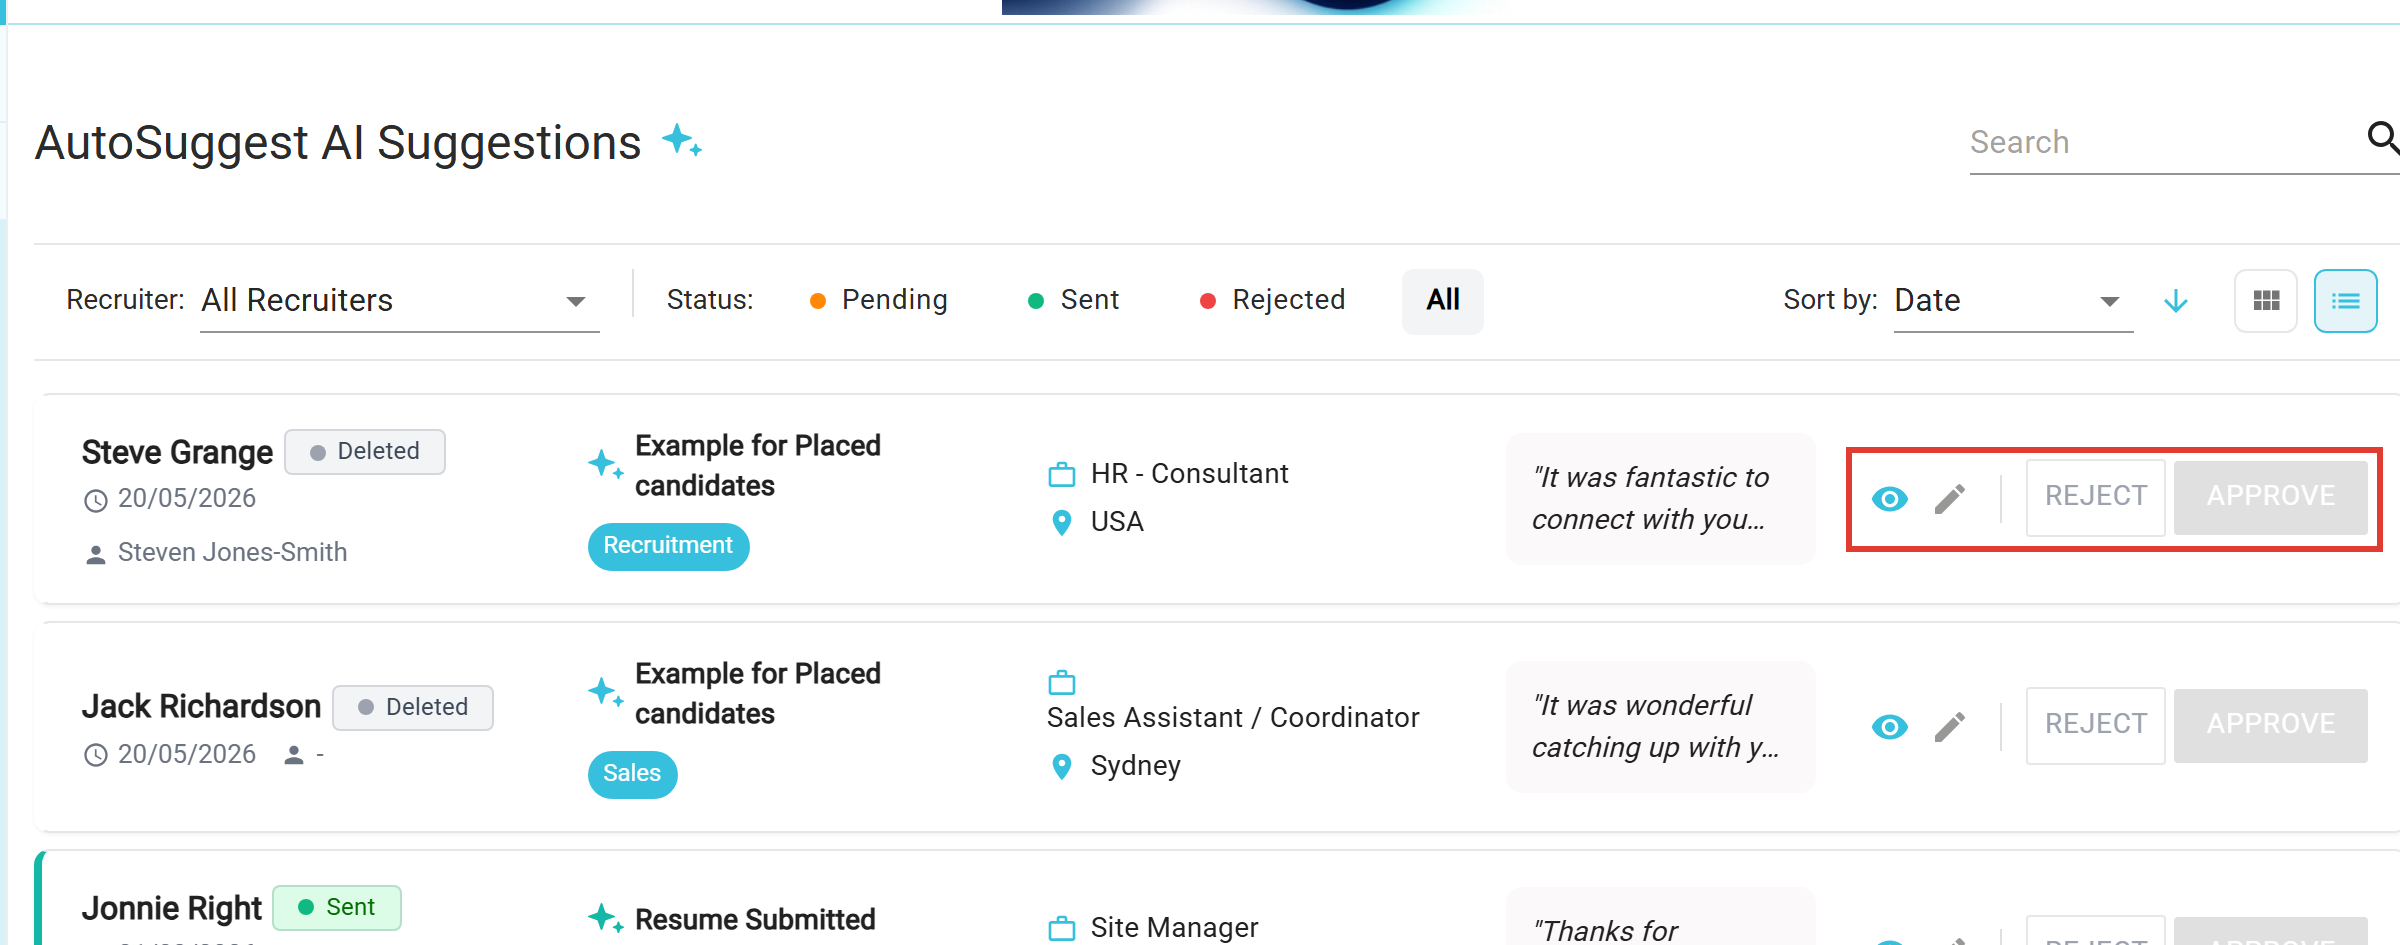
Read the suggestion, then choose Approve to send it or Reject to discard it. The eye icon previews the full email, and the pencil icon lets you edit the message before you send. Use the filters at the top to view suggestions by recruiter or by status (Pending, Sent or Rejected), and sort the queue to work through it quickly.
Idea: Nothing is sent until you approve it, so check the suggestions regularly. A quick edit before approving is the easiest way to add a personal touch.Done: With a rule active and your suggestions reviewed, candidates automatically receive relevant job alerts at the right moment, with you approving each one before it goes out.How AutoSuggest AI rewards you
AutoSuggest AI quietly rewards the recruiters who keep their pipeline up to date. The suggestions are triggered by your candidates moving through their application statuses, so the simple habit of progressing candidates in your ATS does double duty: it keeps your records accurate, and it powers a steady stream of candidate marketing on your behalf. The more diligently you work your pipeline, the more the system works for you.
It also counts towards your achievement badges. Progressing candidates builds your candidate progression achievements, and every job alert suggestion you approve builds your Recruiter Generated Job Alerts badge, climbing from Tin through Bronze, Silver, Gold and Platinum. So staying on top of your candidates earns recognition on the leaderboard, not just results. For how badges and points work, see Achievement Badges: what are they for and how do they help ↗.
Final Notes
Start with one or two rules around the moments that matter most, such as a candidate being unsuccessful or placed, and review the suggestions before approving. Once you trust the output, you can add more rules to cover the rest of your pipeline.
Other articles you might be interested in: AI-Enabled Job Alerts | How to create a Job Alert Suggestion Template
Was this article helpful?
That’s Great!
Thank you for your feedback
Sorry! We couldn't be helpful
Thank you for your feedback
Feedback sent
We appreciate your effort and will try to fix the article