This guide explains how to use FormFlow, Refari's custom form builder. You will learn where to find it, how to build a form by hand or by describing it to Refari AI, how to decide who a form is for, how to share it, and how to work through the responses that come back, including approving them, writing the answers into your ATS and filing uploaded documents onto the candidate.
Idea: FormFlow was in beta with a limited group of companies. It is now switched on for everyone, so if you looked for it before and did not have it, it is on your account now.What FormFlow is
FormFlow lets you build your own forms for anything your team keeps chasing by email: onboarding details after somebody signs, a compliance check, a reference request, an availability check-in, an intake survey, or a registration form for an event. You choose the questions, how they are grouped across pages, who the form is for, and what happens to the answers when it is submitted.
Questions come from your question bank, the shared library your company manages under Tools > Question Config. A question you write for one form is saved to the bank, so the next form reuses it rather than creating a near-duplicate that splits your reporting.
Note: FormFlow is separate from your job application, registration and referral forms. Those are built into your job board and follow their own rules, and they are covered in their own article. FormFlow is for everything else.Where to find it
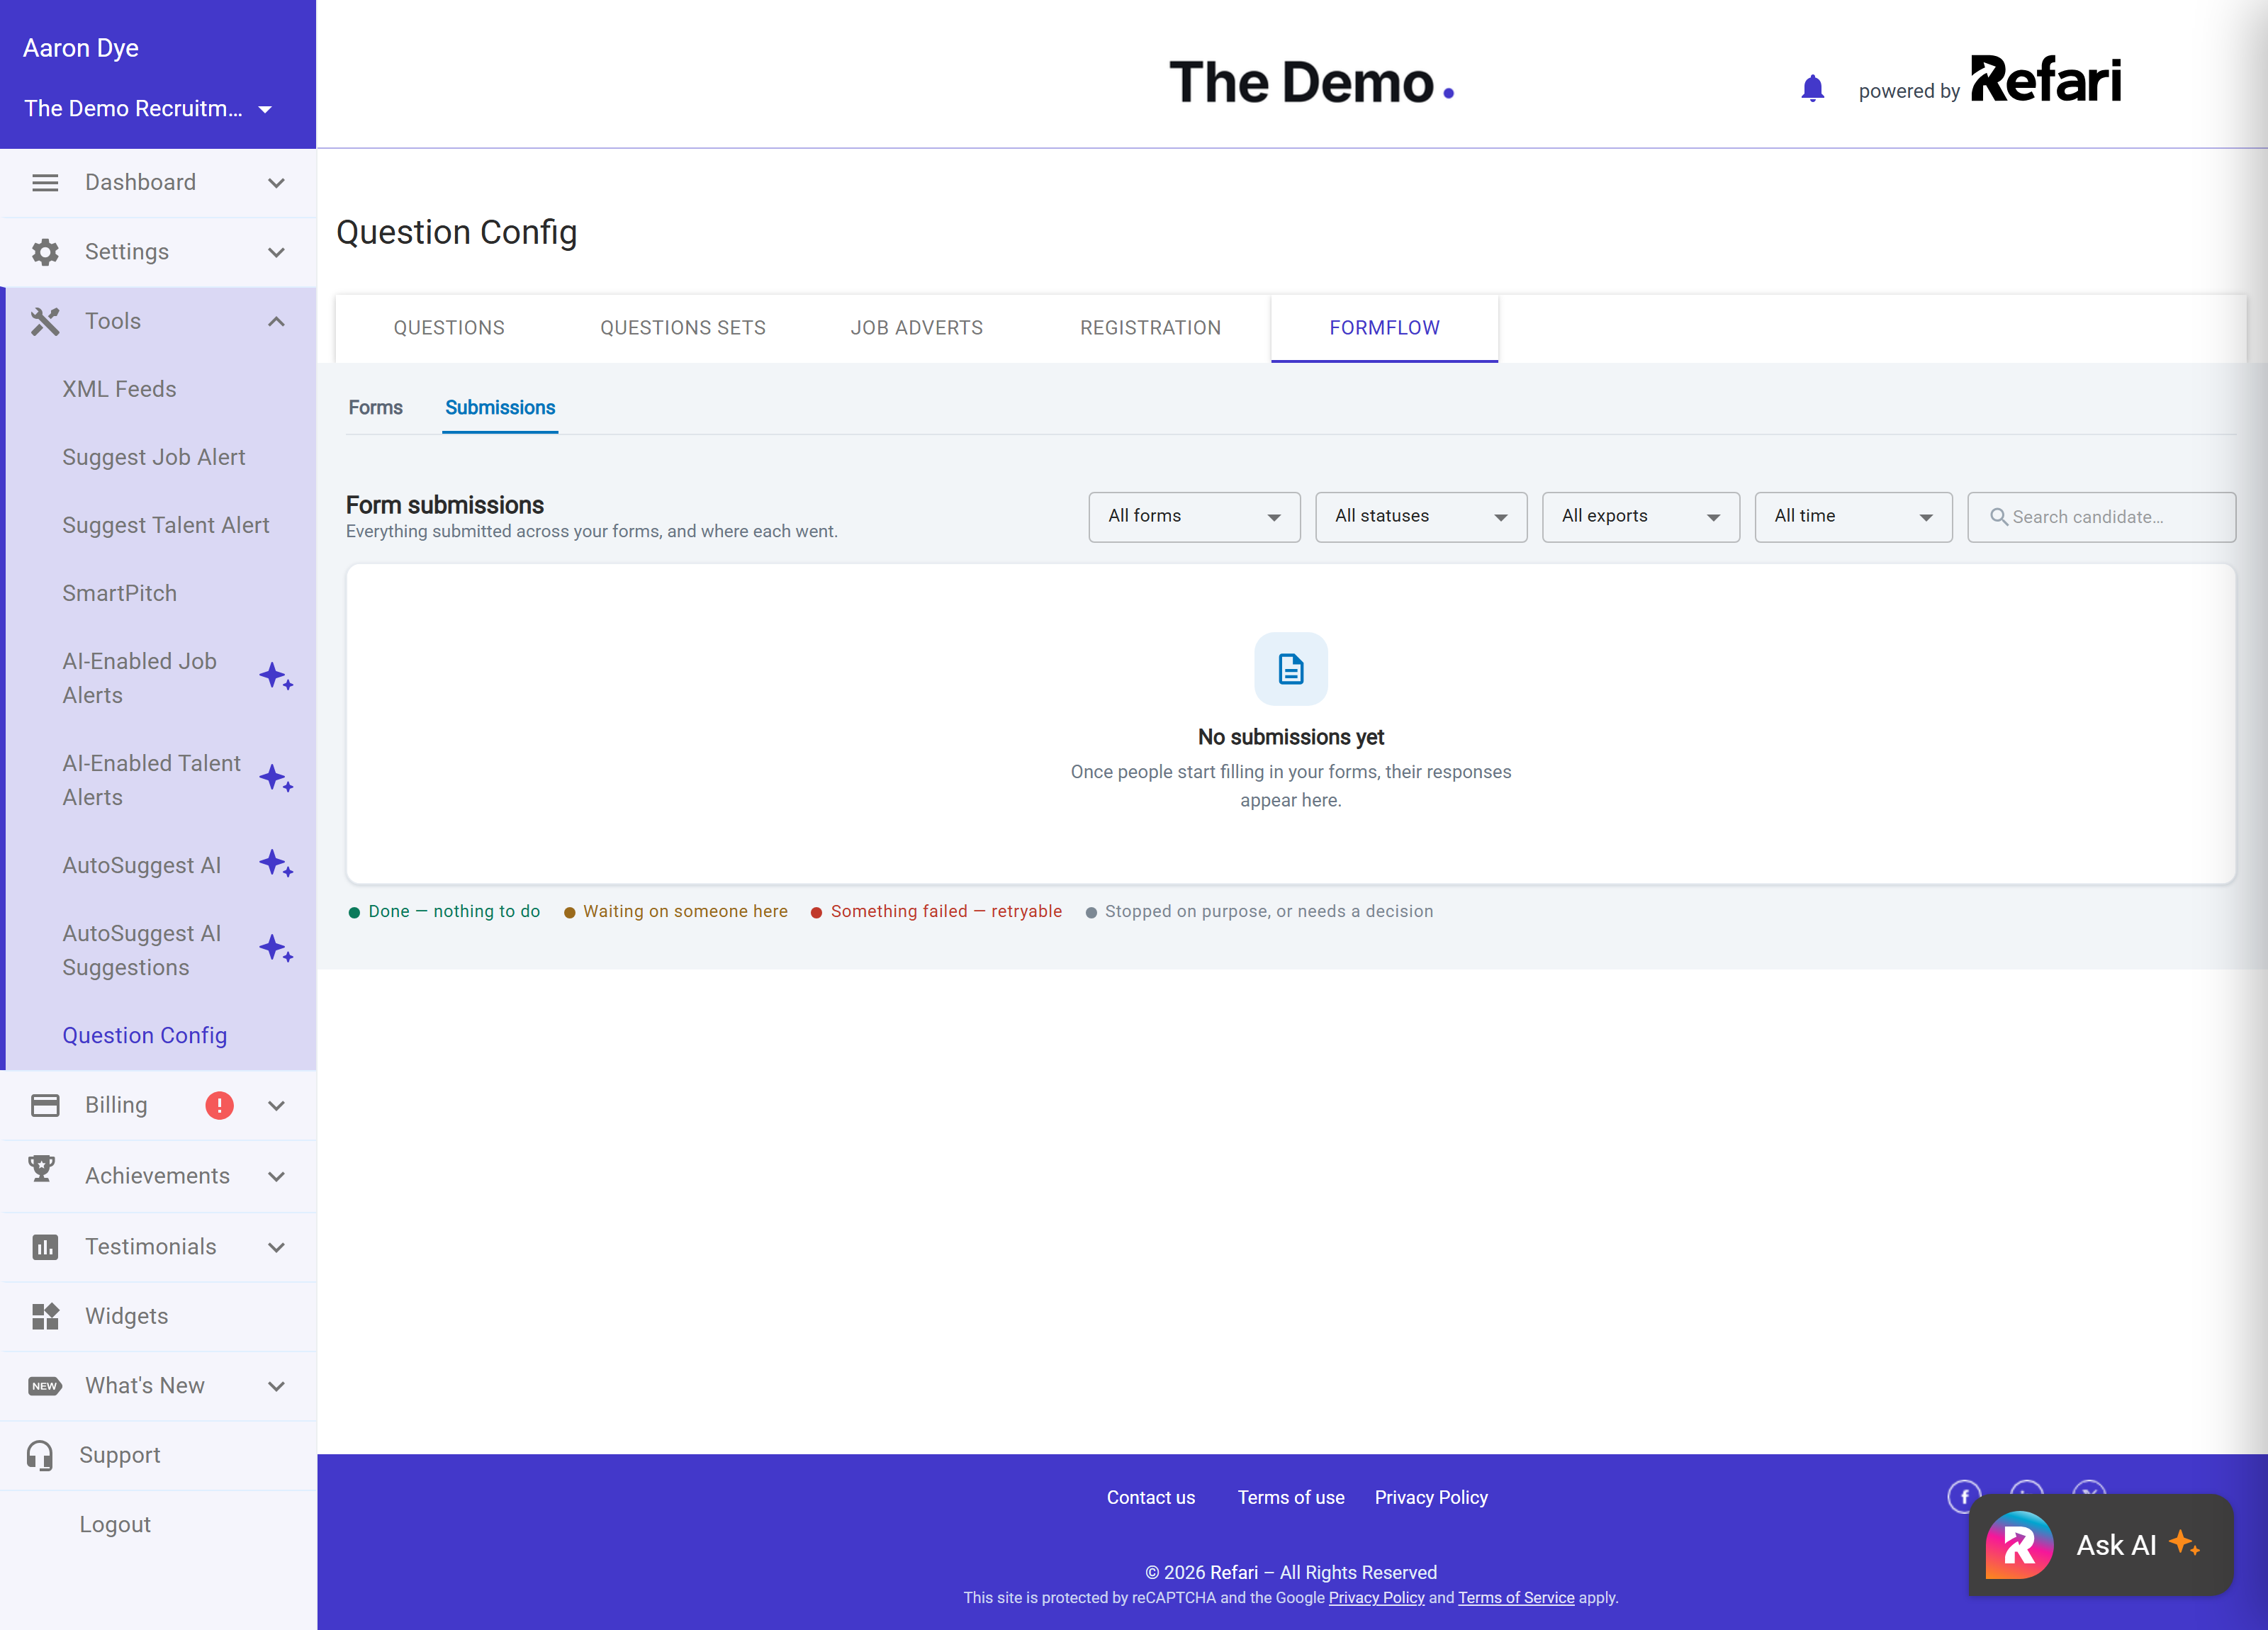
Go to Tools > Question Config and open the FormFlow tab. It has two views: Forms, where you build and share them, and Submissions, where the responses arrive.
The Forms list shows each form with its status, how many questions and pages it has, and how many submissions it has received. Under each name is a short line summarising how that form behaves, for example "Keep in Refari · open link" or "Review before ATS push · you choose who it is for". Those two halves are the decisions explained further down: what happens to the answers, and who the form is for.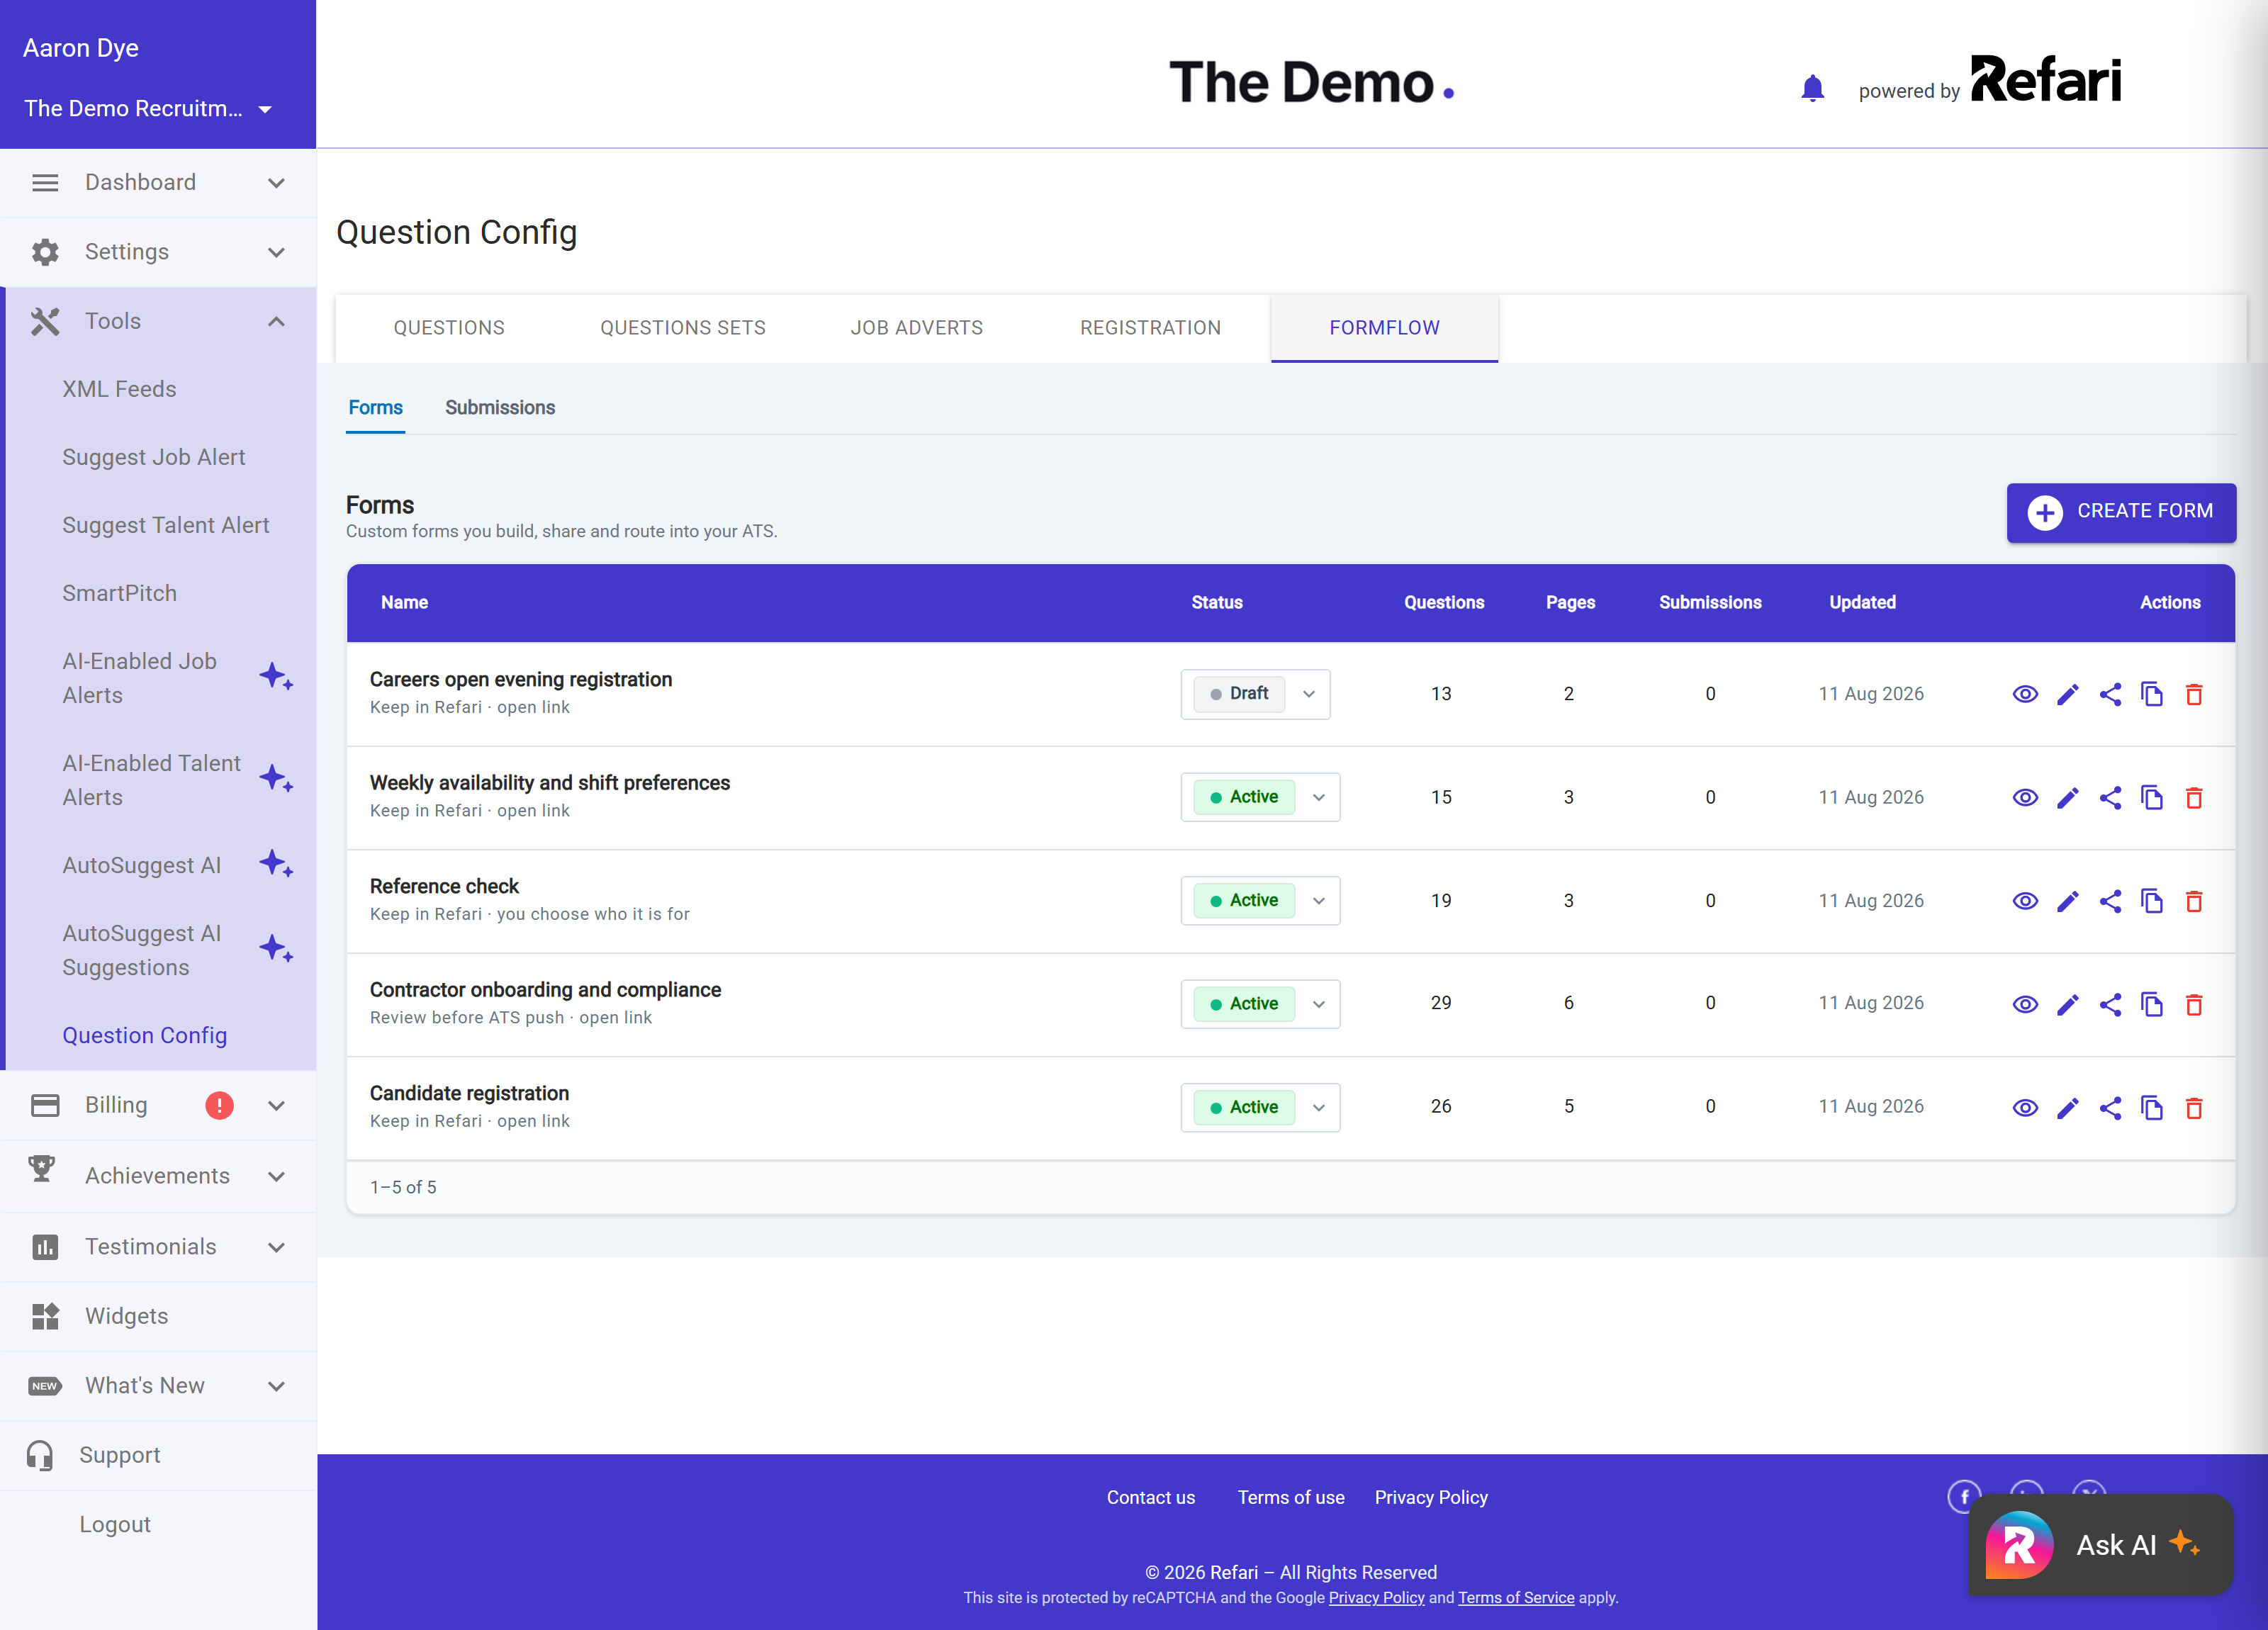
Creating a form
- Click Create form and give it a name and a short description. The description appears at the top of the form, so use it to tell the person filling it in what it is for and roughly how long it will take.
- Add your questions. Pick existing ones from your question bank or write new ones as you go, then drag them into the order you want.
- Group them across pages if the form is long. A page is just a group of questions with a heading, and it keeps a thirty-question pack from landing as one intimidating wall.
- Mark anything the form should not be submittable without as Required.
- Set a thank you message, shown after a successful submission, and add the email addresses that should be told each time a response arrives.
- When you are ready, switch the status from Draft to Active. Only active forms accept submissions.
Idea: Every new form starts with first name, last name and email already on it, and already pointed at the right places on the candidate record. You do not have to add them, and you should not remove them: they are how a response finds the right person.Question types you can use
| Question type | What the person filling in the form sees |
|---|---|
| Text | A free-text box, with a character limit you control. |
| List | A set of options you define. Turn on multi-select to let people tick more than one. |
| Searchable dropdown | A single-choice menu people can type into, best when there are many options such as a country or a city. |
| Numeric | A whole-number field, for years of experience or a notice period in weeks. |
| Date | A date picker, for example the earliest date somebody can start. |
| Phone | A phone number field. |
| File | A file upload, for CVs, certificates or supporting documents. |
| Heading | Not a question: a heading you place between questions to break a long form into readable sections. |
Pages and the progress indicator
A long form is far more likely to be finished if it arrives in chunks. Split yours into pages and Refari shows the person how far through they are: as labelled steps, a filling bar, a percentage, or plain page numbers, whichever you choose. Left alone, the indicator appears automatically once a form is long enough to be worth pacing, and stays out of the way on short ones.
Asking a question only when it matters
A compliance form asks "Do you hold a current Working With Children Check?", and then asks everyone for the card number, the expiry date and a photo of it, including the people who have just answered No. So those follow-ups could never be made compulsory, and the document you actually needed stayed optional for the people who had one.
A question can be shown only when an earlier answer matches.
Setting one up
- Open the form in Question Config, FormFlow.
- On the follow-up question, choose Show only when... from its menu.
- Pick the earlier question, and the answer that should reveal it.
The question then carries an amber note, Shown if ... is ..., so the rule is visible while you build rather than hidden in a settings panel. Choose Edit condition... to change it, or remove the condition to show the question to everyone again.
What your candidate sees
- Someone who answers No never sees the follow-ups, and submits a shorter form.
- Someone who answers Yes gets them, and because only the right people are asked, you can now mark those questions required.
- An answer to a question that was not shown is thrown away completely. It is not stored, not attached to the candidate, not emailed, and not sent to your ATS.
What you can build a rule on
- The question you point at must be a list or drop-down question, and it must sit earlier in the form than the question you are hiding.
- A rule matches one chosen answer.
- Headings and the candidate identity questions cannot carry a rule.
- If a rule is ever broken, by deleting or moving the question it depends on, the follow-up is simply shown to everyone. On a compliance form, one question too many is safer than a missing document.
Building a form by describing it
You do not have to assemble a form field by field. Describe what you need in plain English and Refari AI drafts it with you, live, as you chat. It is the fastest way to get a long pack such as contractor onboarding off the ground.
- It writes questions with the right type for what you asked for, so "the earliest date they can start" becomes a date picker rather than a text box.
- It searches your question bank first and reuses what is already there, instead of inventing a second version of a question you have asked for years.
- It groups questions into pages, reorders them and adjusts the form's settings on request.
- It drafts the wording of the emails the form sends.
Nothing is published behind your back. You review the draft in the builder and change anything you want before the form goes anywhere.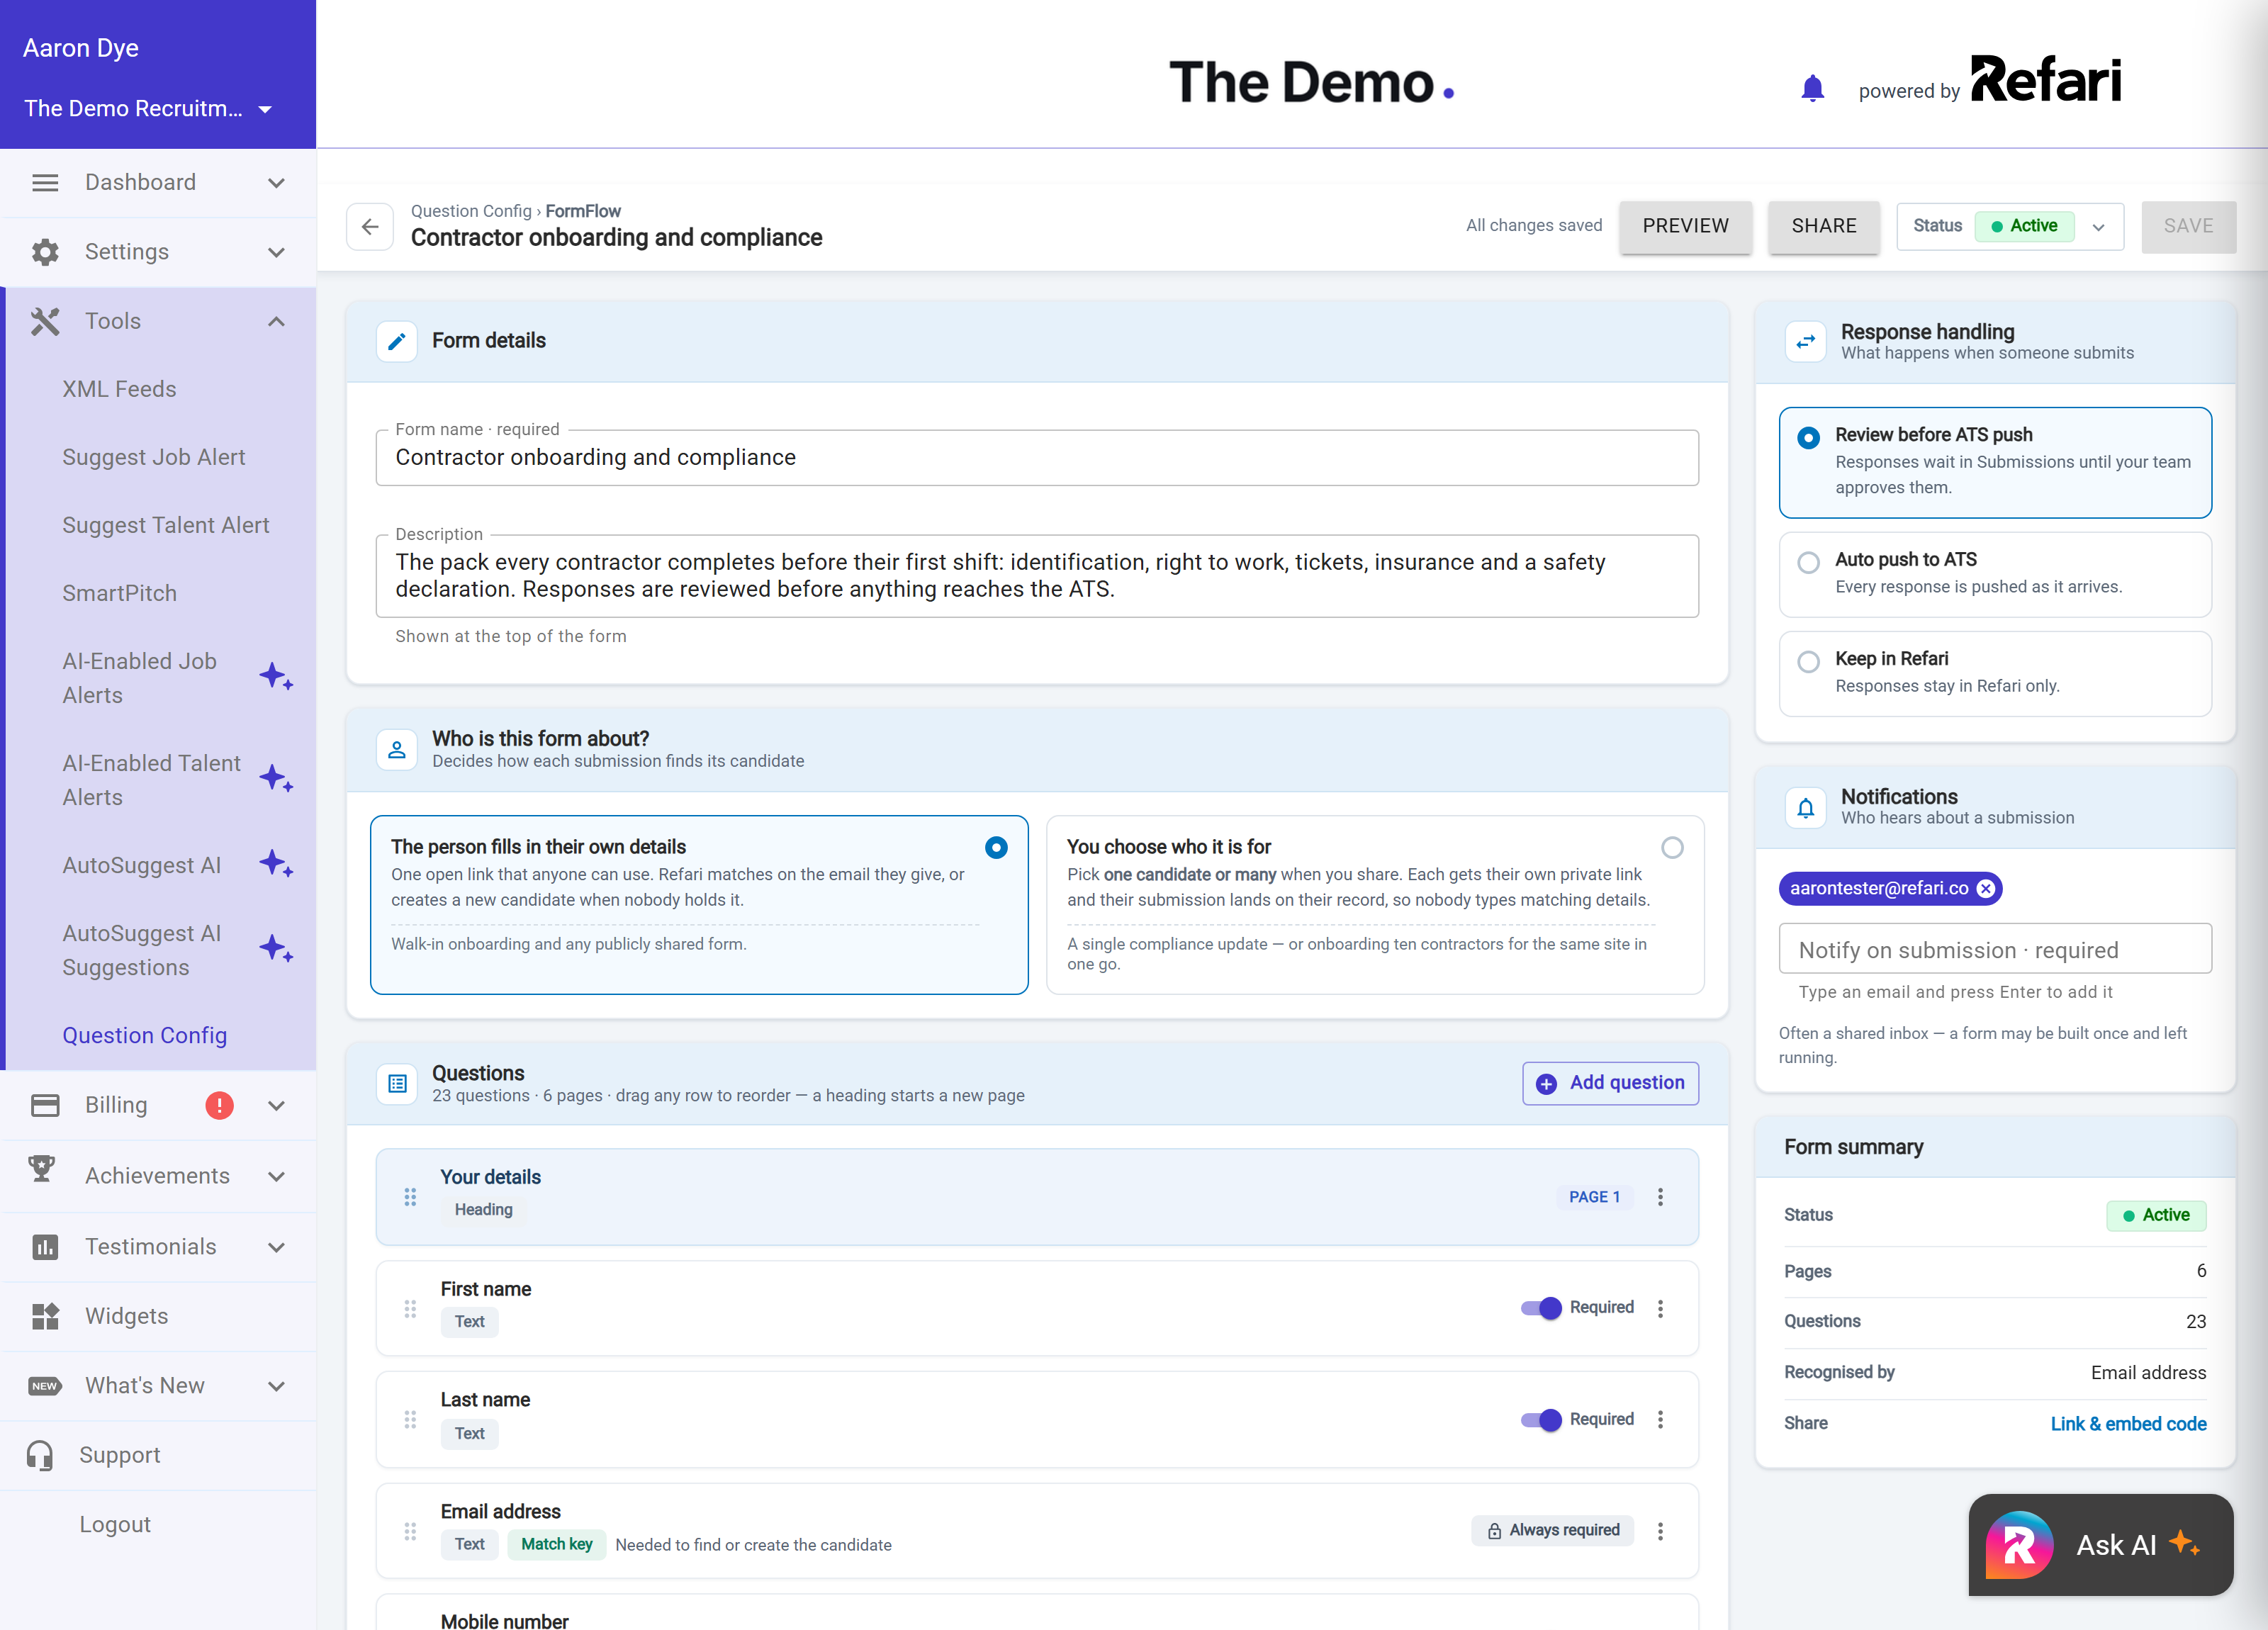 >
>
Idea: Paste the whole brief in one go rather than asking for questions one at a time. Something like "a form for contractors returning from leave: name, phone, the earliest date they can start, their updated CV and their current certifications" lays out the entire form, and you tidy it from there.Who the form is about
In the builder this is Who is this form about?, and it decides how each submission finds its candidate. It is also the second half of the line under each form name in the list.
An open link, where people identify themselves
The default. Anybody with the link can fill the form in, and they tell you who they are as they do it, through the name and email questions every form starts with. This is what you want for a registration form, an availability check-in, or anything you are sending to a list.
A personal link, where you choose who it is for
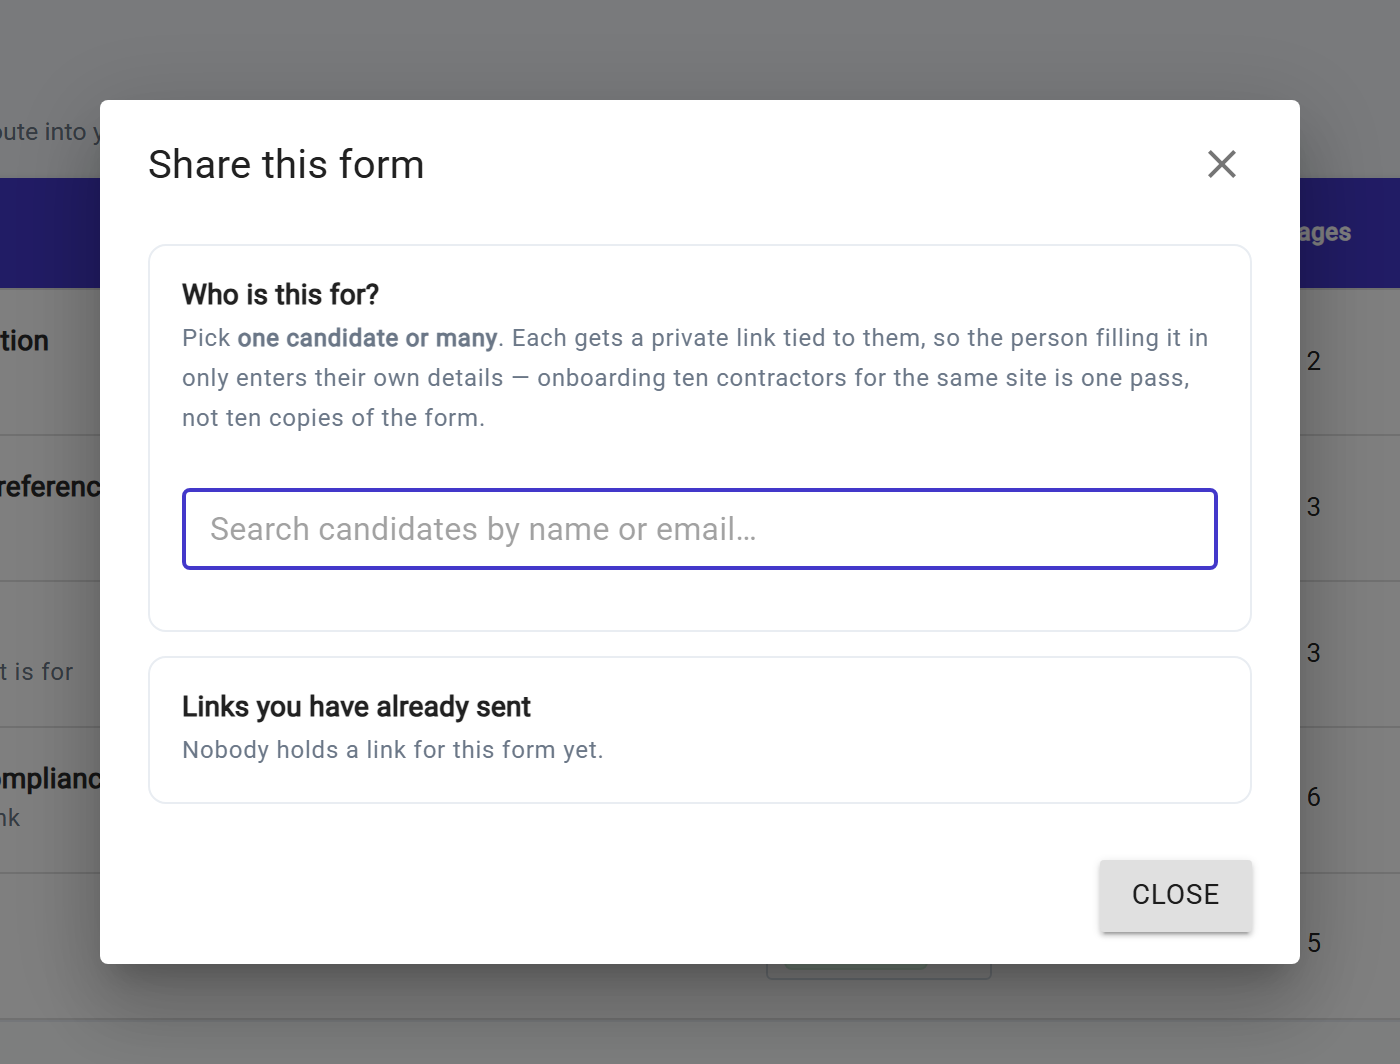
Here you pick the candidate first, and Refari issues a link that belongs to that person alone. The response attaches to their record automatically, so whoever fills it in never has to type the candidate's details to be matched up correctly.
You can issue links to one person or to many at once, which is what makes this practical at scale: onboarding ten contractors for the same site is one pass, not ten copies of the form.
It also covers the case where somebody other than the candidate fills the form in. A reference check is answered by the referee, and asking a referee to type the candidate's email exactly as you hold it is how references end up attached to nobody. With a personal link they simply answer the questions.
Each personal link you issue is listed with a state, so you can see at a glance who still needs chasing.
| State | What it means |
|---|---|
| Active | Sent and still waiting. This is the one to chase. |
| Used | Answered. The link is spent and will not open again, so it cannot be forwarded and filled in a second time. |
| Expired | It aged out on its own. Links do not stay live for ever in an old email, so issue a fresh one if you still need the answers. |
| Revoked | You killed it deliberately, which is what to do the moment you learn a link has been forwarded or has gone astray. |
Note: Treat a personal link like a password while it is live. Anyone holding it can answer as that candidate's referee, so send it to one person and revoke it if it goes further. If you genuinely want more than one answer through the same link, there is a setting to allow repeat responses, which turns off the single-use behaviour.Sharing your form
As a standalone page
Every form has its own page hosted by Refari. Anyone with the link can open and submit it, and it arrives on a clean, branded page with nothing else around it. No website changes are needed, which makes this the right choice when you just need answers from somebody today.
The same panel gives you a QR code for that link. Save it and drop it onto a poster, an induction pack or a stand at an event, and it scans straight to the form on a phone.
Embedded on your website
Copy the embed code and paste it into any page on your site, the same way as any other Refari widget. The form renders in place and picks up the styling around it. If somebody else looks after your website, the snippet is self-contained: email it to them and they can drop it straight in.
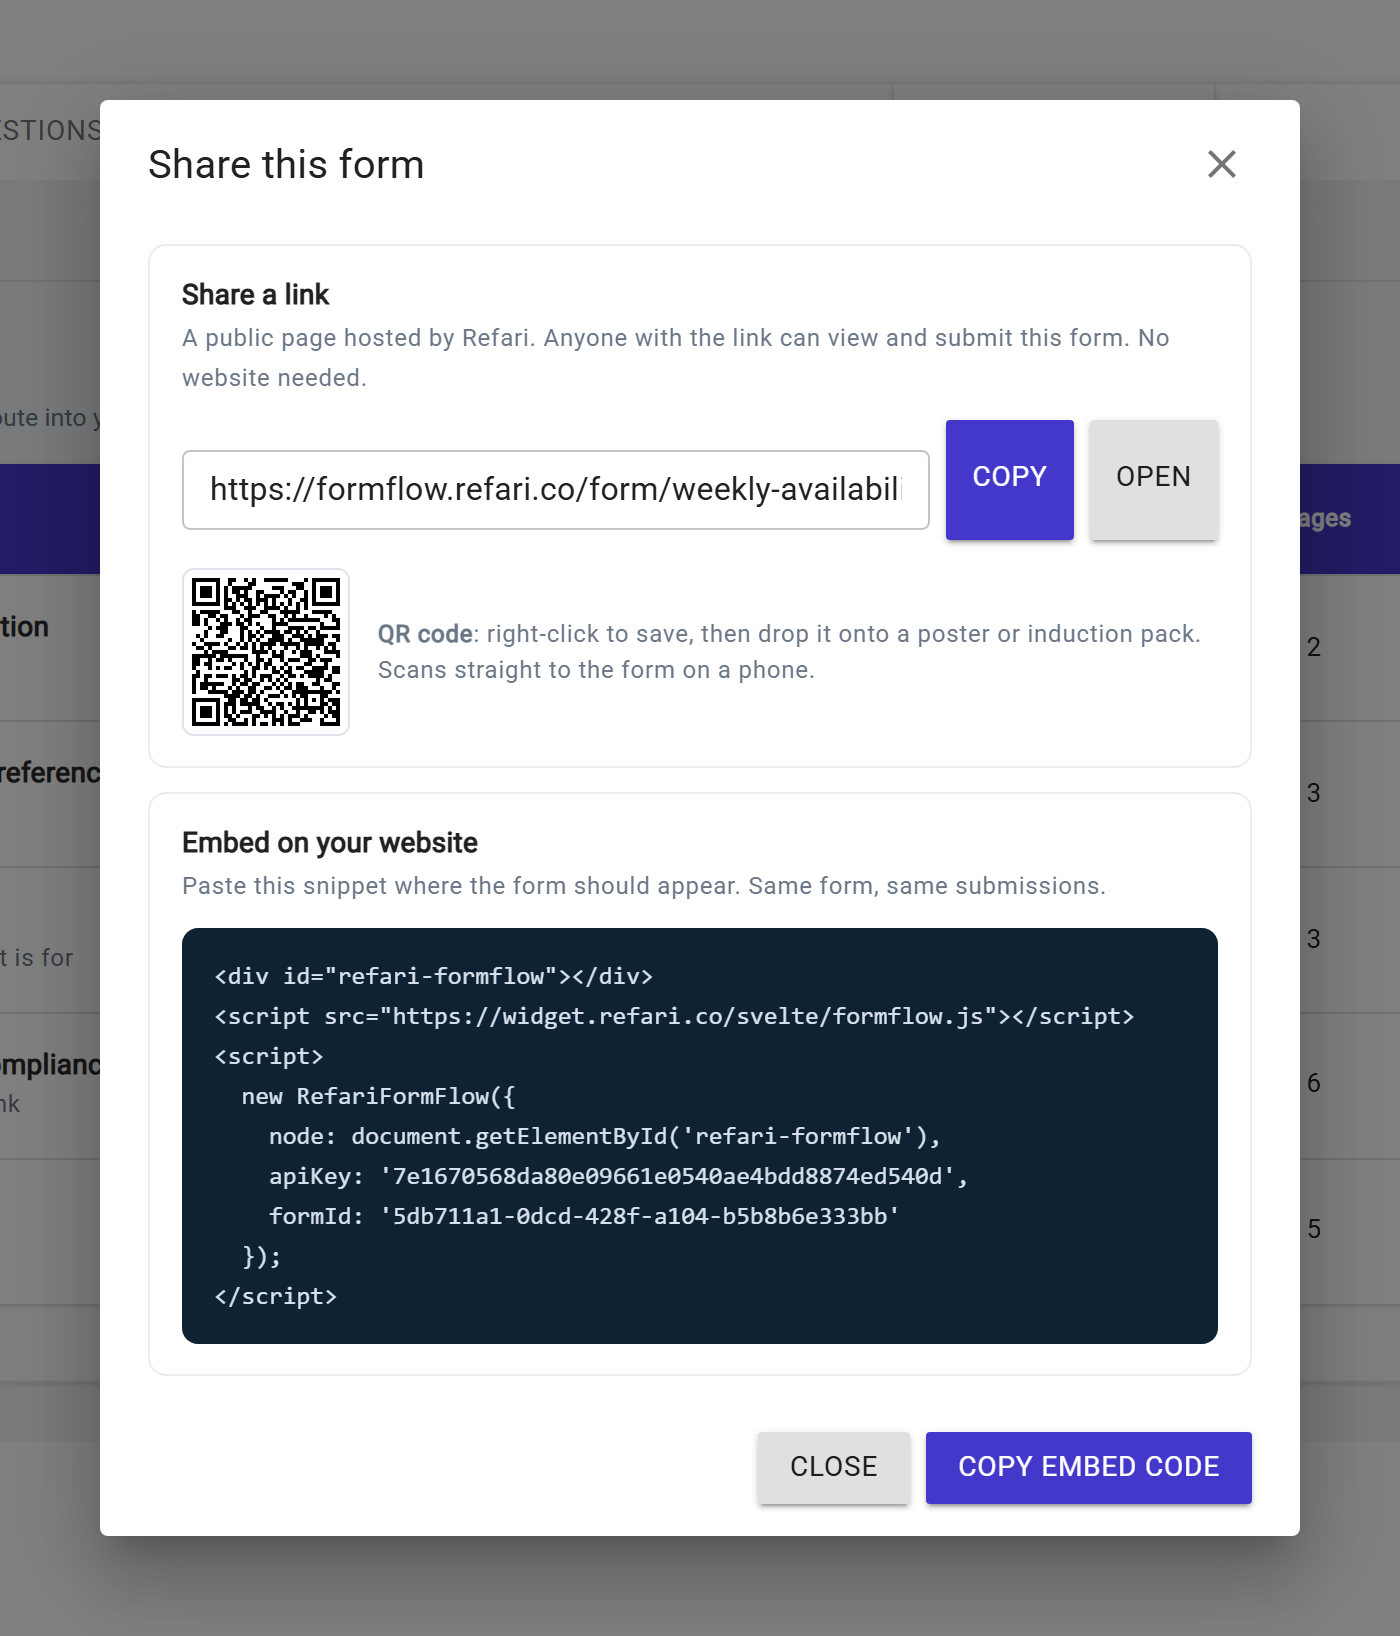
Those two options are what Share offers on a form anyone can fill in. On a form where you choose who it is for, Share does a different job: it is where you pick the candidates and issue their private links, and where you see the ones you have already sent.
Success: Open the standalone link in a private browser window and you will see the form exactly as your respondents do. Send yourself a test answer: it should appear under Submissions within moments, and reach the notification addresses you set.Working through submissions
Responses land in the Submissions view alongside Forms, which is the point: a form is somewhere you work rather than somewhere answers pile up. Open one to read every answer in full, page by page as the respondent saw them. If you added notification addresses, those inboxes also get a summary of each new response.
When a submission attaches to a candidate, Refari also writes a note on that candidate summarising what came in, so the next person to open the record sees it without going looking for the form.
Approving before anything reaches your ATS
You will not always want a raw response written straight into your system of record. Turn on Require approval and each submission waits until somebody approves or rejects it. That is the "Review before ATS push" you see under a form's name in the list. Approving can be done in the dashboard or straight from a link in the email, whichever suits how your team works.
Writing answers into your ATS
Note: Writing answers into an ATS currently requires a JobAdder connection. If your ATS is reached another way, everything else here still applies: you can build forms, share them, and read and approve responses in Refari. The export step simply does not run, so work from the submission itself rather than expecting the answers to appear in your ATS.Any question can be mapped to a real field on the candidate record in your ATS. Turn on auto export and approved answers are written into those fields, so nobody re-keys a form by hand.
Application fields are not available, because a form response is not tied to a particular job application, and the report below names that rather than failing quietly. Files are different: an upload can be filed onto the candidate in JobAdder, which is covered in the next section.
Each submission then carries a report of what actually happened, question by question rather than one all-or-nothing tick. Every field Refari tried to write is listed by name as Sent, Failed or Not sent, with the reason when something did not land. Documents are reported in the same list but in their own words, as Filed, Failed to file or Not filed, and the summary counts them separately, for example "2 fields written · 1 document filed". A field is written and a document is filed, so the two are never added together. That record stays accurate even if you later rename or remap the question.
Filing uploaded documents into JobAdder
Ask for a Working With Children Check, a licence or a police check on a form, and the file the candidate uploads can be filed straight onto their JobAdder record under the right document type. Nobody downloads it and attaches it again.
You need two things: a connected JobAdder account, and a question of type File on your form. If your ATS is reached another way, no document types are offered and your forms behave exactly as they do today.
- Open Tools > Question Config > FormFlow and open the form.
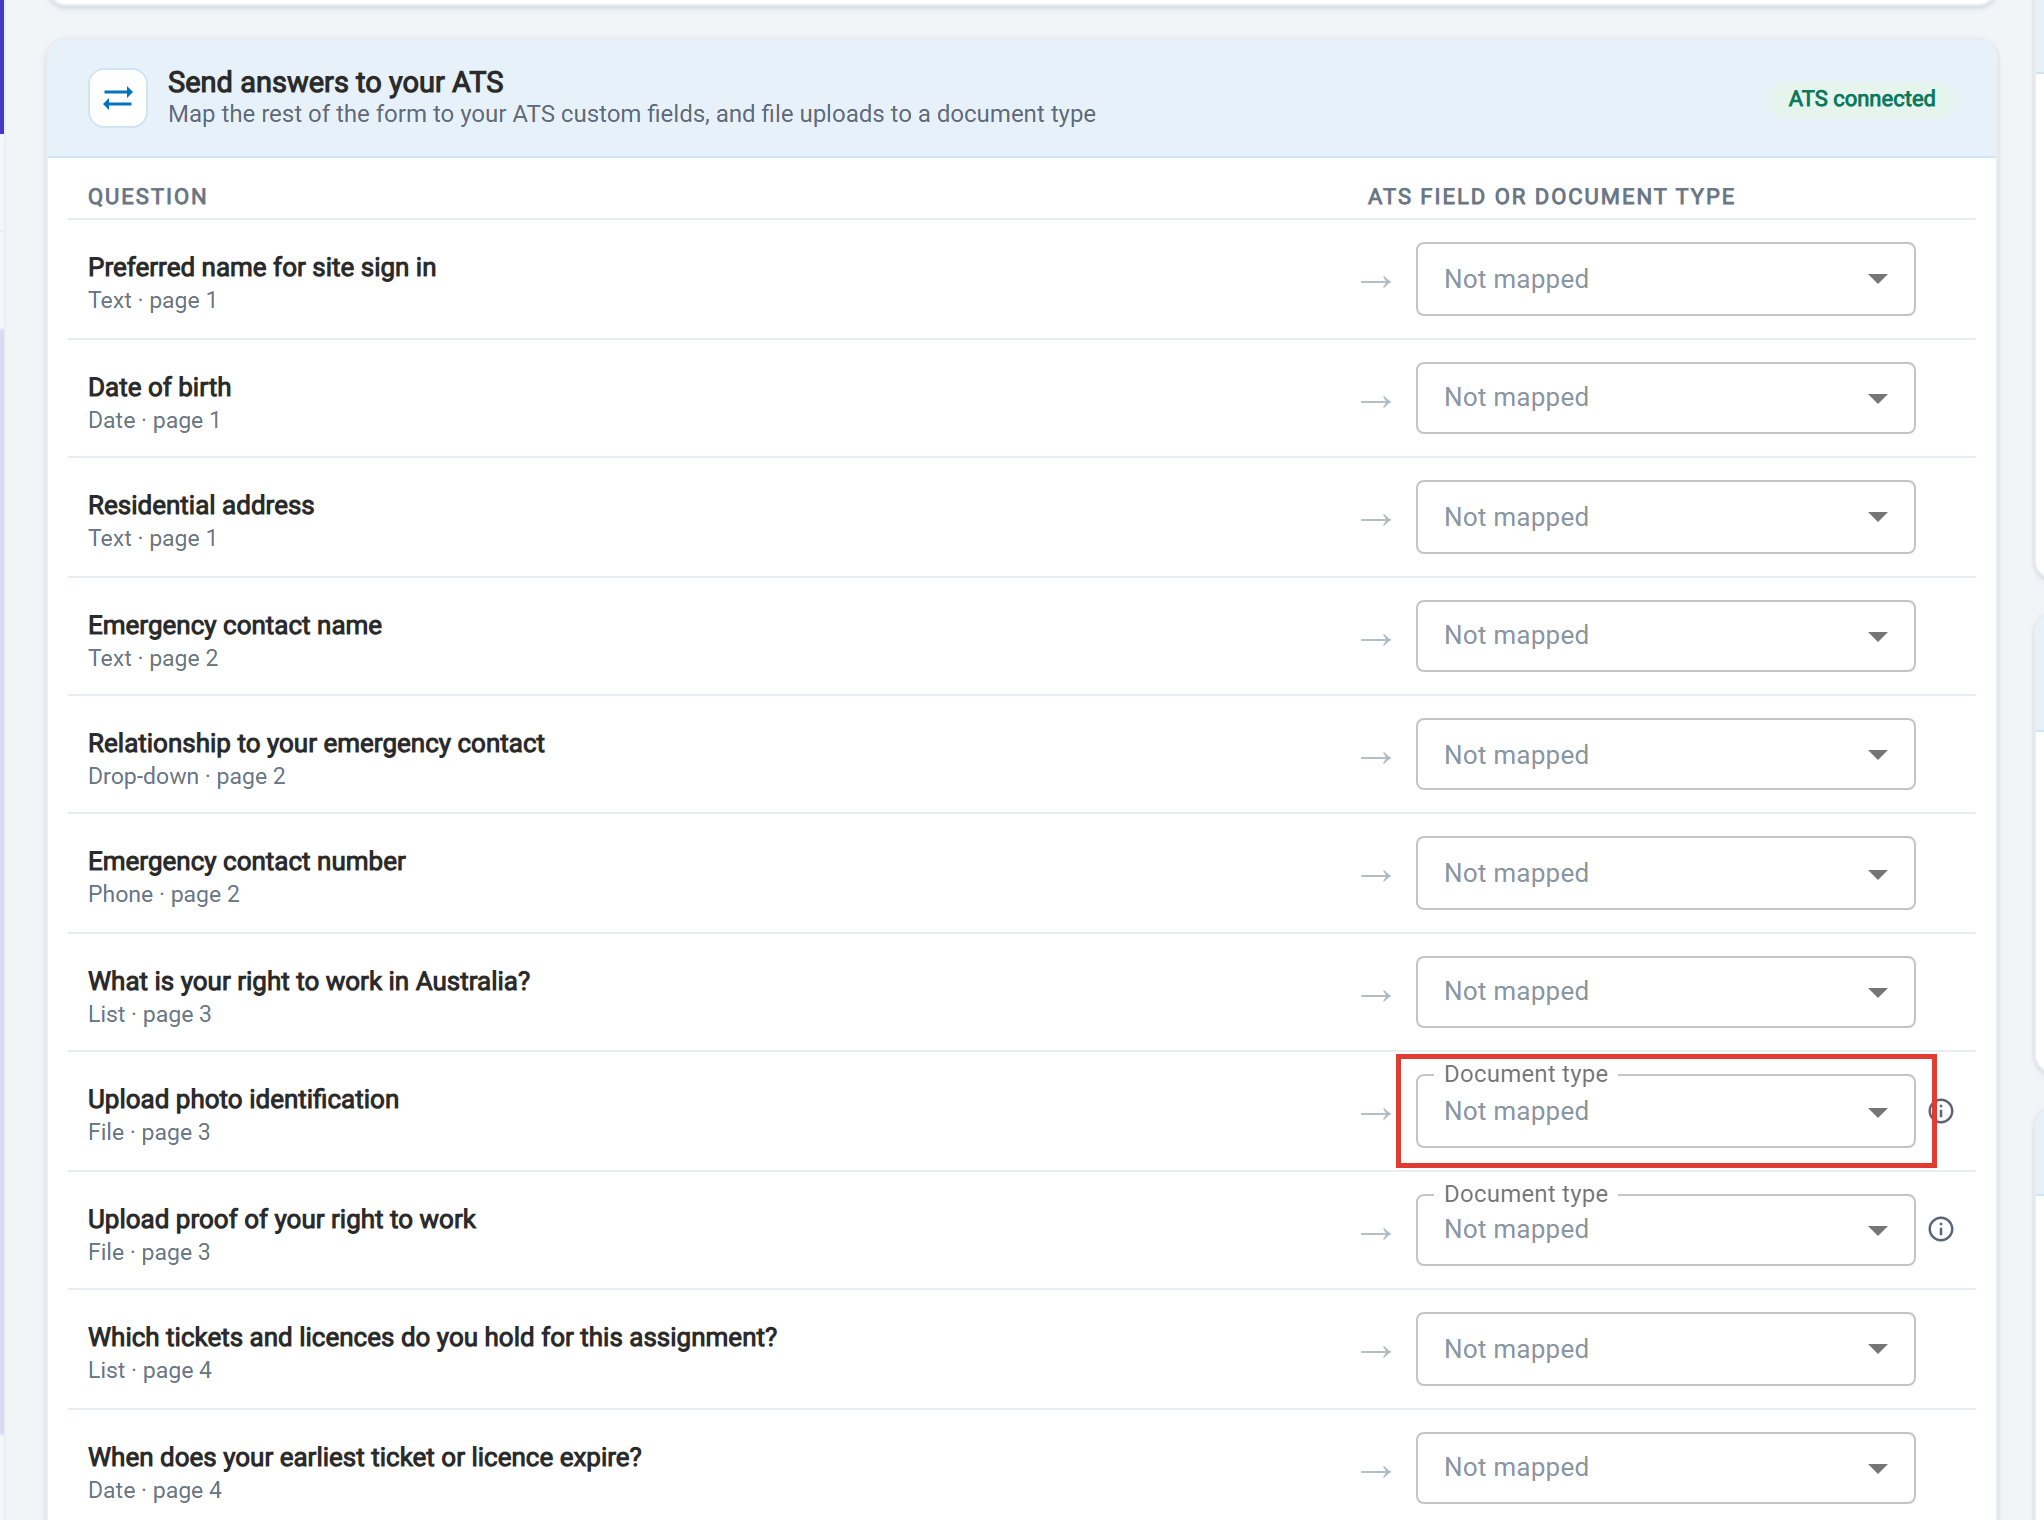
- Scroll to the mapping card, headed with your ATS name. It reads "Map the rest of the form to your ATS custom fields, and file uploads to a document type".
- Find your upload question. Where other questions have a field picker, an upload question has its own picker labelled Document type.
- Choose the type that matches what you are asking for, then save the form.
There are seven types, and they are JobAdder's own, so a document filed as a Check lands exactly where it would if you had attached it in JobAdder yourself.
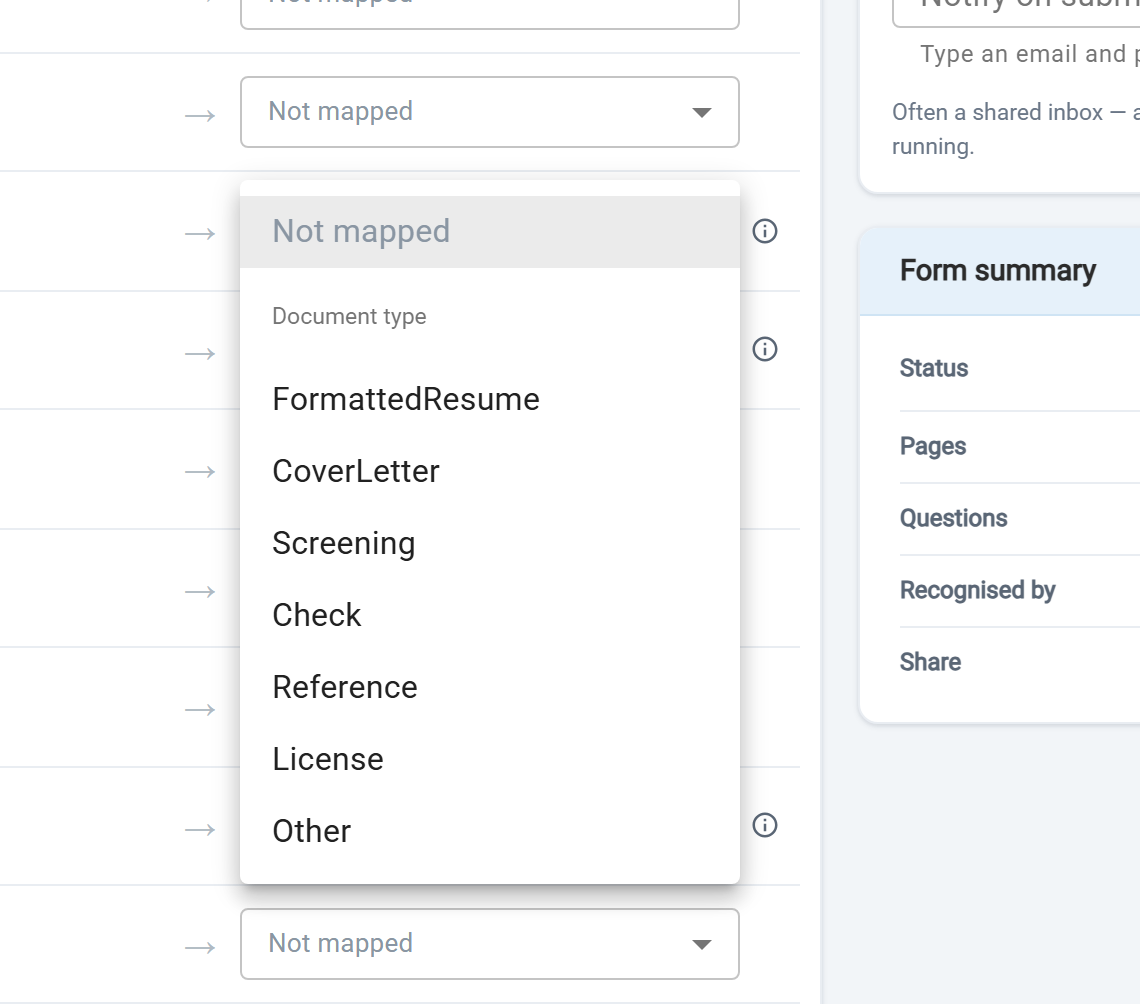
| Document type | Typically used for |
|---|---|
| Check | Police checks, Working With Children Checks and similar background checks. |
| License | Driving licences, forklift tickets and trade licences. JobAdder spells this one the American way. |
| Screening | Medicals, and drug and alcohol screening. |
| Reference | Reference documents. |
| FormattedResume | A CV. |
| CoverLetter | A cover letter. |
| Other | Anything that does not fit the list, such as a certificate of currency. |
The names are JobAdder's, and so is the choice of which to use: Refari does not read the file to check you picked the right one. Where a document goes in JobAdder is decided entirely by the type you choose here.
Note: Changing a document type later applies to new responses only. Documents already filed keep the type they were filed under, and moving them is done in JobAdder.Nothing changes for the person filling in the form. They upload their file as usual, and when the submission reaches Refari the file is filed against the candidate under the type you chose, alongside the answers that map to fields.
Forms you built before this change
Nothing was migrated, and no form starts sending documents on its own.
- An upload question created before this change stays Not mapped, and sends nothing until somebody chooses a document type.
- An upload question you add from now on starts as Other. Change it if another type fits better.
- If an upload question was pointed at a JobAdder field, the form now says "This upload is not being sent. Choose a document type." Pick a type, save, and it starts filing.
That last case is worth knowing about if a certificate has ever gone missing: pointing an upload at a field was never something JobAdder could accept, so the form looked correctly set up and the submission quietly reported that question as not sent.
If the picker says "Document types are not available right now", Refari could not read the list from your ATS at that moment. Your existing mappings are untouched; try again shortly.
What document filing does not do
- It does not track expiry dates, chase renewals or show compliance status. It files the document and stops there.
- It does not file documents into any ATS other than JobAdder.
- It does not change who can see or download the file in Refari.
Questions that were not asked
A submission from a form with conditions still reads as a complete record. Questions that were skipped are listed as Not shown, with the reason beside them, for example "only asked when Do you hold a current Working With Children Check? is Yes". The heading counts them too, so you will see something like "5 answers over 2 pages, 4 questions not shown".
Submissions made before conditions existed do not show these lines, because the rules were not there when the form was filled in.
Final Notes
Keep forms short and specific. Every extra question costs you completed responses, and because the question bank makes a second form cheap to build, it is nearly always better to run two focused forms than one catch-all. When a form has served its purpose, set it back to Draft: the link and the embed stop taking new answers, and everything already received stays exactly where it is.
Other articles you might be interested in: Refari Forms: application, registration and referral forms explained | Using Refari forms with JobAdder: what gets created and how
Was this article helpful?
That’s Great!
Thank you for your feedback
Sorry! We couldn't be helpful
Thank you for your feedback
Feedback sent
We appreciate your effort and will try to fix the article