This article explains how to add recruiter tags to a team member's profile, how to choose which tags appear on your Meet The Team widget, and how visitors use them to filter your team by speciality.
The Meet The Team widget is a great way of displaying your whole team alongside important information and contact details. Each team member can be clicked on to open their individual profile and the specific jobs they are working on. You can also let visitors filter the widget using recruiter tags, which are built from the specialities set on each profile. In the current dashboard the per-person field is labelled Specialities (Recruiter Tags), and the company-wide list of tags you can show on the widget is called Company User Tags; they are two halves of the same feature.
Add recruiter tags to a profile
Recruiter tags come from the Specialities (Recruiter Tags) field on a team member's profile. You can add them to your own profile, and if you are a Company Admin you can manage them across your whole team.
Idea: If you are a Company Admin you can log in and manage the profiles of every team member, rather than asking each person to add their own specialities. See How to edit your team members' profiles.
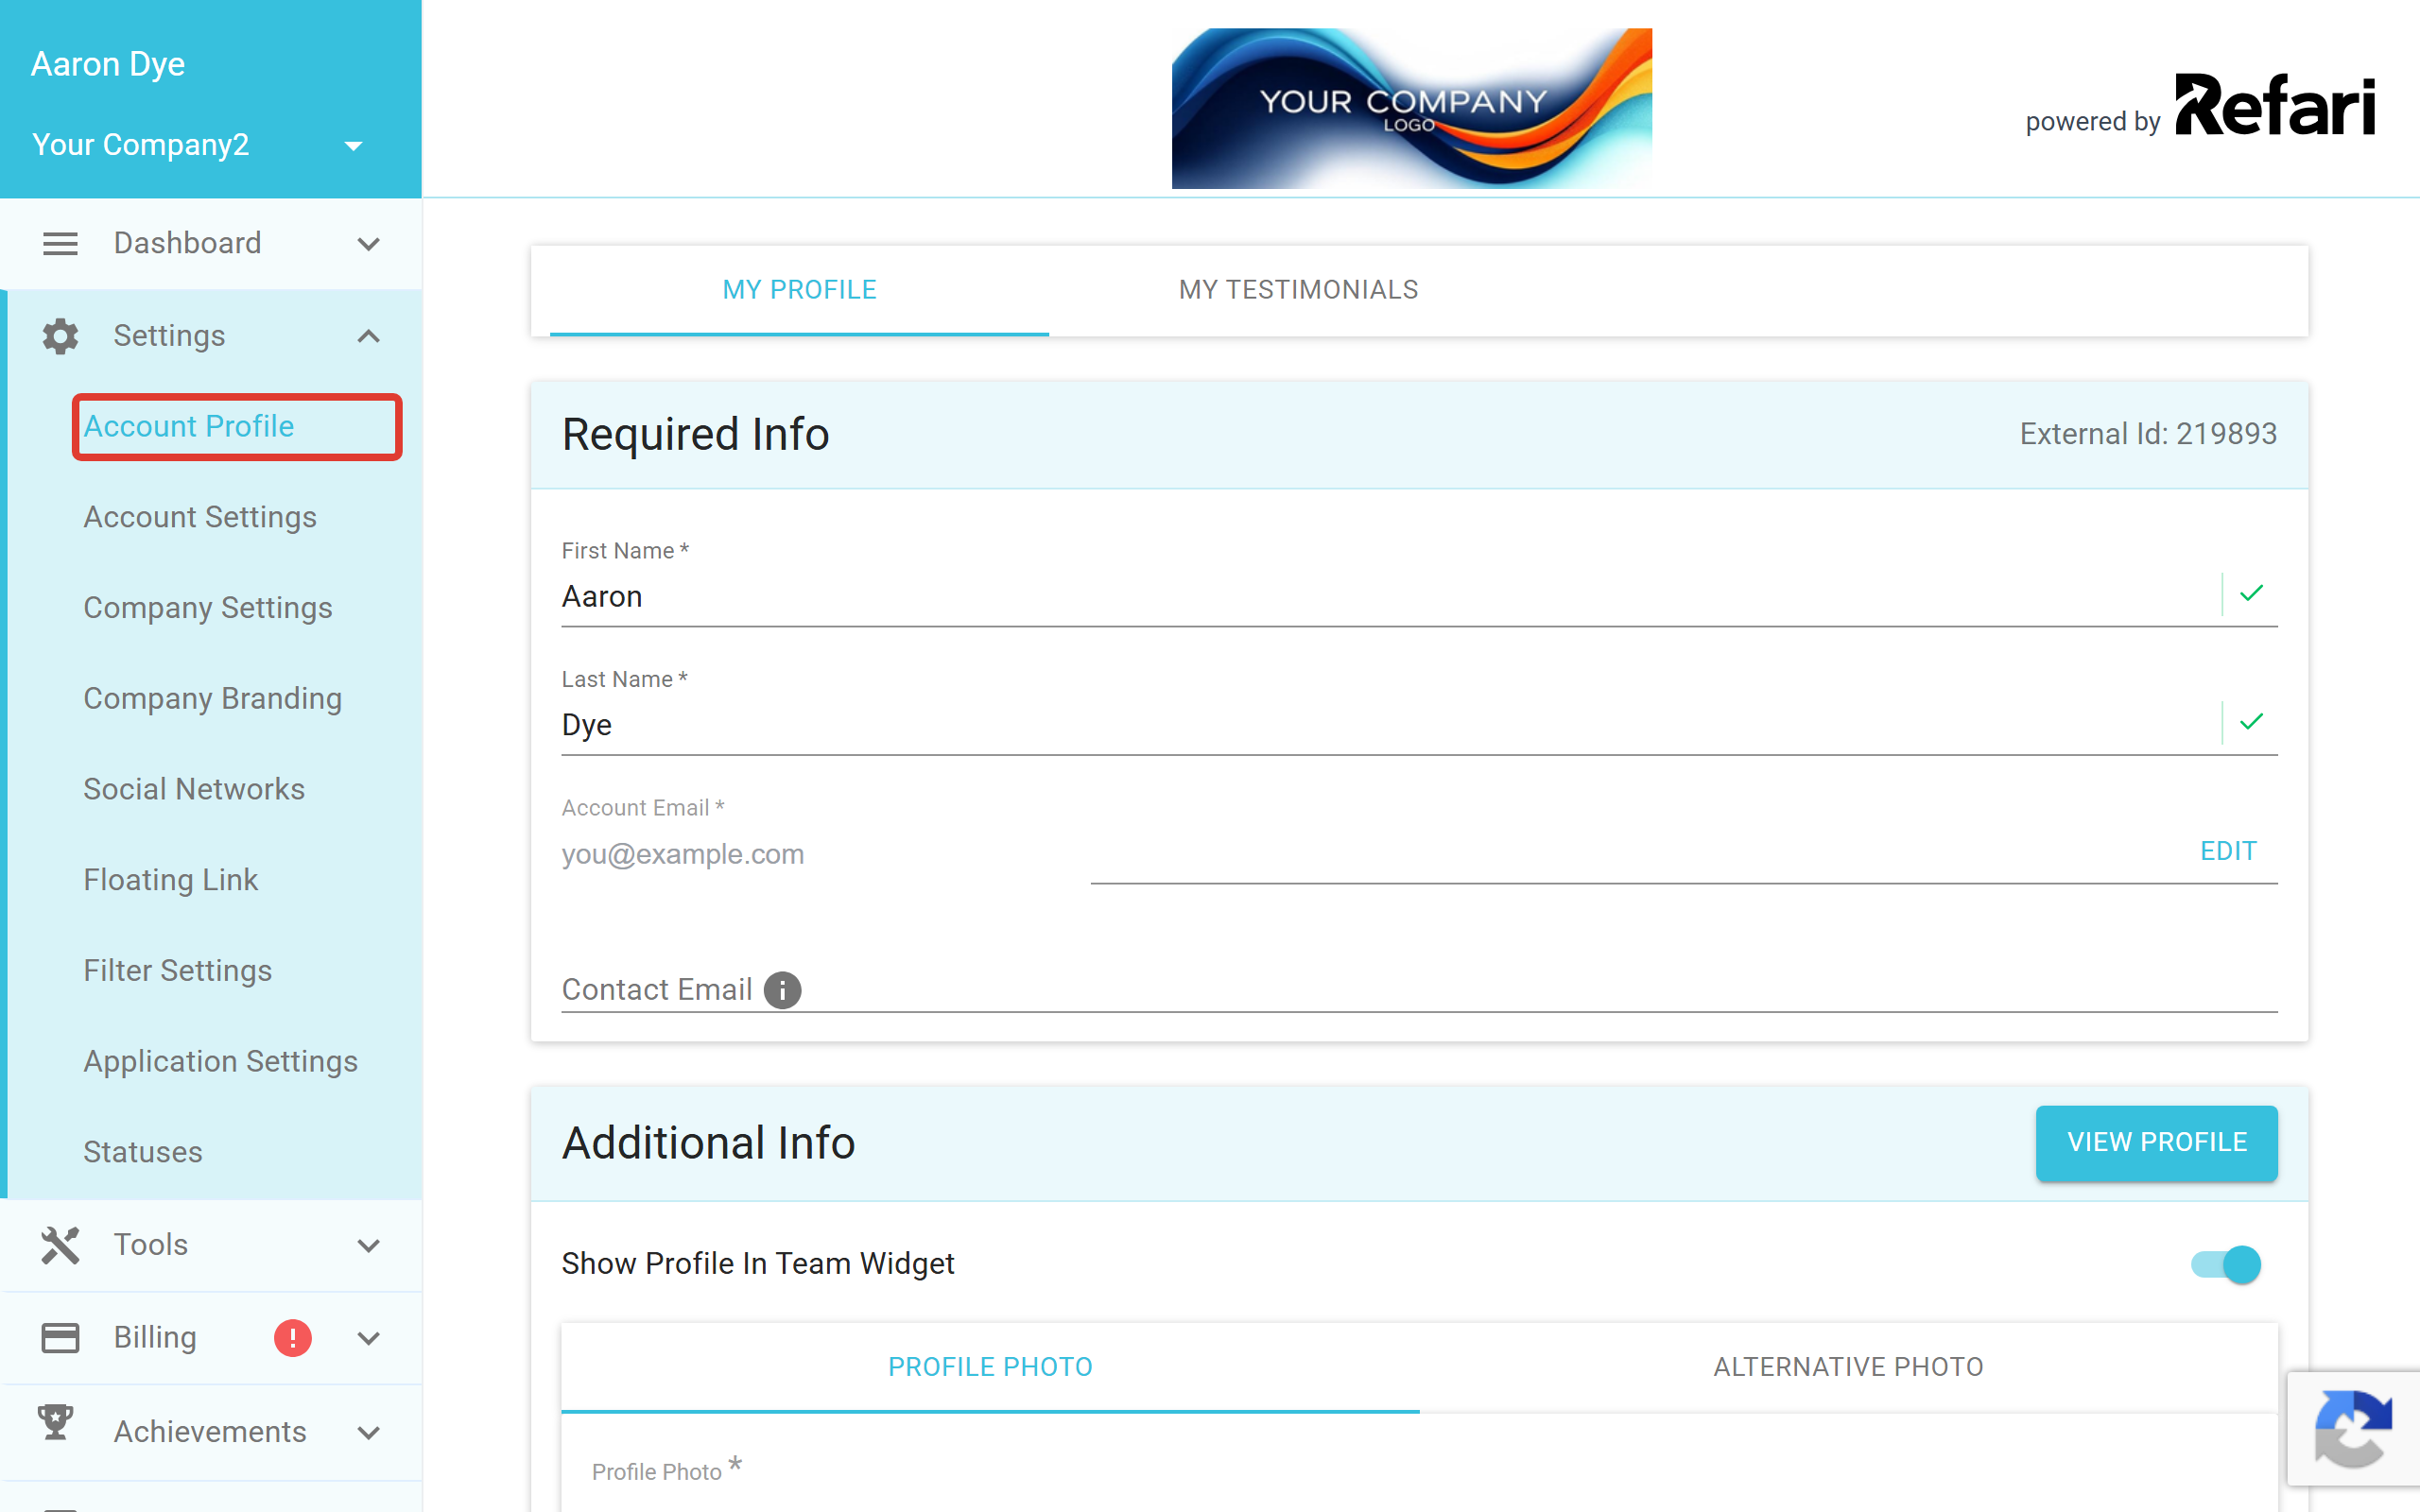
Step 1: Open your Account Profile
Log into your account as normal at "refari.co". From the menu on the left hand side, click "Settings" and then "Account Profile" to open your profile.
Step 2: Add your specialities
Scroll down to the Additional Info section and find the field labelled Specialities (Recruiter Tags). Type a speciality and press Enter or Return to turn it into a tag chip, then add the next one the same way. Each speciality you add here becomes a tag you can later choose to show on the widget. The same section also holds Specialities (Job Categories) and Service Location Tags, which are separate fields.
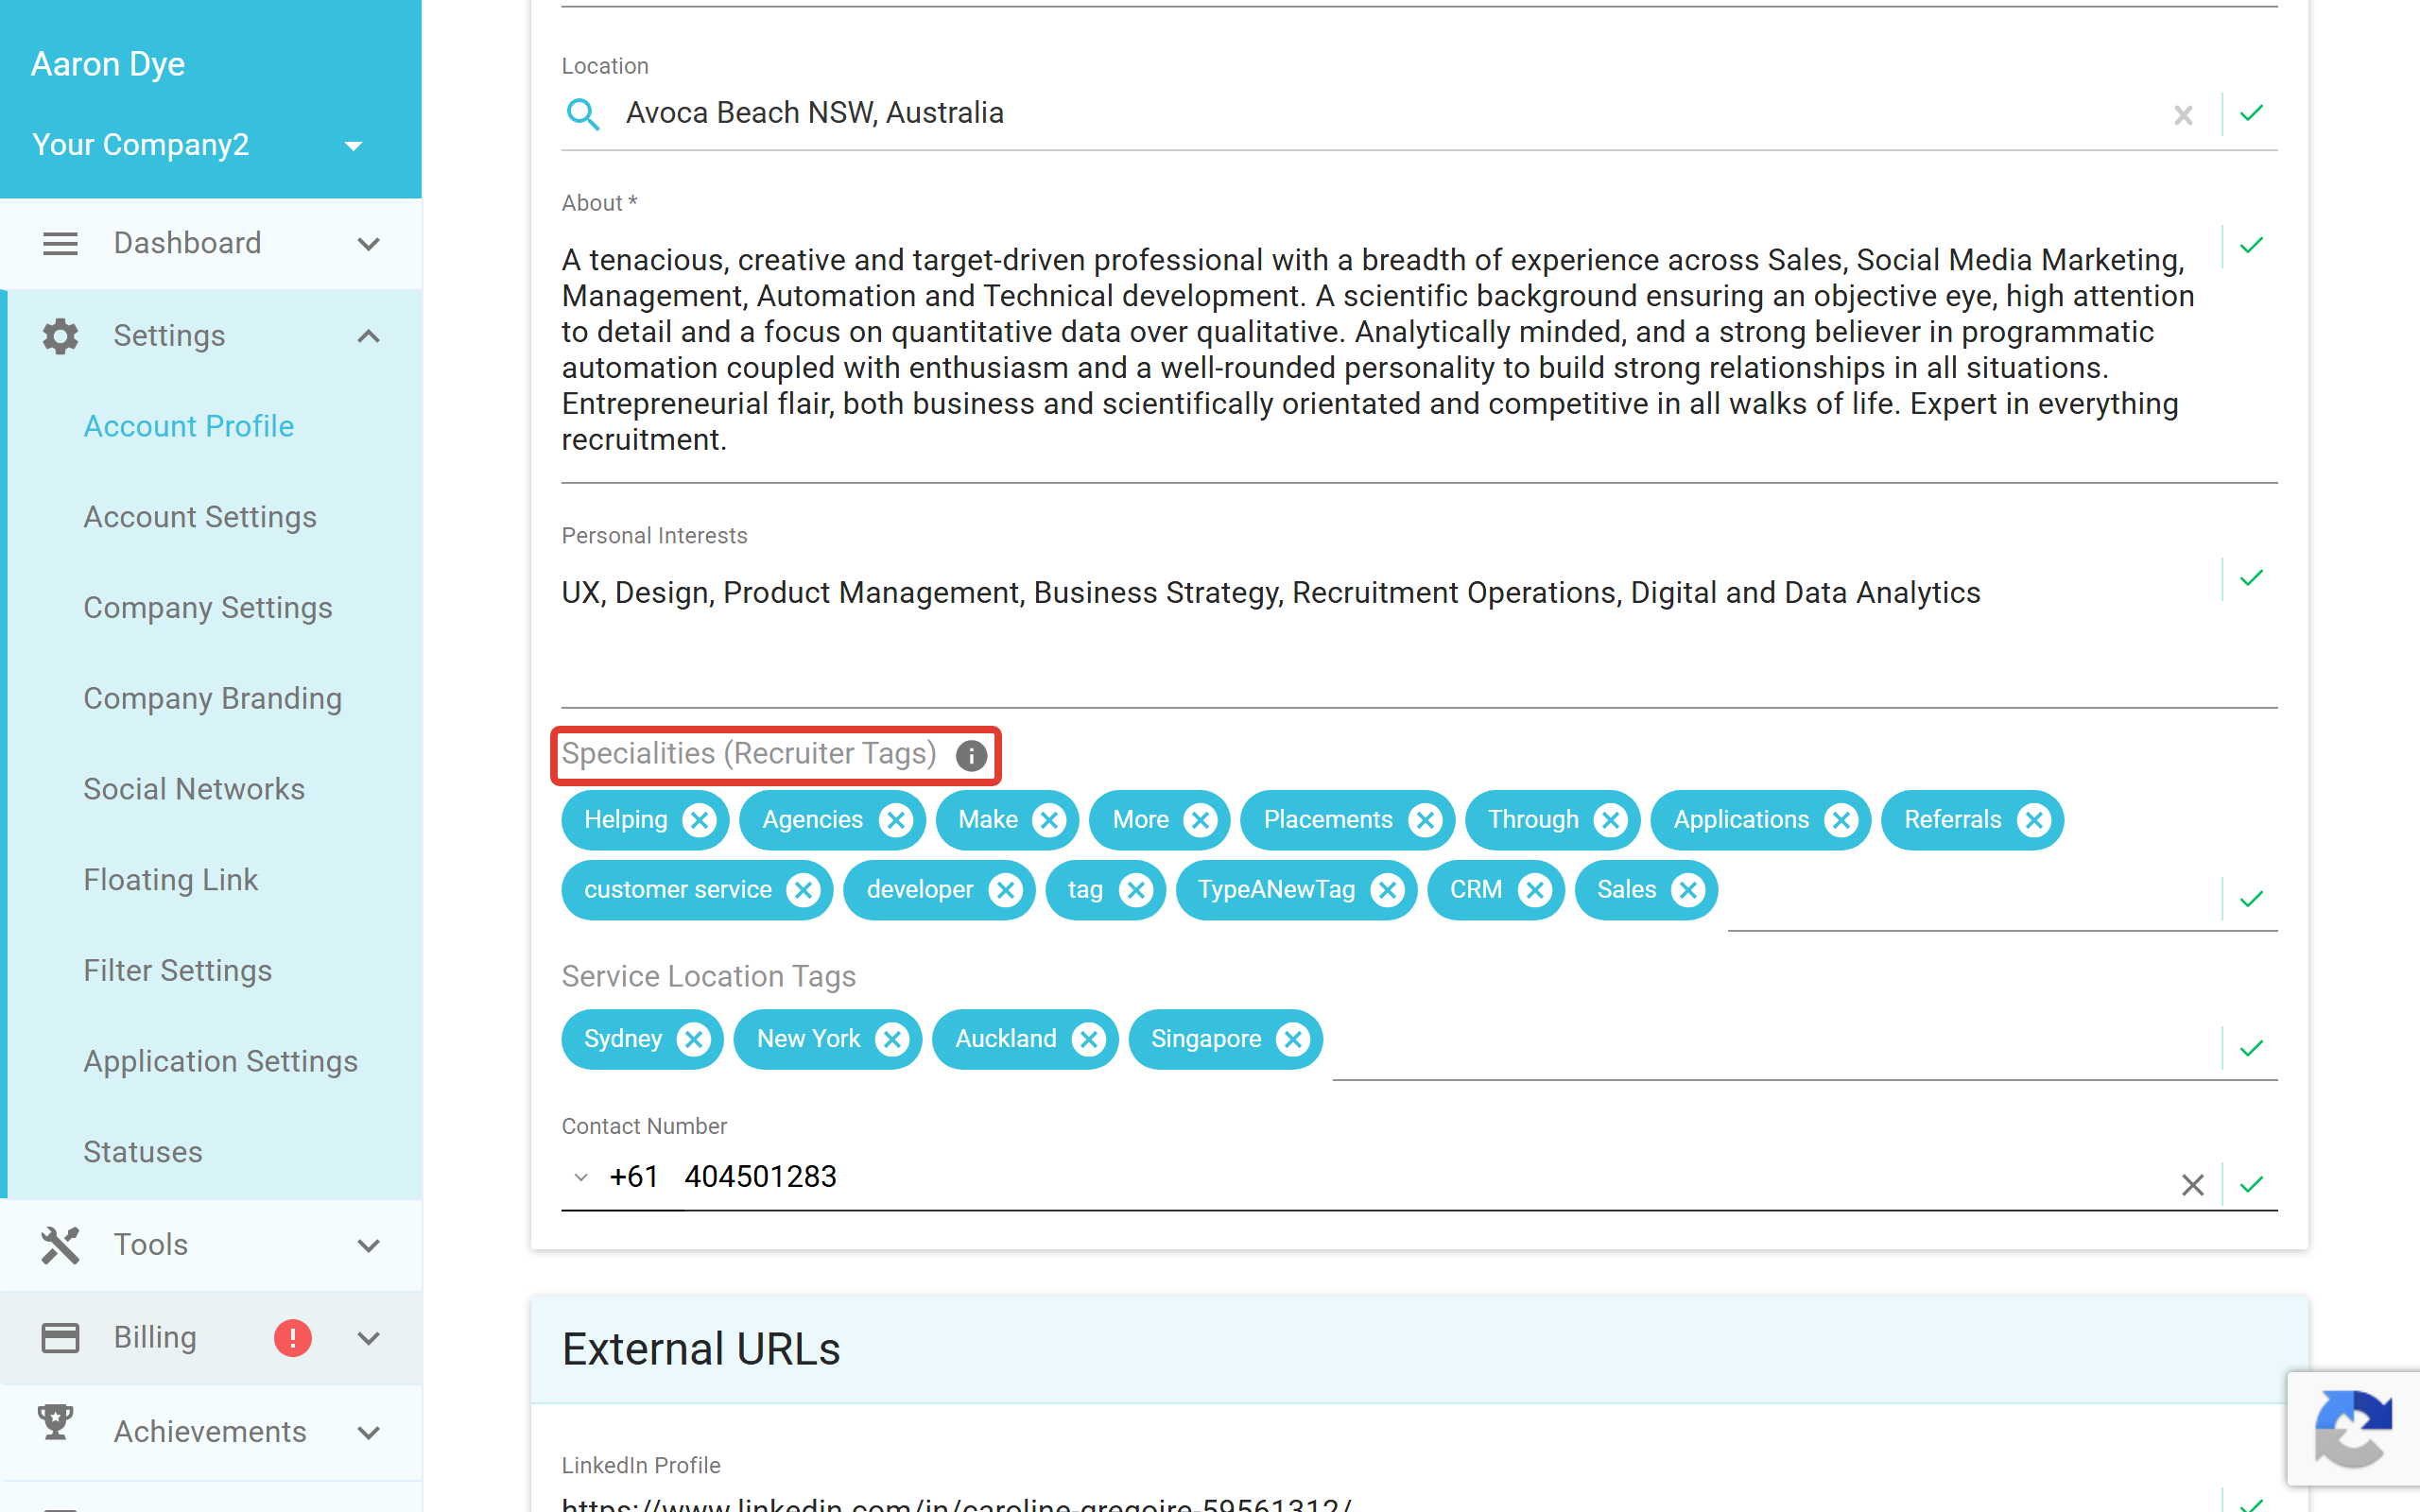
Note: Your profile saves each field automatically. A green tick appears next to a field once it has saved, so there is no Update or Submit button to click.
Choose which tags appear on the widget
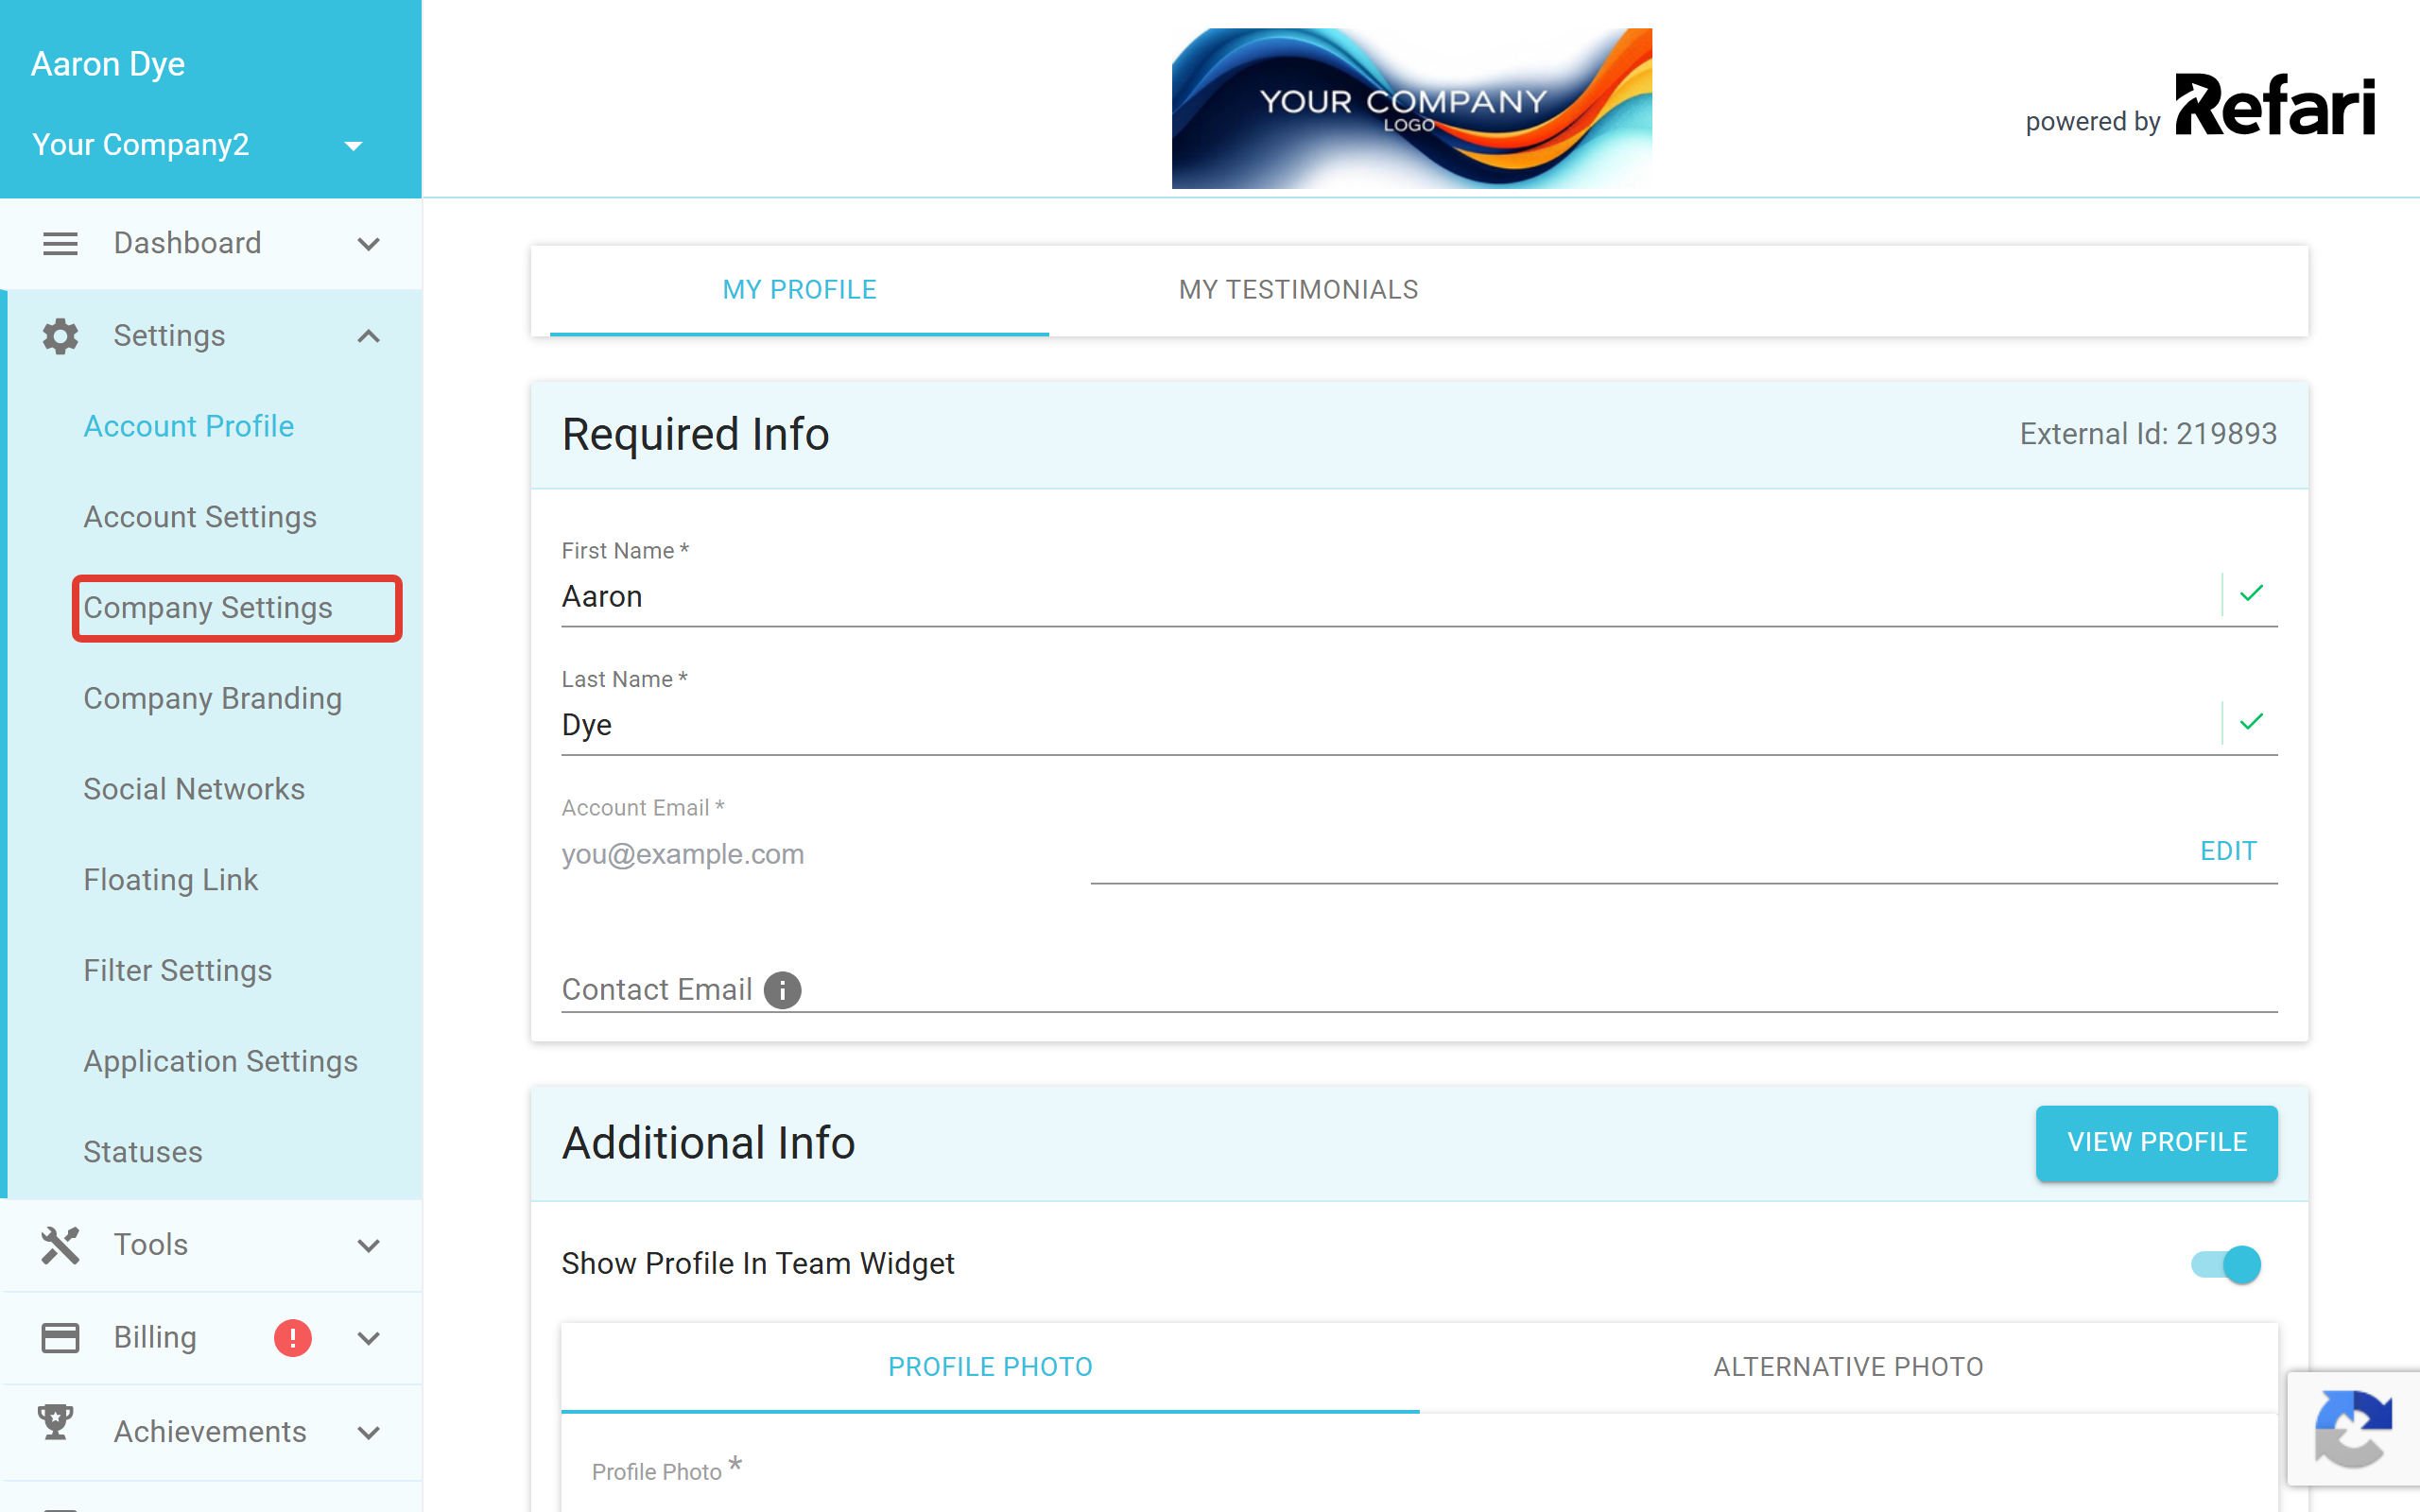
A profile may have many specialities added, but you may want to show only a few of them on the widget. A Company Admin chooses which tags appear from the company-wide list. Open Settings and then Company Settings from the menu on the left hand side.
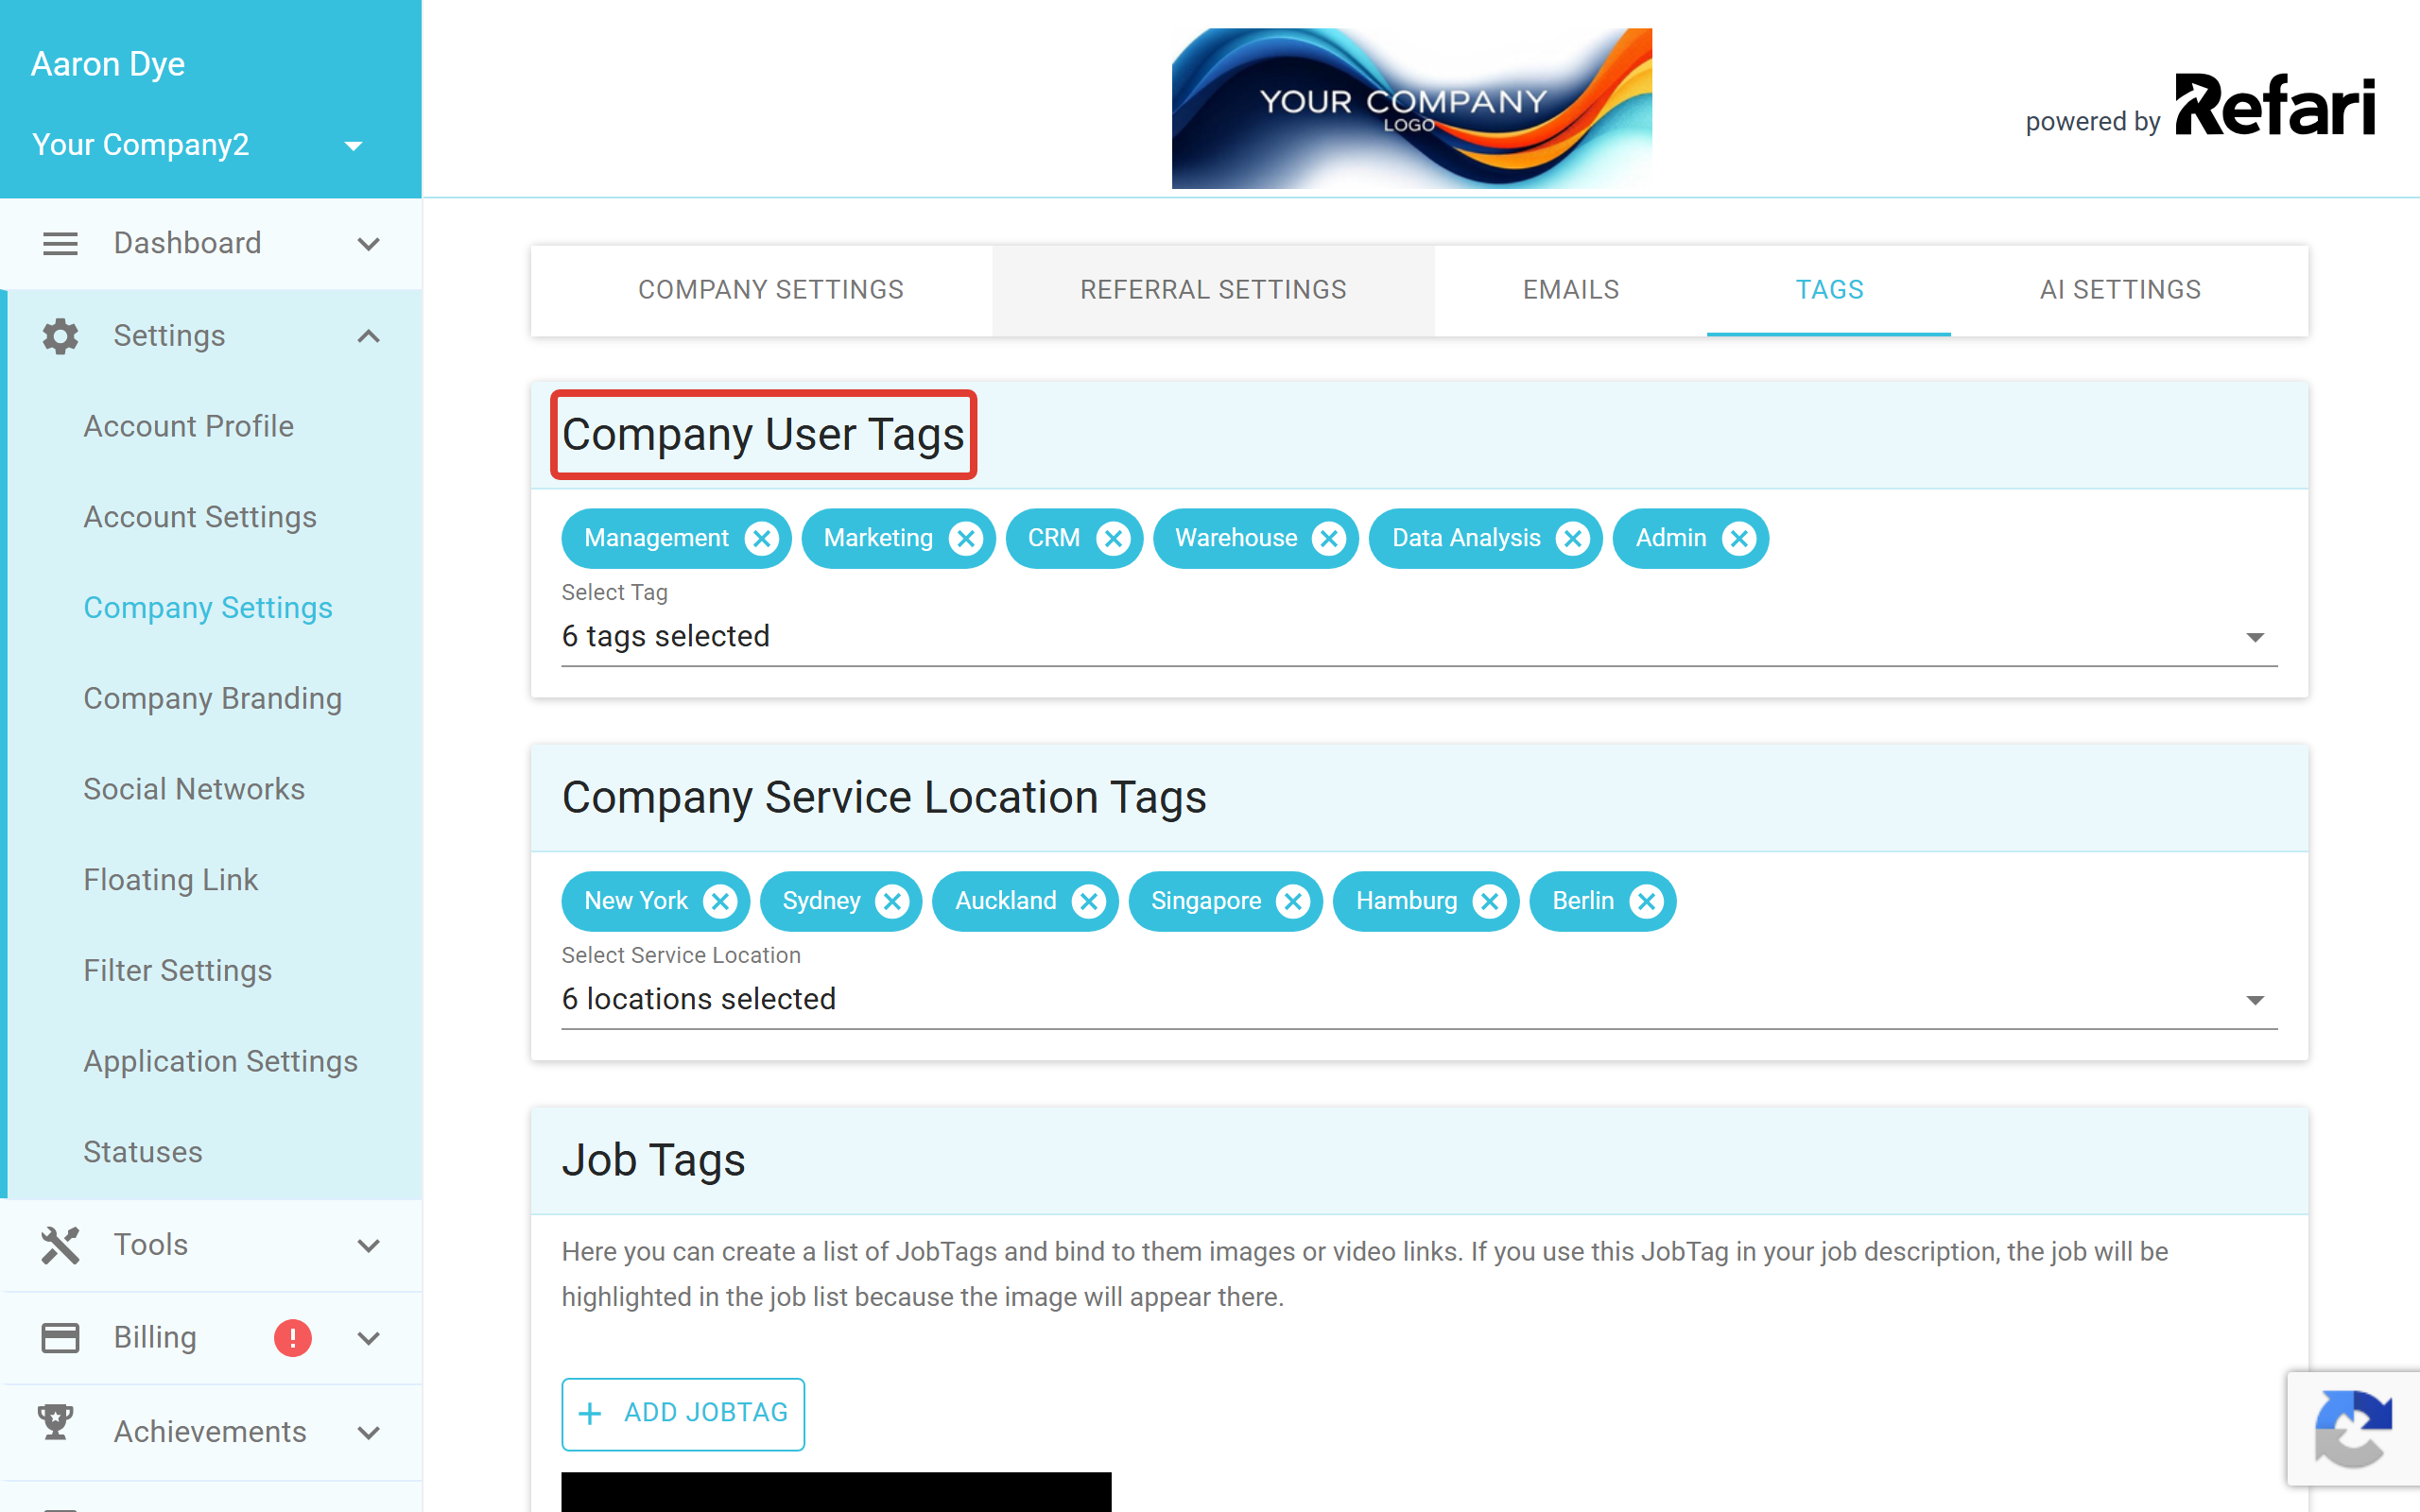
Open the TAGS tab and find Company User Tags. Click Select Tag to open the dropdown of every speciality added by anyone on your team, then click the tags you want to display on your Meet The Team widget. The same tab also holds Company Service Location Tags and Job Tags, which control other filters. Your choices save automatically.
How tags appear on the widget
Once you have added recruiter tags to the profiles you want and selected them as Company User Tags, they appear as a filter bar on the Meet The Team widget. The All tag is shown by default and displays everyone.
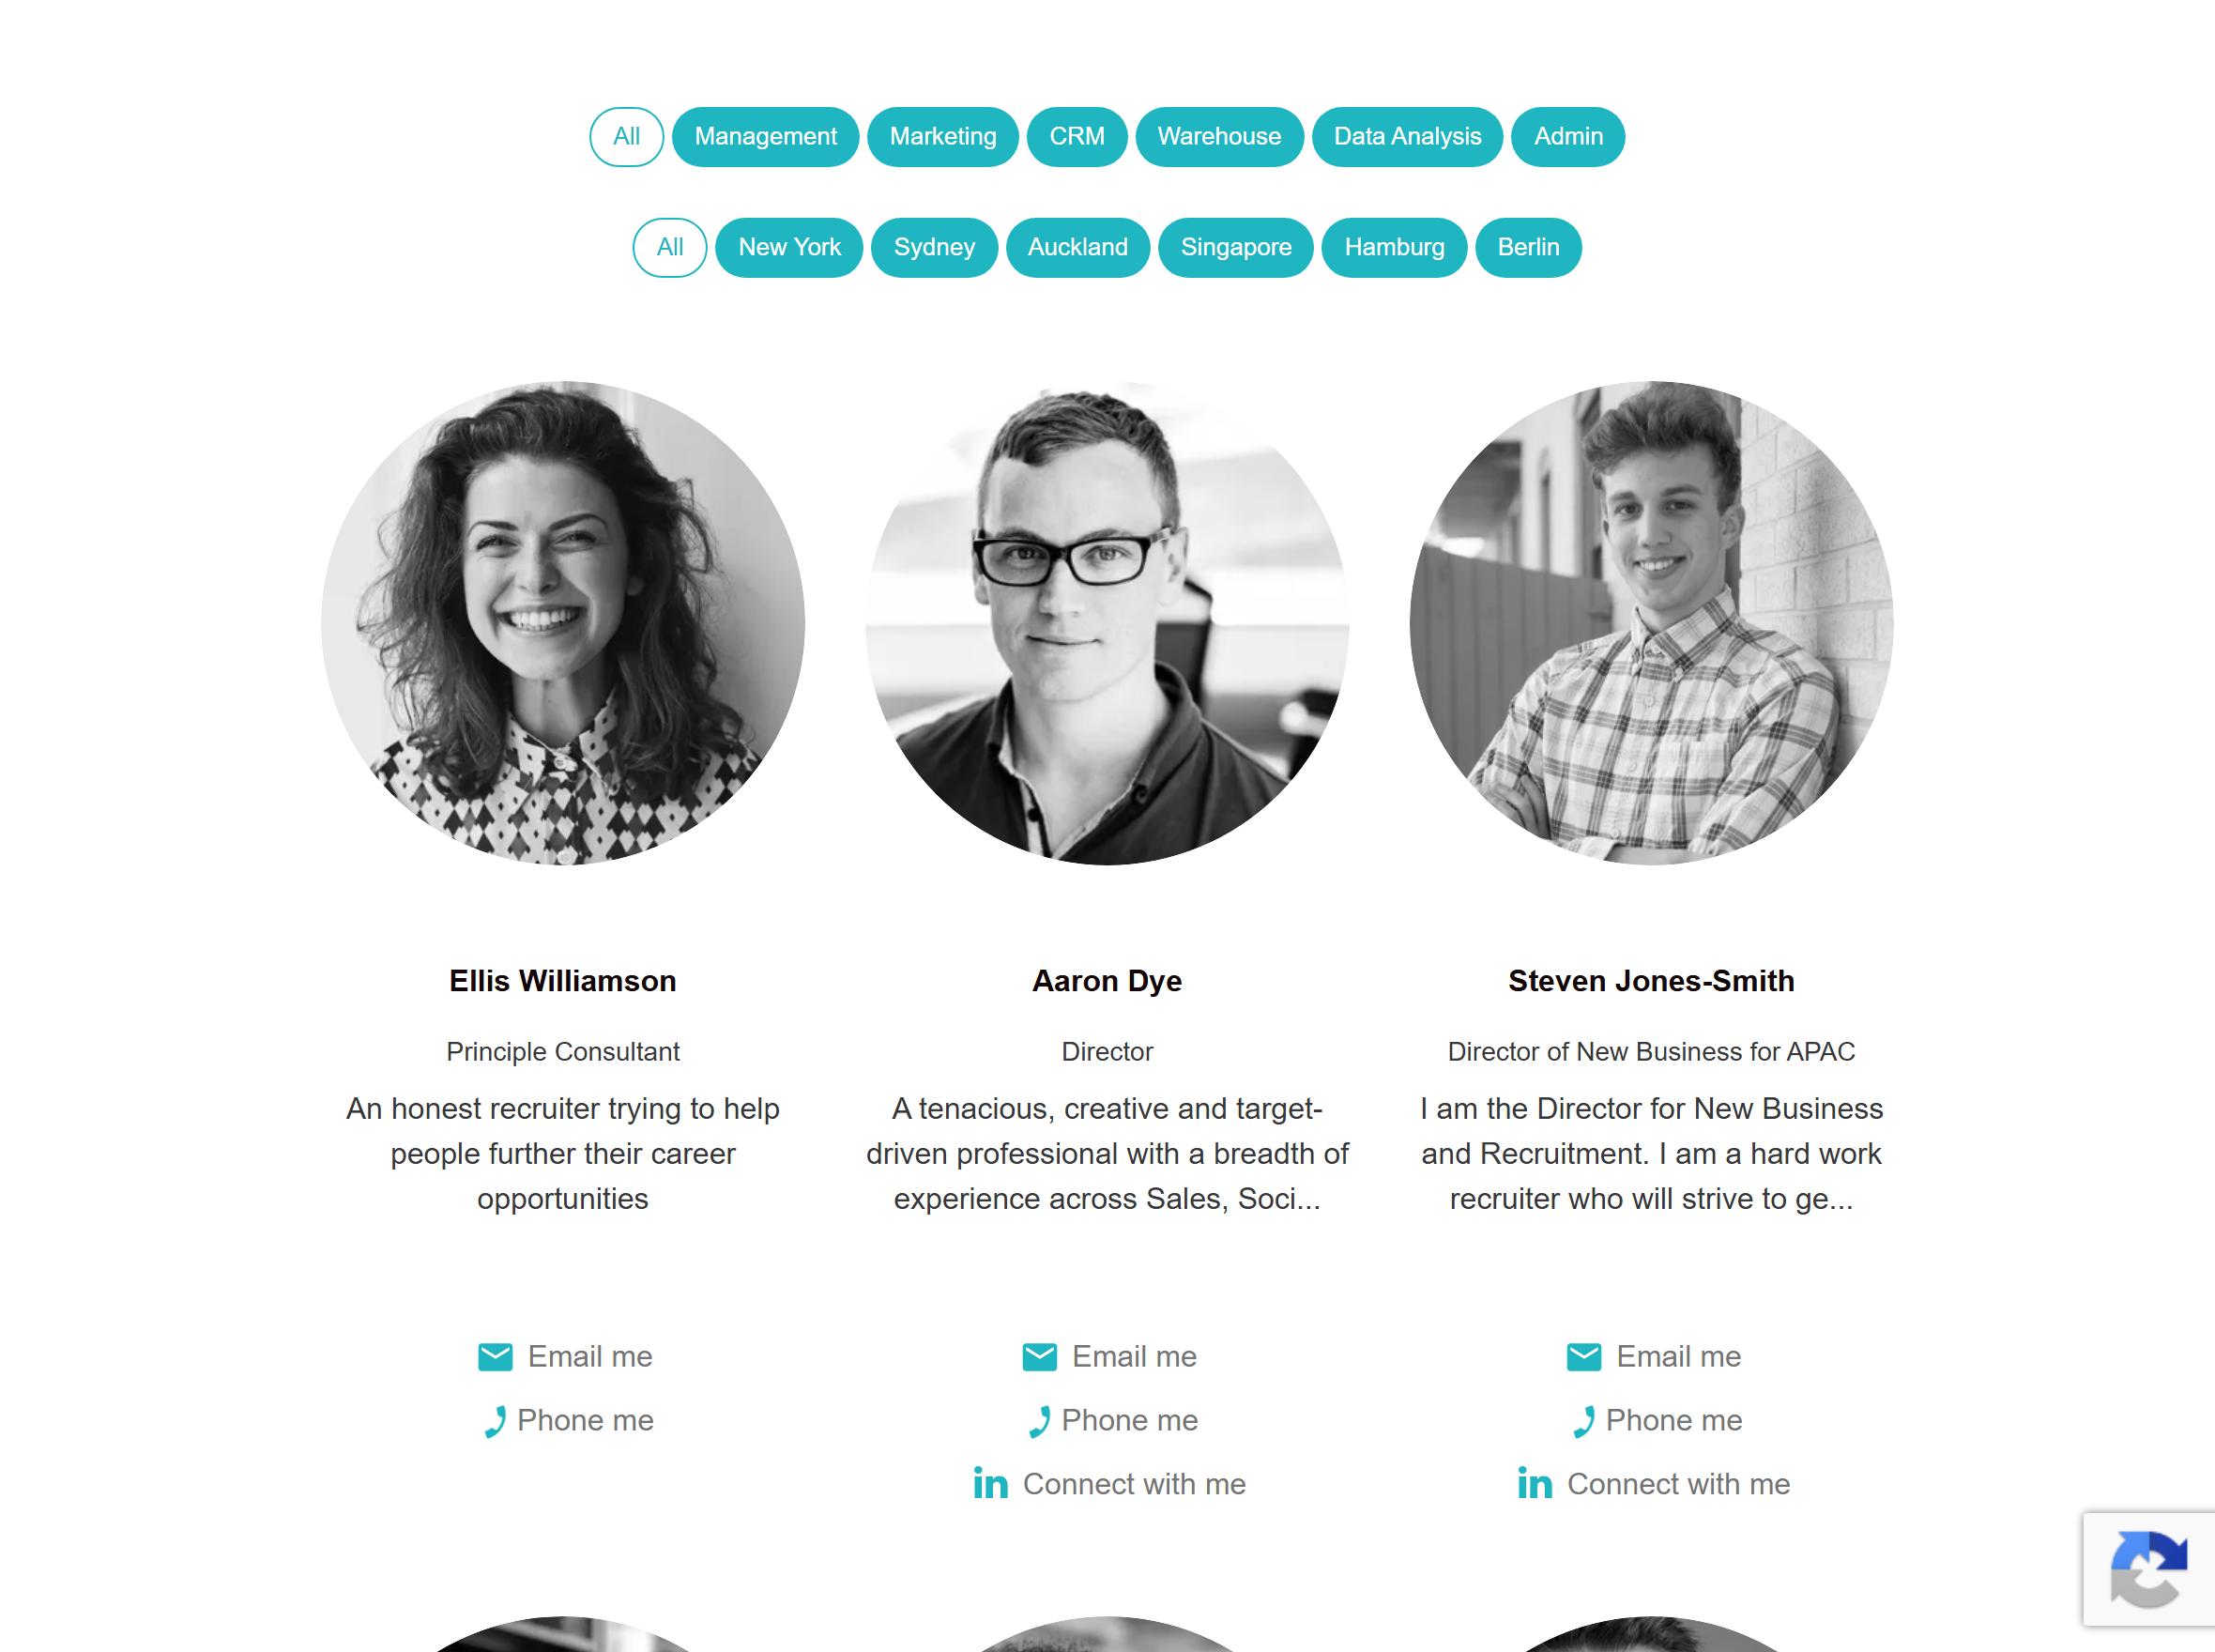
A visitor can click any tag in the bar, and only the team members with that speciality on their profile are shown.
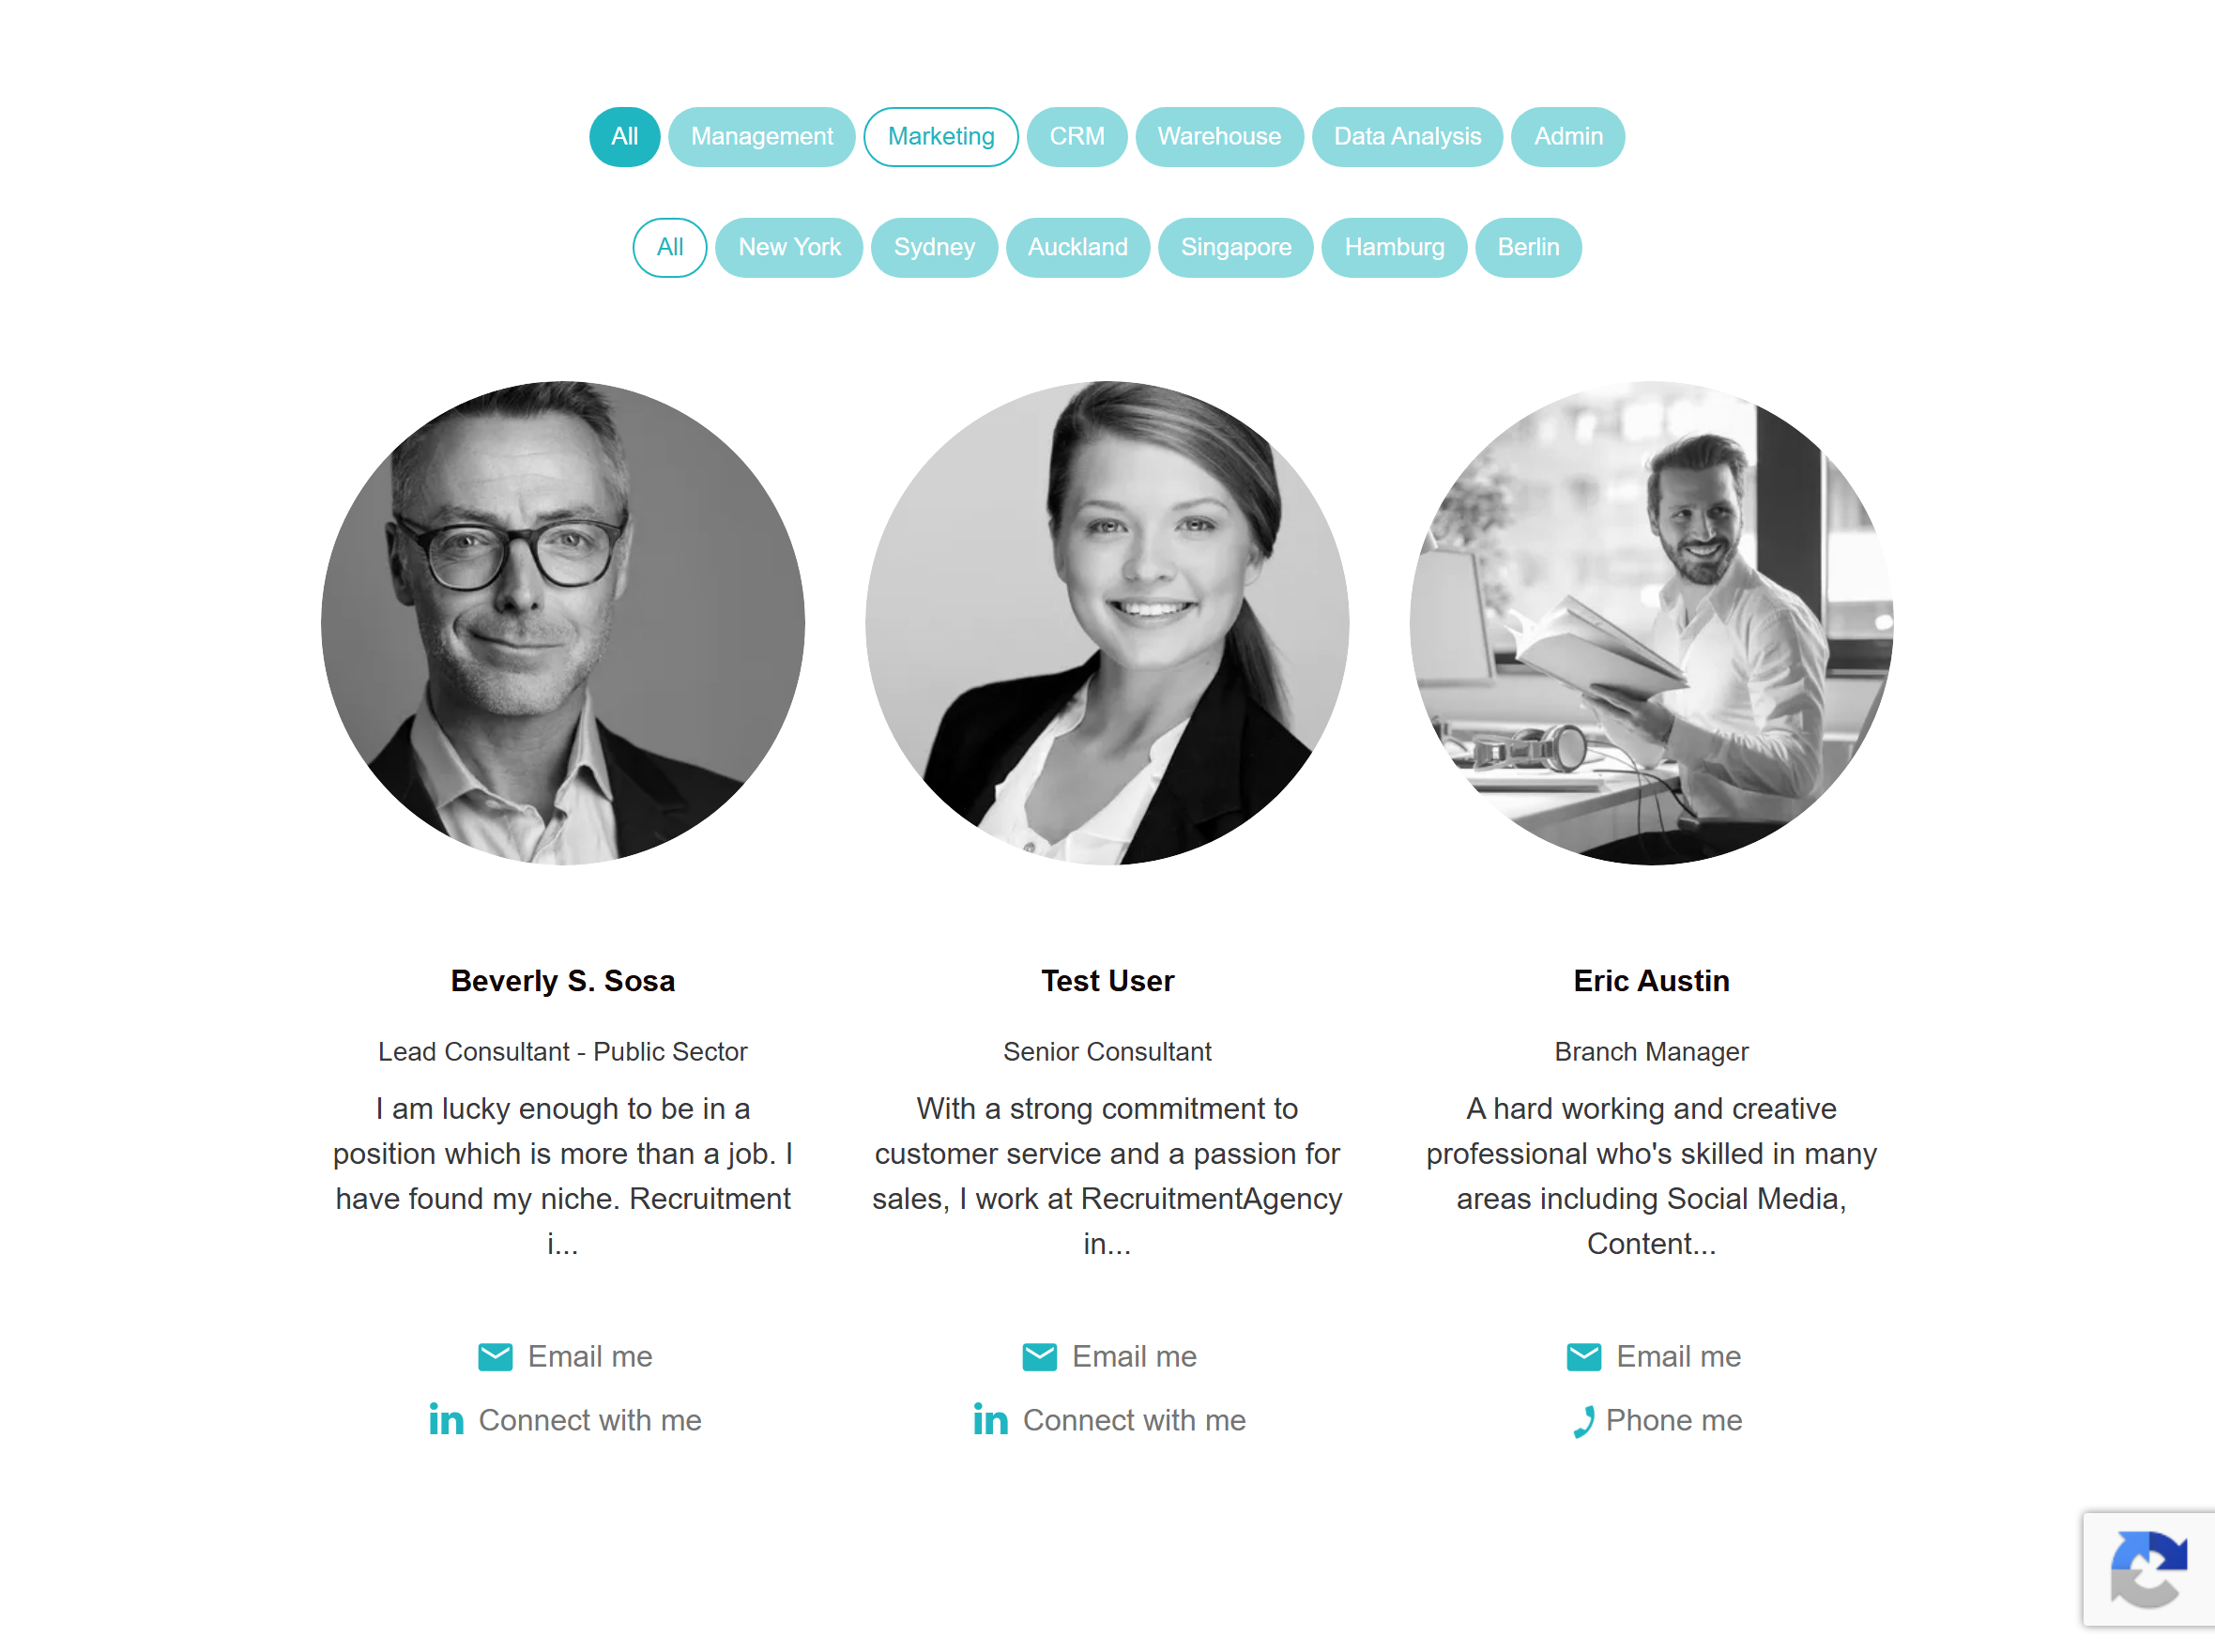
Clicking a different tag filters the team again, so visitors can quickly find the right person for their area.
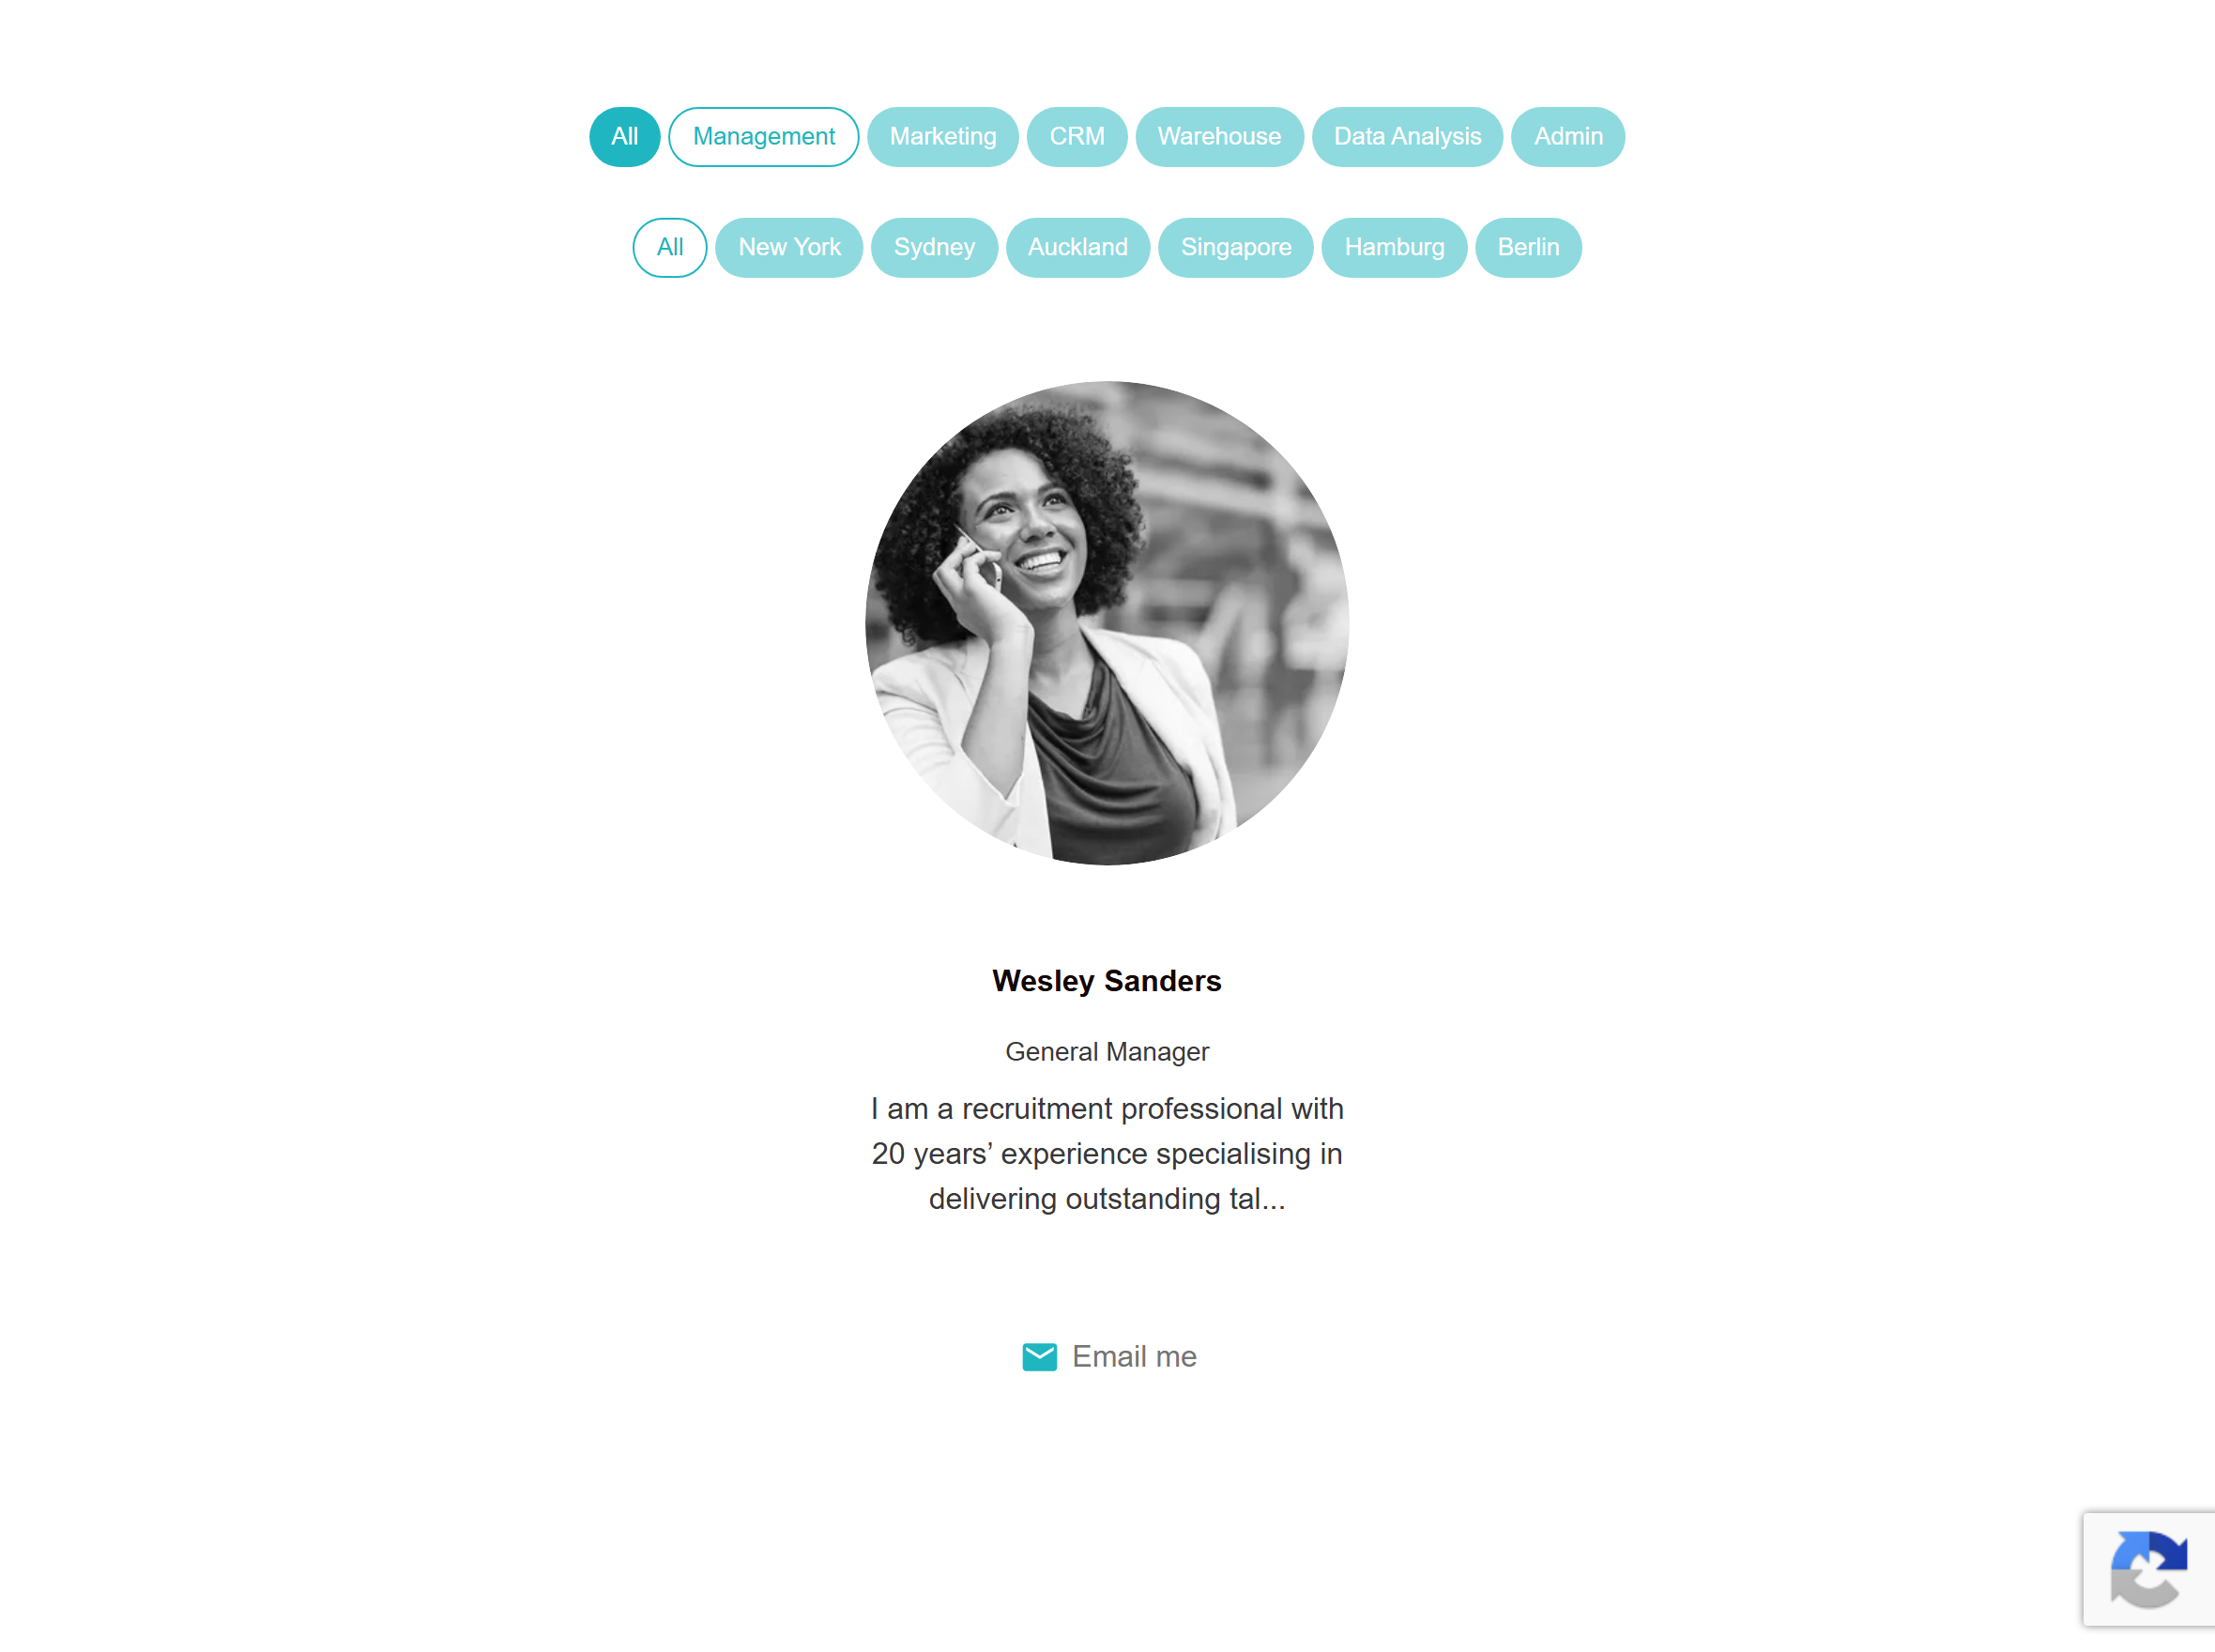
Note: Team members can have several tags on their profile, so the same person may appear under more than one tag depending on the specialities they added.
Final Notes
You do not have to display the tag filter on the widget at all. If you would prefer a separate page for each tag, you can set up multiple Meet The Team widgets on different pages, one per tag.
Other articles you might be interested in: Recruiter Tags & Service Location Tags | How to edit your team members' profiles | How to set up your profile
Was this article helpful?
That’s Great!
Thank you for your feedback
Sorry! We couldn't be helpful
Thank you for your feedback
Feedback sent
We appreciate your effort and will try to fix the article